

Introduction
CyberPanel runs on OpenLiteSpeed, a web server with page caching built in. The server keeps a ready-made copy of each page and sends that to visitors, so PHP and the database don’t have to rebuild the page every time. The control panel itself is free and open source.
CyberPanel is a potentially good alternative to cPanel or Plesk if you run a handful of WordPress sites of your own and want caching without extra tools. Our guide to choosing a VPS control panel lists it as a strong second choice for that job.
We’ll install and secure CyberPanel, then get a first website running over HTTPS.
What You’ll Need
- Root access to a clean server. CyberPanel runs on Ubuntu or AlmaLinux. We used an STW GP34 with two vCPUs, 4 GB of RAM, and 120 GB of storage, running CyberPanel 3.0.7 on Ubuntu 24.04 LTS.
- Two subdomains you can point at the server. You’ll point one at the control panel and one at the website. We’ll call them
panel.example.comandsite.example.com. - SSH access as root. STW’s GP3 servers accept SSH logins with a key rather than a password, and STW’s GP3 documentation walks you through adding yours. STW’s browser-based console is an easy alternative if you prefer.
- An authenticator app for the admin login’s two-factor codes.
The minimal install doesn’t set up email or DNS hosting, so both will stay with your current providers, or with a hosted service like STWmail.
Step 1 — Prepare a Fresh Server and a Snapshot
Begin with a fresh operating system. A reinstall wipes the VPS and its existing snapshots, which means anything you want to keep has to be copied off first.
To do this easily, in the STW control panel, go to Products, click Manage on your VPS, and open Reinstallation. Pick a template CyberPanel supports, such as Ubuntu, and set a new root password. When the rebuild is done, log in as root and bring the system up to date with following commands:
apt update
apt full-upgrade
reboot
After the reboot, take a snapshot under Snapshots → Take Snapshot, with a name like before-cyberpanel-install and Include RAM left unchecked.
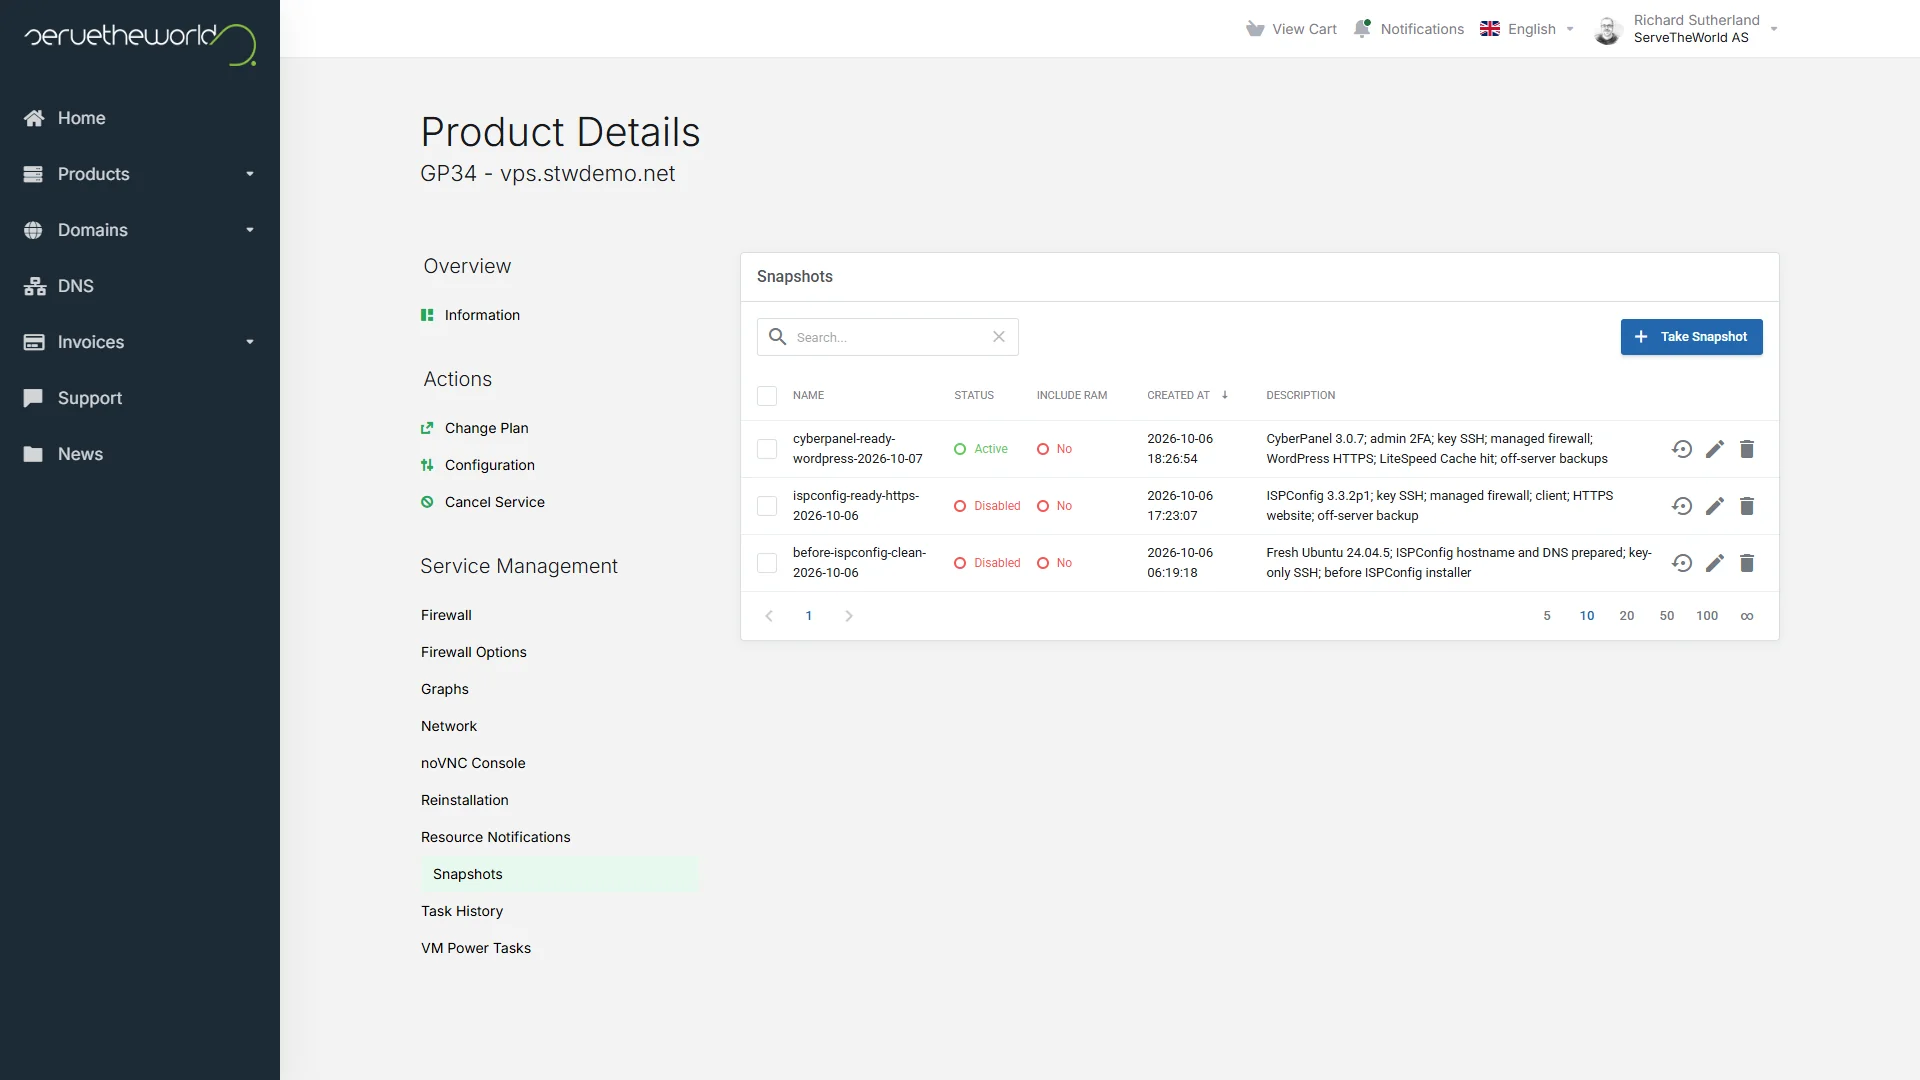
The first installation guide in this series shows each of these screens in more detail.
Step 2 — Set DNS and the Hostname
The control panel and the website each need a certificate to load over HTTPS, and CyberPanel gets them free from Let’s Encrypt. Let’s Encrypt only issues a certificate once it can reach the name over the internet and find your server there, so the names have to point at your VPS first.
Add two A records (an A record points a name at an IPv4 address) with whoever hosts your domain’s DNS.
| Type | Name | Value | TTL |
|---|---|---|---|
| A | panel |
Your VPS’s IPv4 address | 300 |
| A | site |
Your VPS’s IPv4 address | 300 |
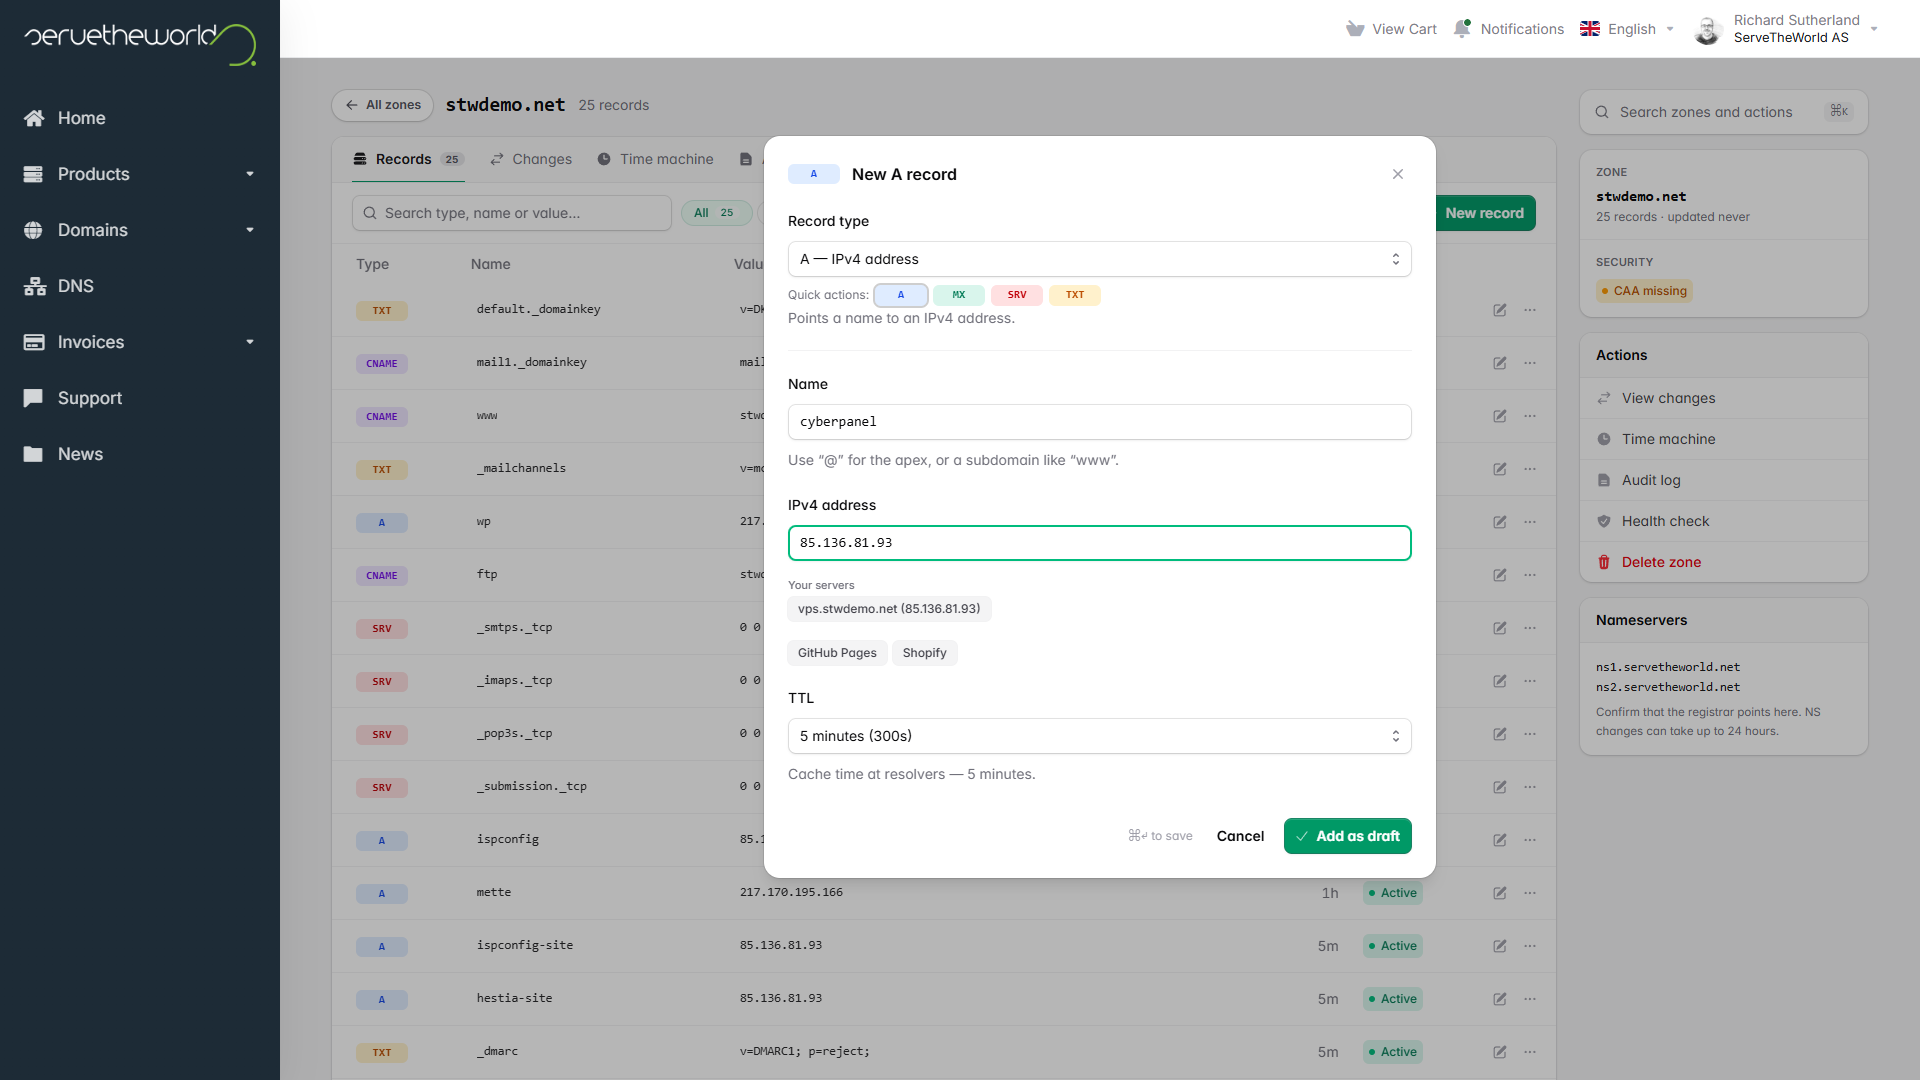
If your DNS is with STW, our guide to updating DNS shows where to add them.
Then, run these lookups on your own computer. They query Google’s public DNS server directly:
nslookup panel.example.com 8.8.8.8
nslookup site.example.com 8.8.8.8
Linux and macOS users can run
dig +short panel.example.com @8.8.8.8for the same check, and it returns only the address. If a changed record still shows the old address, give it time to expire.
When both show your VPS’s IP address, move on to the hostname. In Step 4, CyberPanel’s setup wizard requests the control panel’s certificate for the hostname, so set it to the full DNS name of the control panel, panel.example.com.
Log in to the VPS, set the hostname, and open the hosts file, which maps names to addresses on the server itself.
hostnamectl set-hostname panel.example.com
nano /etc/hosts
Keep the localhost lines. The 127.0.1.1 line maps the server’s name to its own loopback address, so edit it to read like this, with your own names.
127.0.1.1 panel.example.com panelSTW’s image, like most cloud images, runs cloud-init at boot to set the hostname, which can undo your change after a restart. You can fix this with the following command:
printf 'preserve_hostname: true\n' > /etc/cloud/cloud.cfg.d/99-preserve-hostname.cfg
hostname -f
You should see panel.example.com.
Step 3 — Install CyberPanel With OpenLiteSpeed
Download CyberPanel’s official installer and run it as root by using the following commands.
mkdir -p /root/cyberpanel-install
cd /root/cyberpanel-install
curl -fsSL https://cyberpanel.net/install.sh -o install.sh
sh install.sh --version ols --password random --minimal
--version ols chooses the free OpenLiteSpeed server, --password random generates the admin password, and --minimal leaves out the mail, DNS, and FTP servers. You still get MariaDB for databases and PHP for your sites.
The installation takes about 5-7 minutes. When it finishes, copy the admin password it prints and keep it somewhere safe, then let the server restart when it asks. Once you’ve reconnected, check that the main services are running with:
systemctl is-active lscpd lsws mariadb firewalldAll four should report active. lscpd is the control panel, lsws is the web server, MariaDB runs the databases, and firewalld is the firewall.
If a service reports
failedorinactive, runsystemctl statusfollowed by its name to see the error, andjournalctl -ufollowed by the name for the full log so you can troubleshoot further.
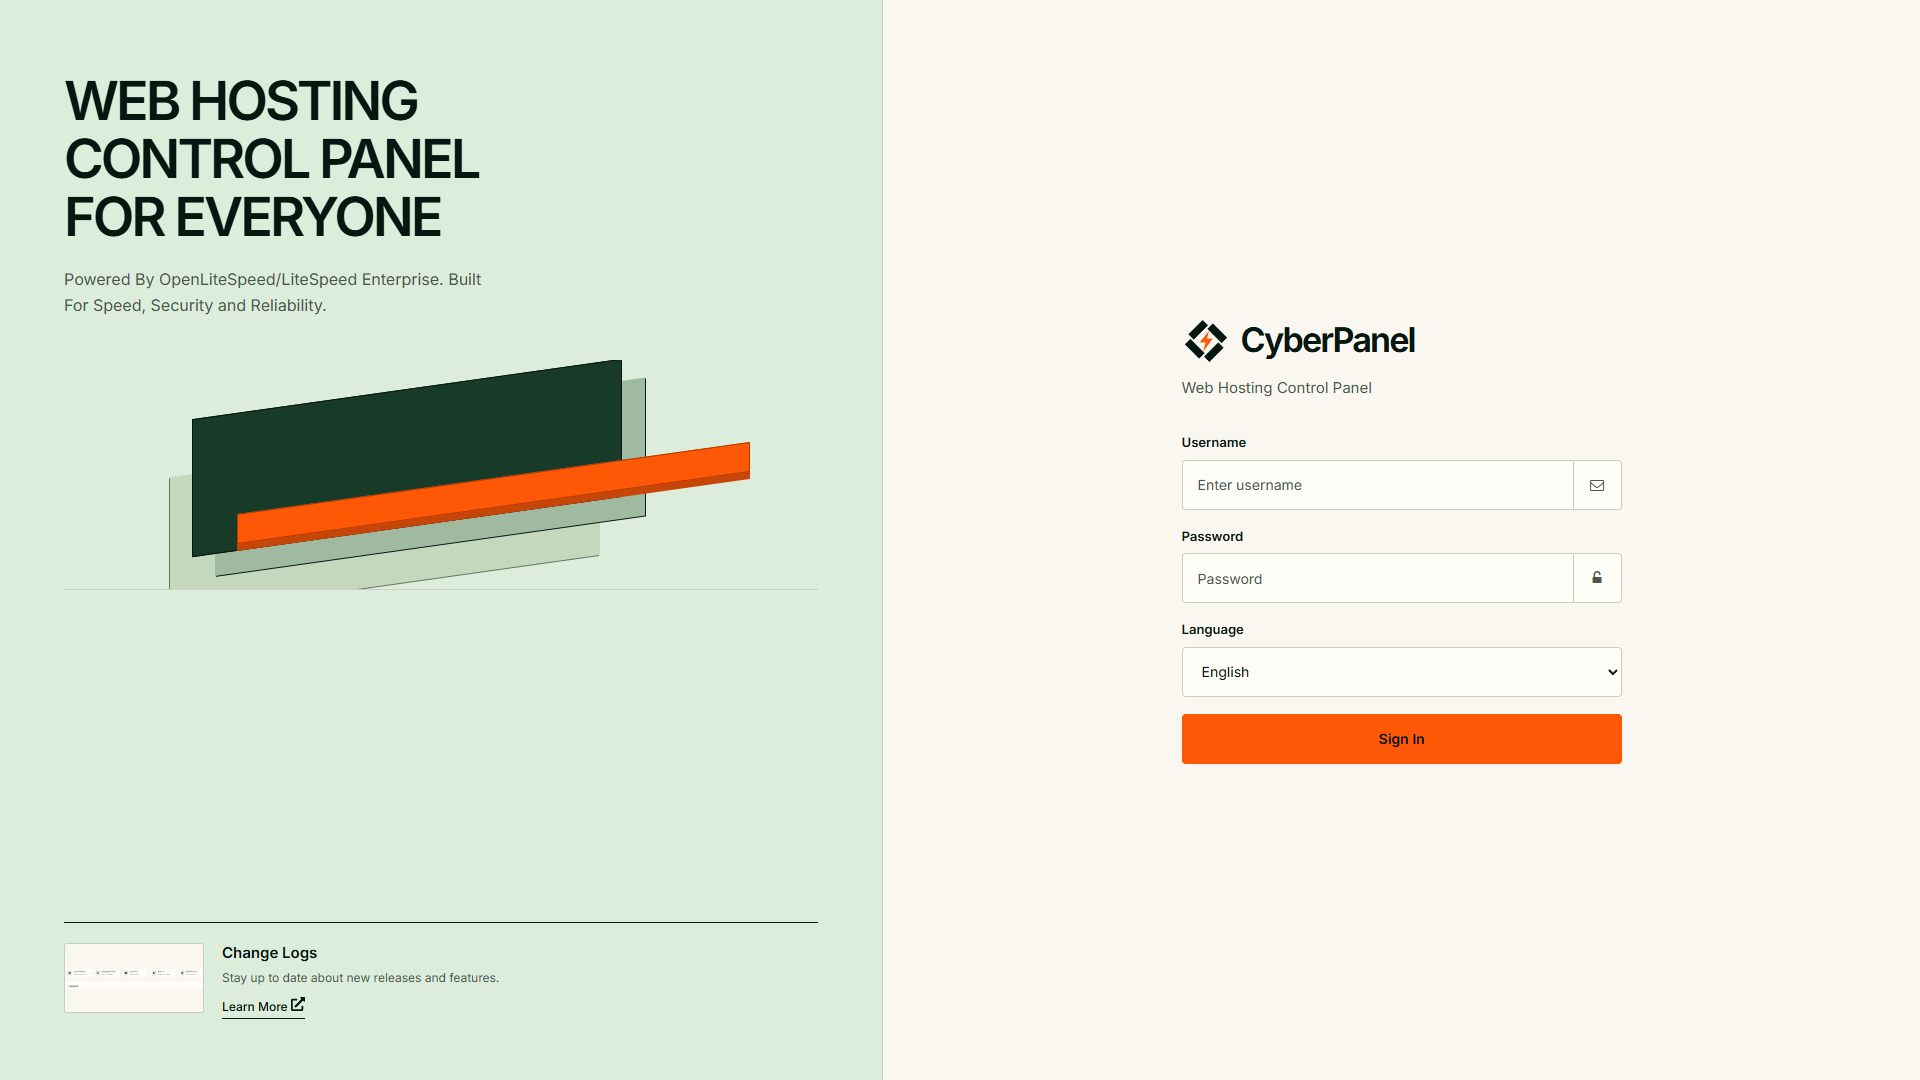
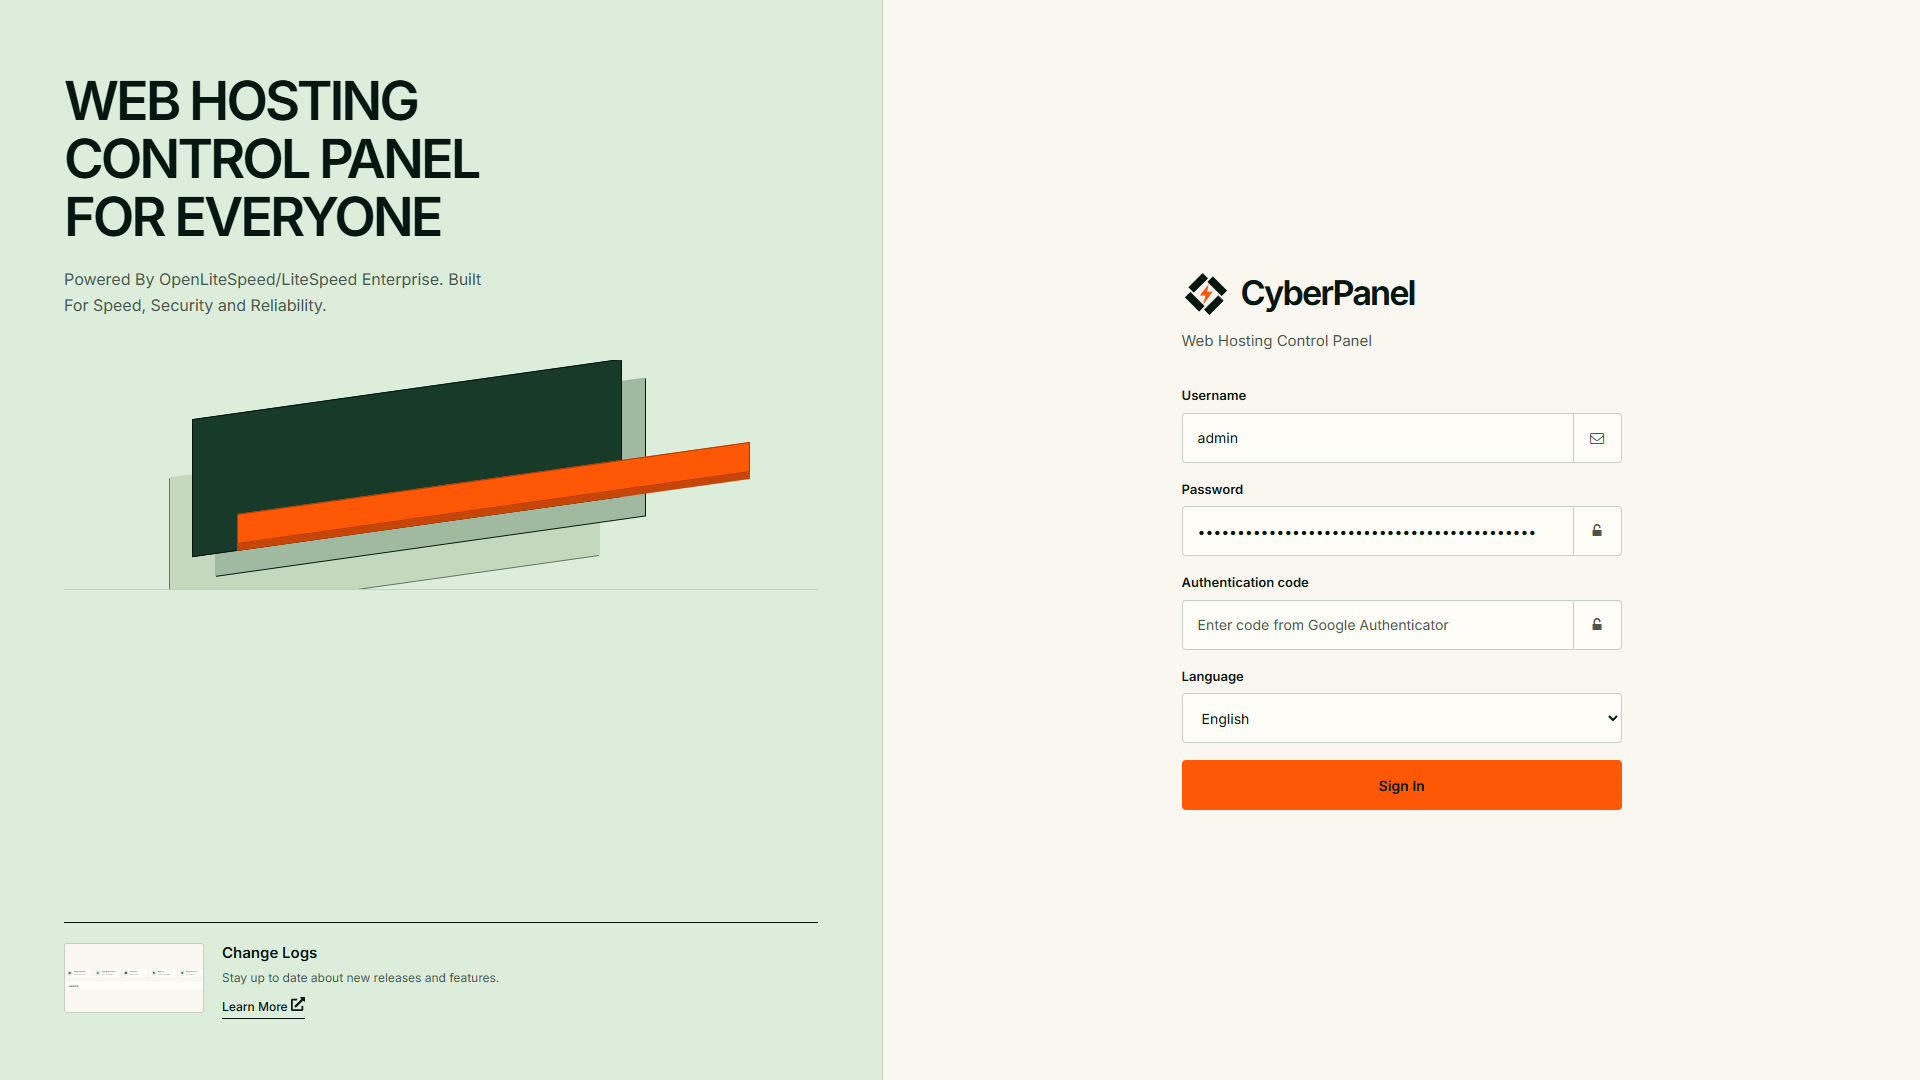
Now open https://panel.example.com:8090/, CyberPanel’s login page. Your browser may warn that the connection isn’t private, because CyberPanel starts with a self-signed certificate, one it generated itself instead of getting from Let’s Encrypt. You can safely continue past the warning for this first login and swap in a trusted certificate in Step 4.
Step 4 — Secure the Panel and Firewall
Change the admin password and turn on two-factor authentication
Go to Users & Plans → Modify User and select admin. Set a new password and an email address you control. Then select Enable Two-Factor Authentication (2FA), scan the QR code with your authenticator app (such as Google Authenticator or Microsoft Authenticator), and click Save Changes. Anyone with that QR code can generate your login codes, so don’t screenshot or share it.
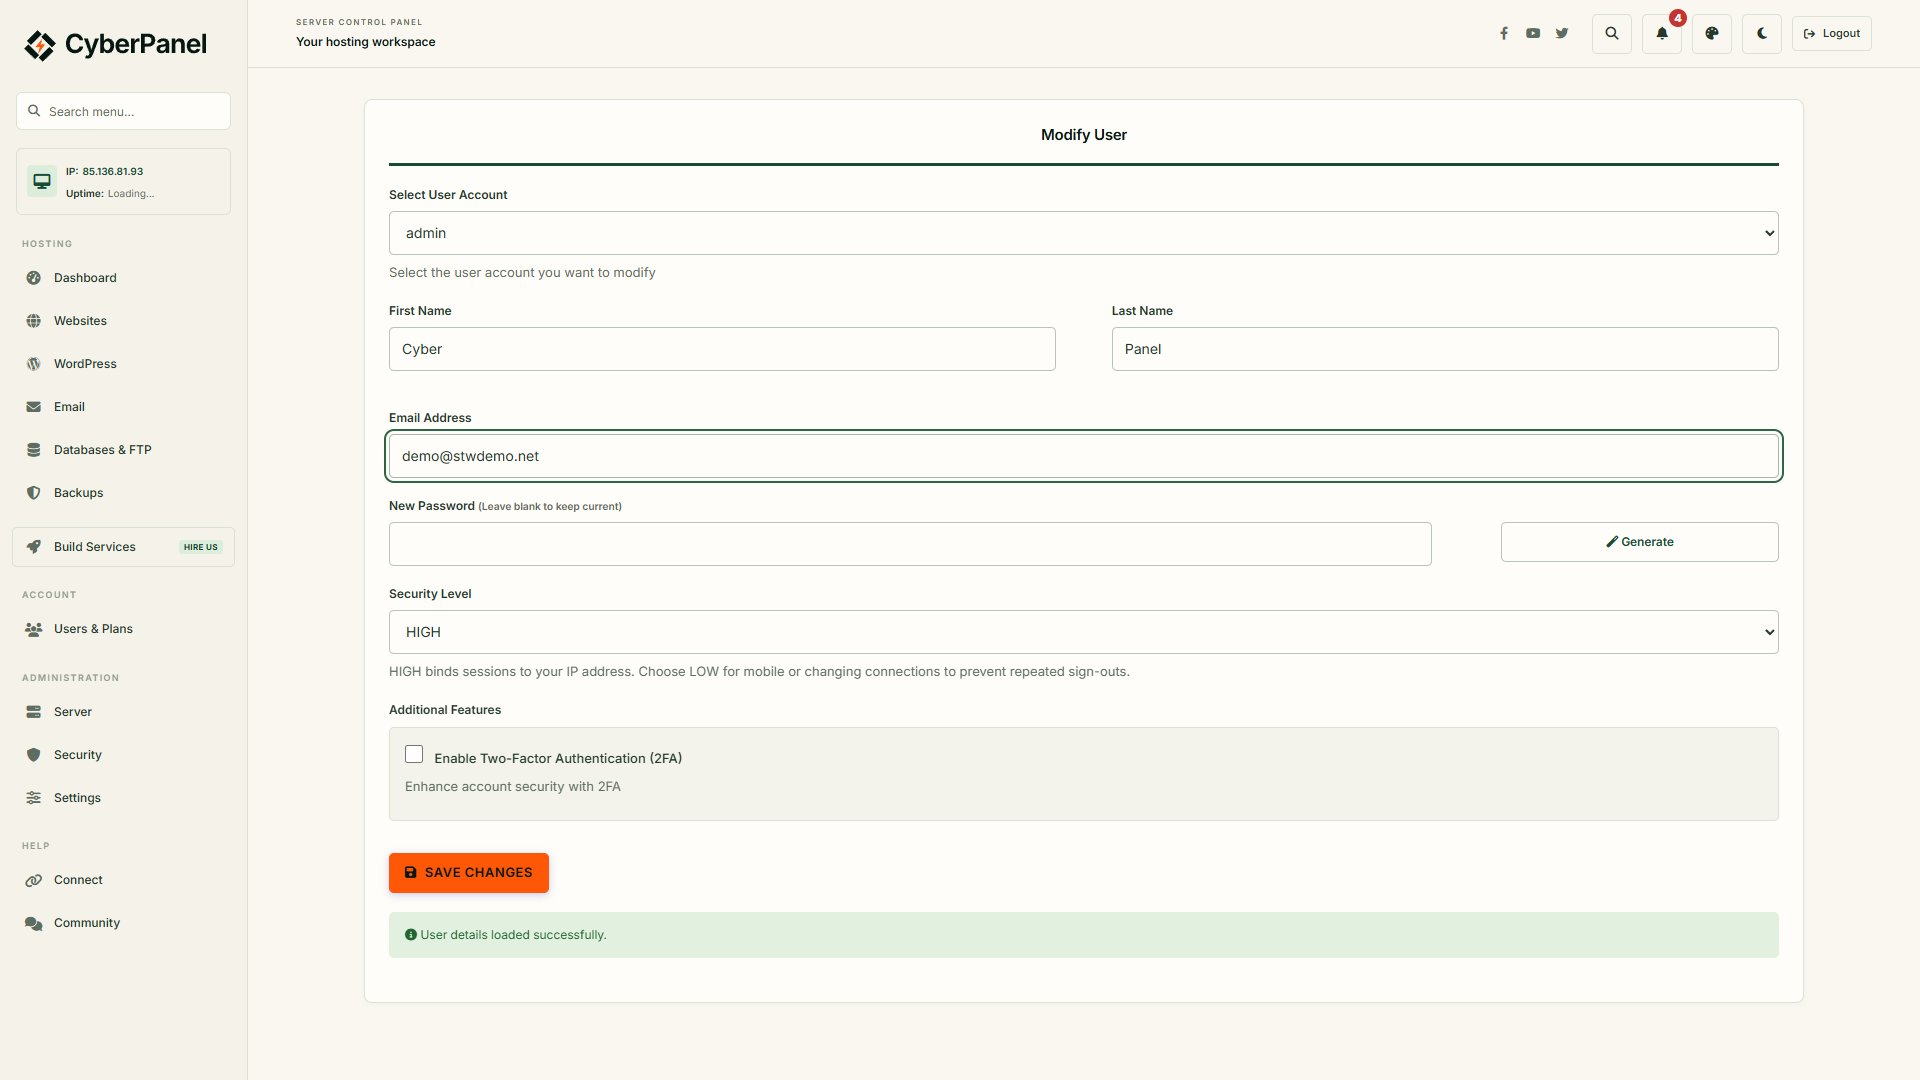
Before you log out, test the new login in a second browser. Enter the new password, and CyberPanel should ask for a code from your app.
Give the control panel a trusted certificate
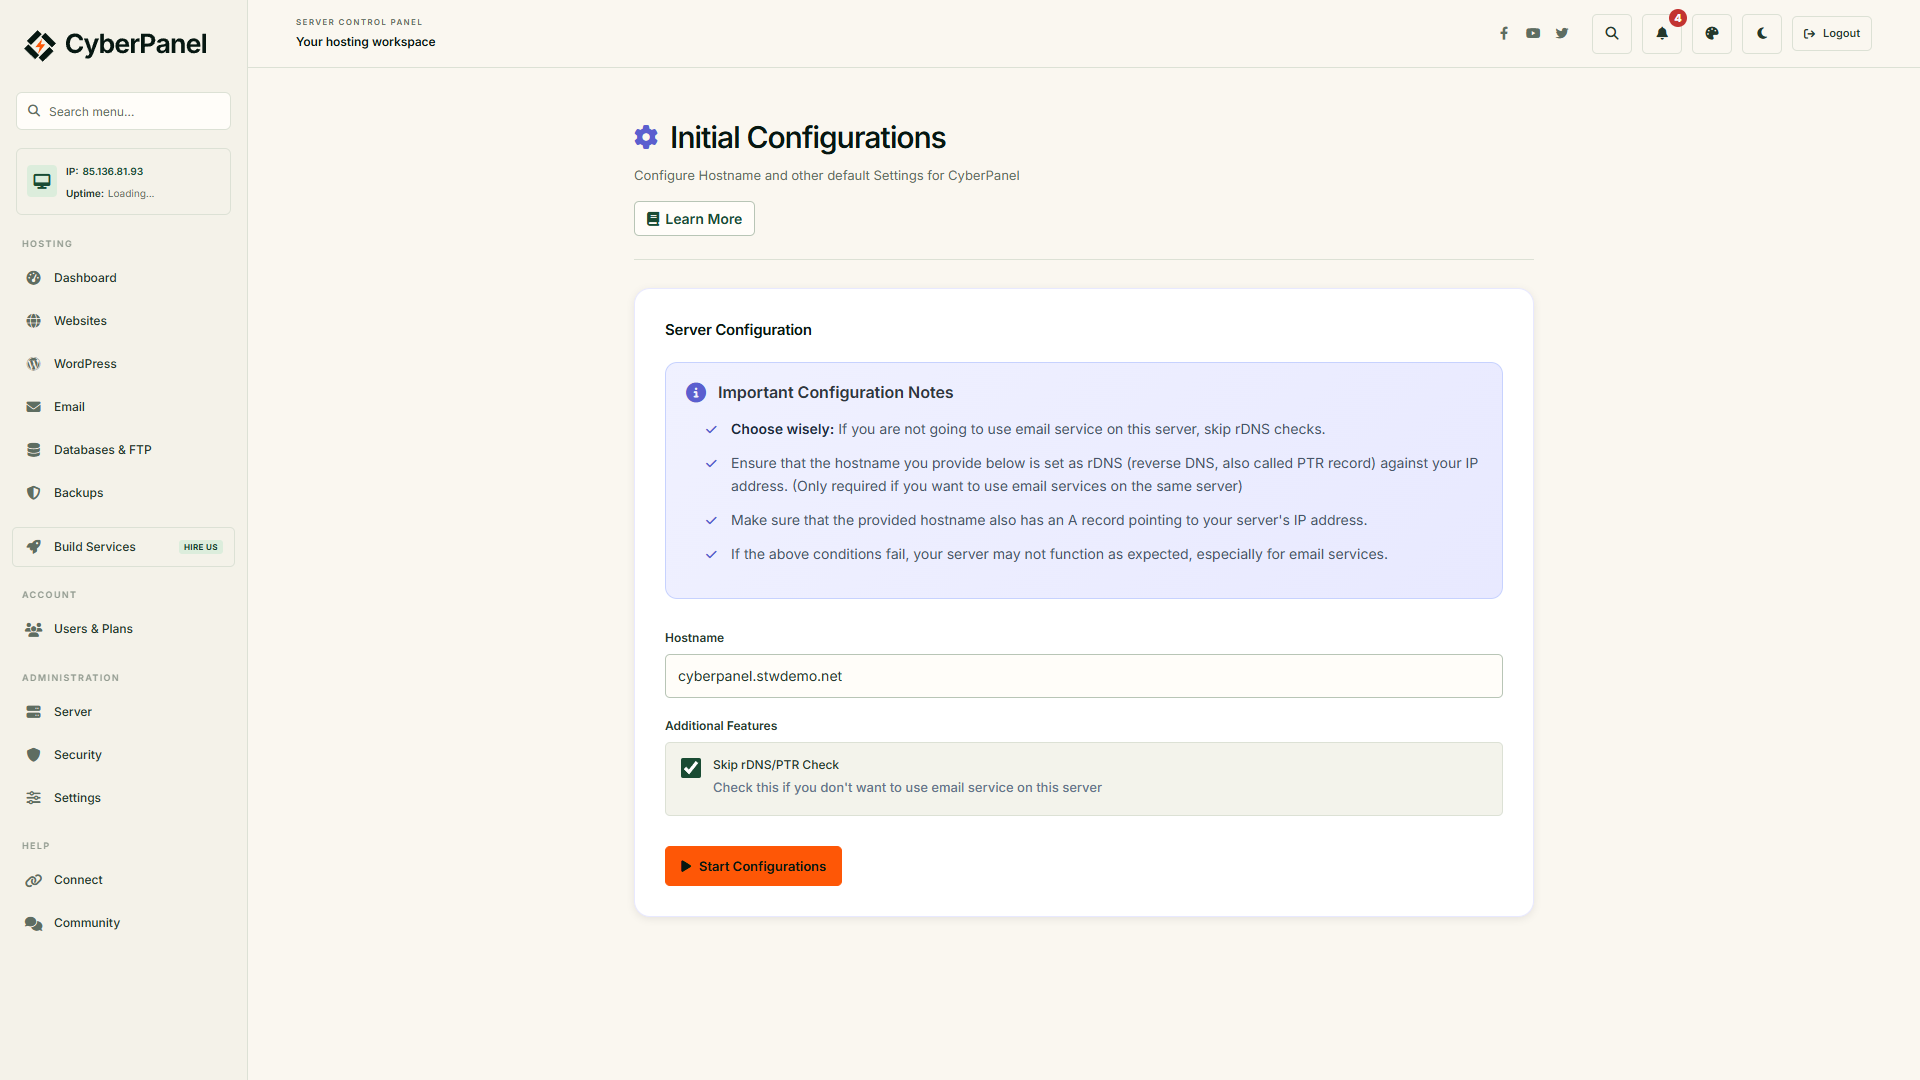
Go to Settings → Setup Wizard and enter panel.example.com as the hostname. Select Skip rDNS/PTR Check, since reverse DNS only matters for mail servers. Then click Start Configurations.
When the page reloads, reopen https://panel.example.com:8090/ in a new browser window. The browser should no longer warn that the connection isn’t private, as it did at your first login in Step 3, because the control panel now uses a trusted Let’s Encrypt certificate instead of the self-signed one.
If the browser still shows the “not private” warning, Let’s Encrypt couldn’t reach the panel’s name. Run
nslookup panel.example.com 8.8.8.8from your computer and check that it returns the VPS’s address. Then make sure TCP port80is allowed under Security → Firewall and in any firewall your provider runs, and run the wizard again.
Close the ports you don’t need
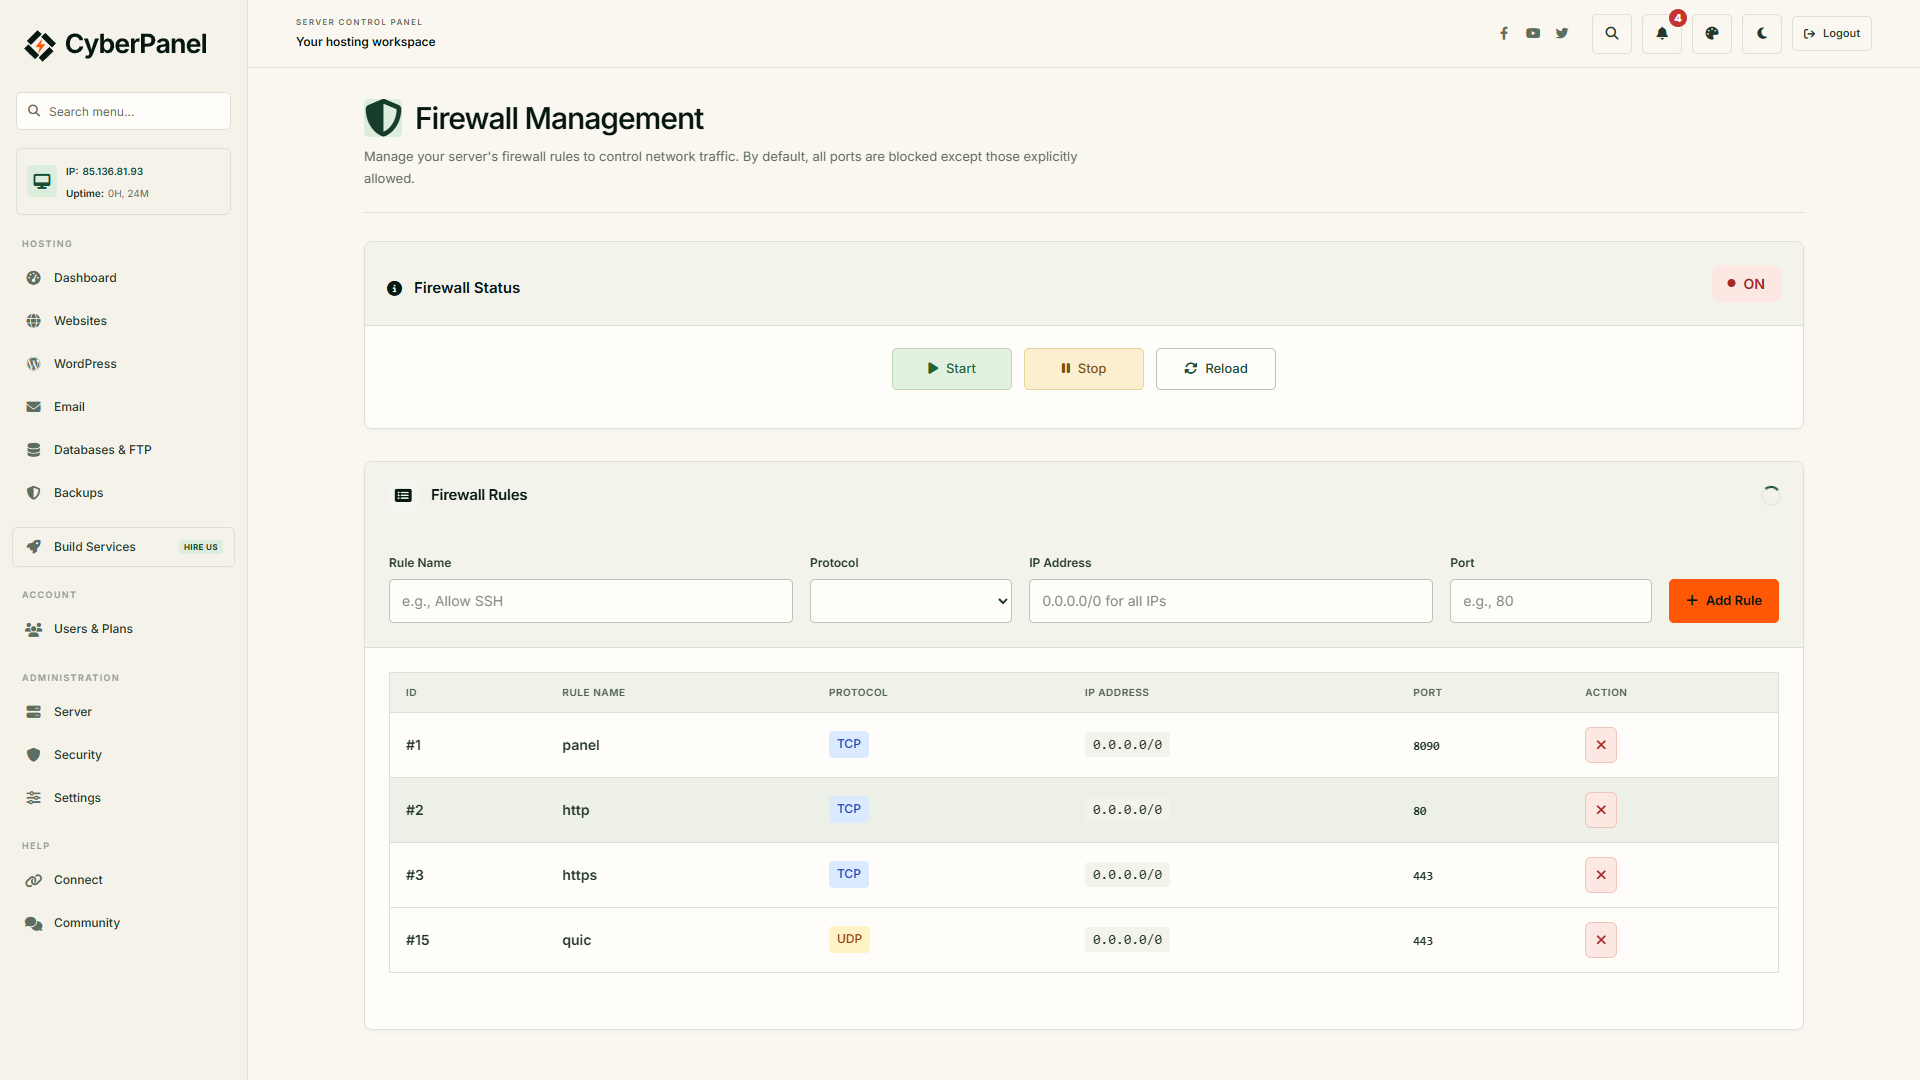
Even in minimal mode, the installer opens ports for services we’re not using, like mail and FTP. Go to Security → Firewall, keep the following rules, and delete the rest.
- TCP
80and443for websites - TCP
8090for the control panel - UDP
443for HTTP/3, the newest version of the web protocol
SSH stays open even though it’s not in this list, because firewalld allows it through a separate built-in rule.
Step 5 — Create a Website Owner and an HTTPS Site
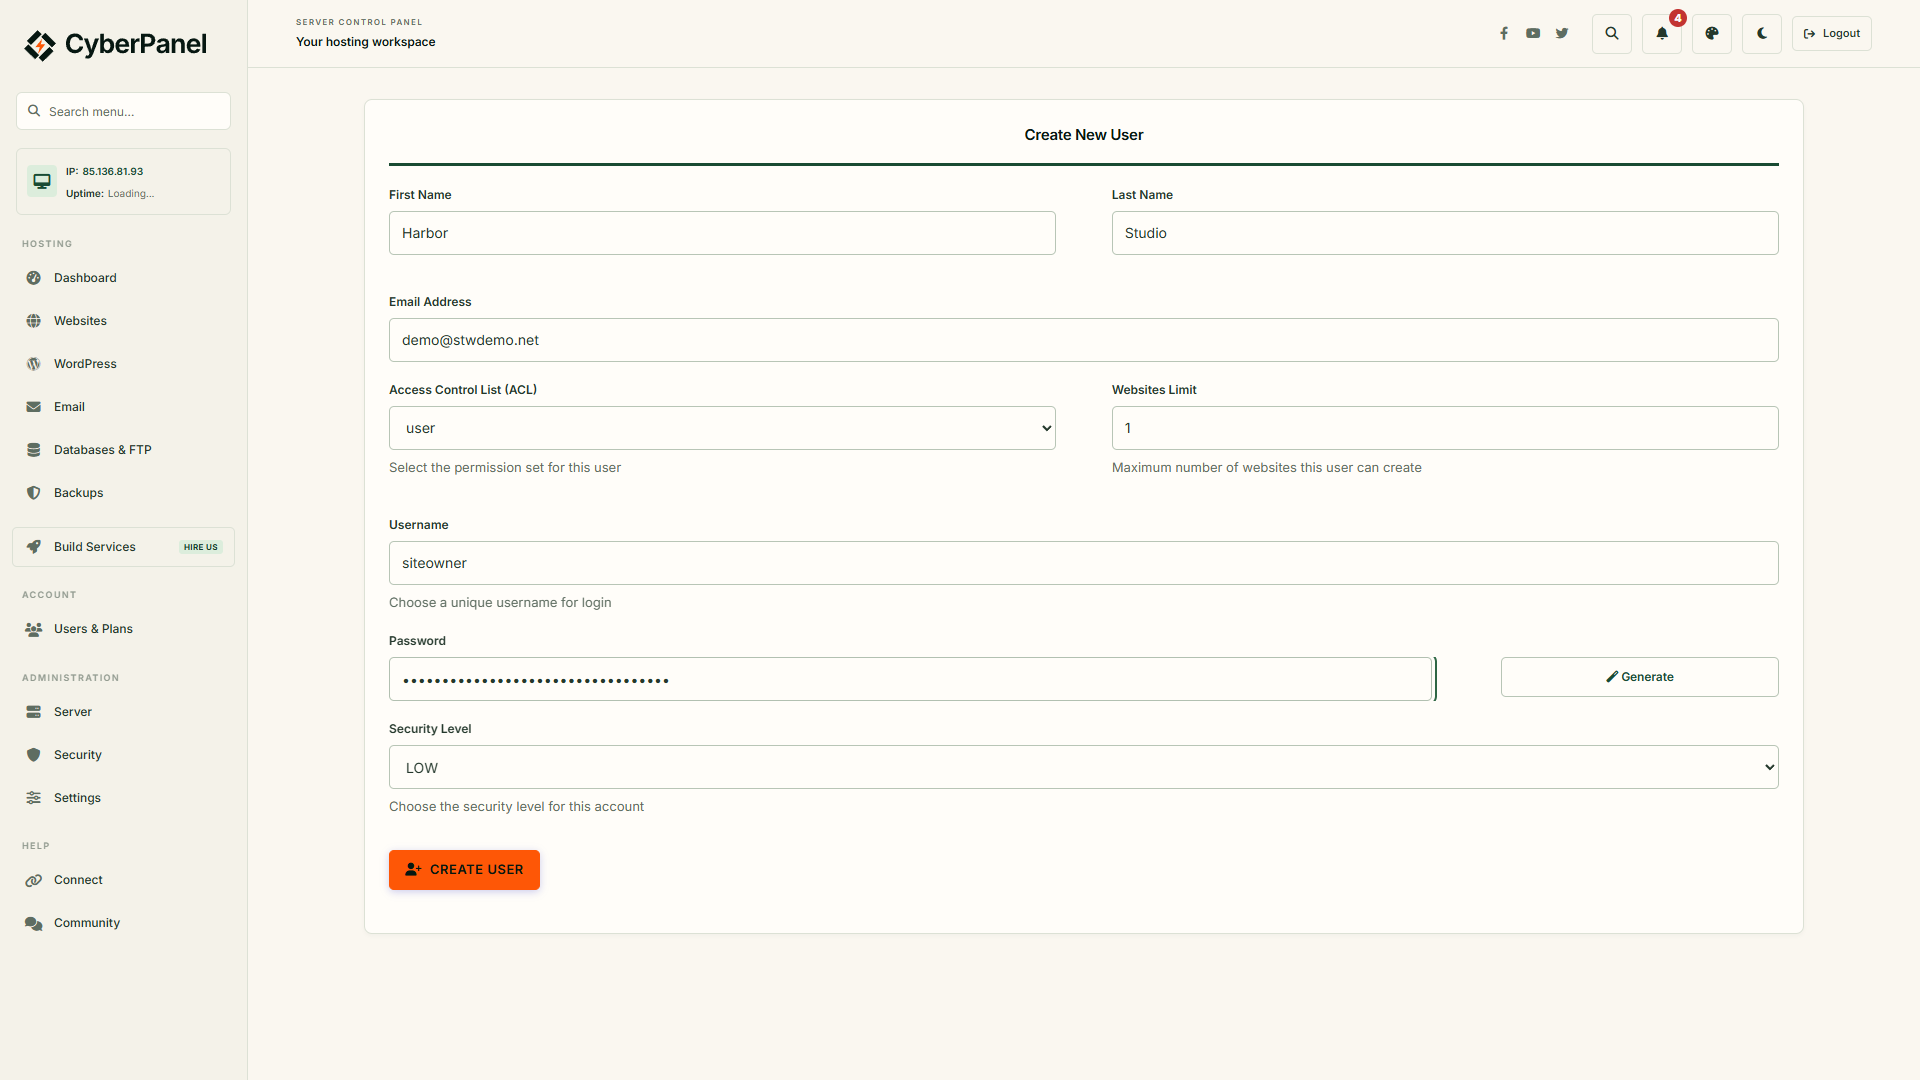
Websites should belong to a regular user, so you’re not using the admin account for everyday work. Go to Users & Plans → Create User and fill in the owner’s details and password. Choose the user access role, and set the website limit to 1 for a single site.
The Security Level setting decides whether a login is tied to one IP address. LOW is the practical choice for someone whose connection changes, and it doesn’t give the user any extra powers.
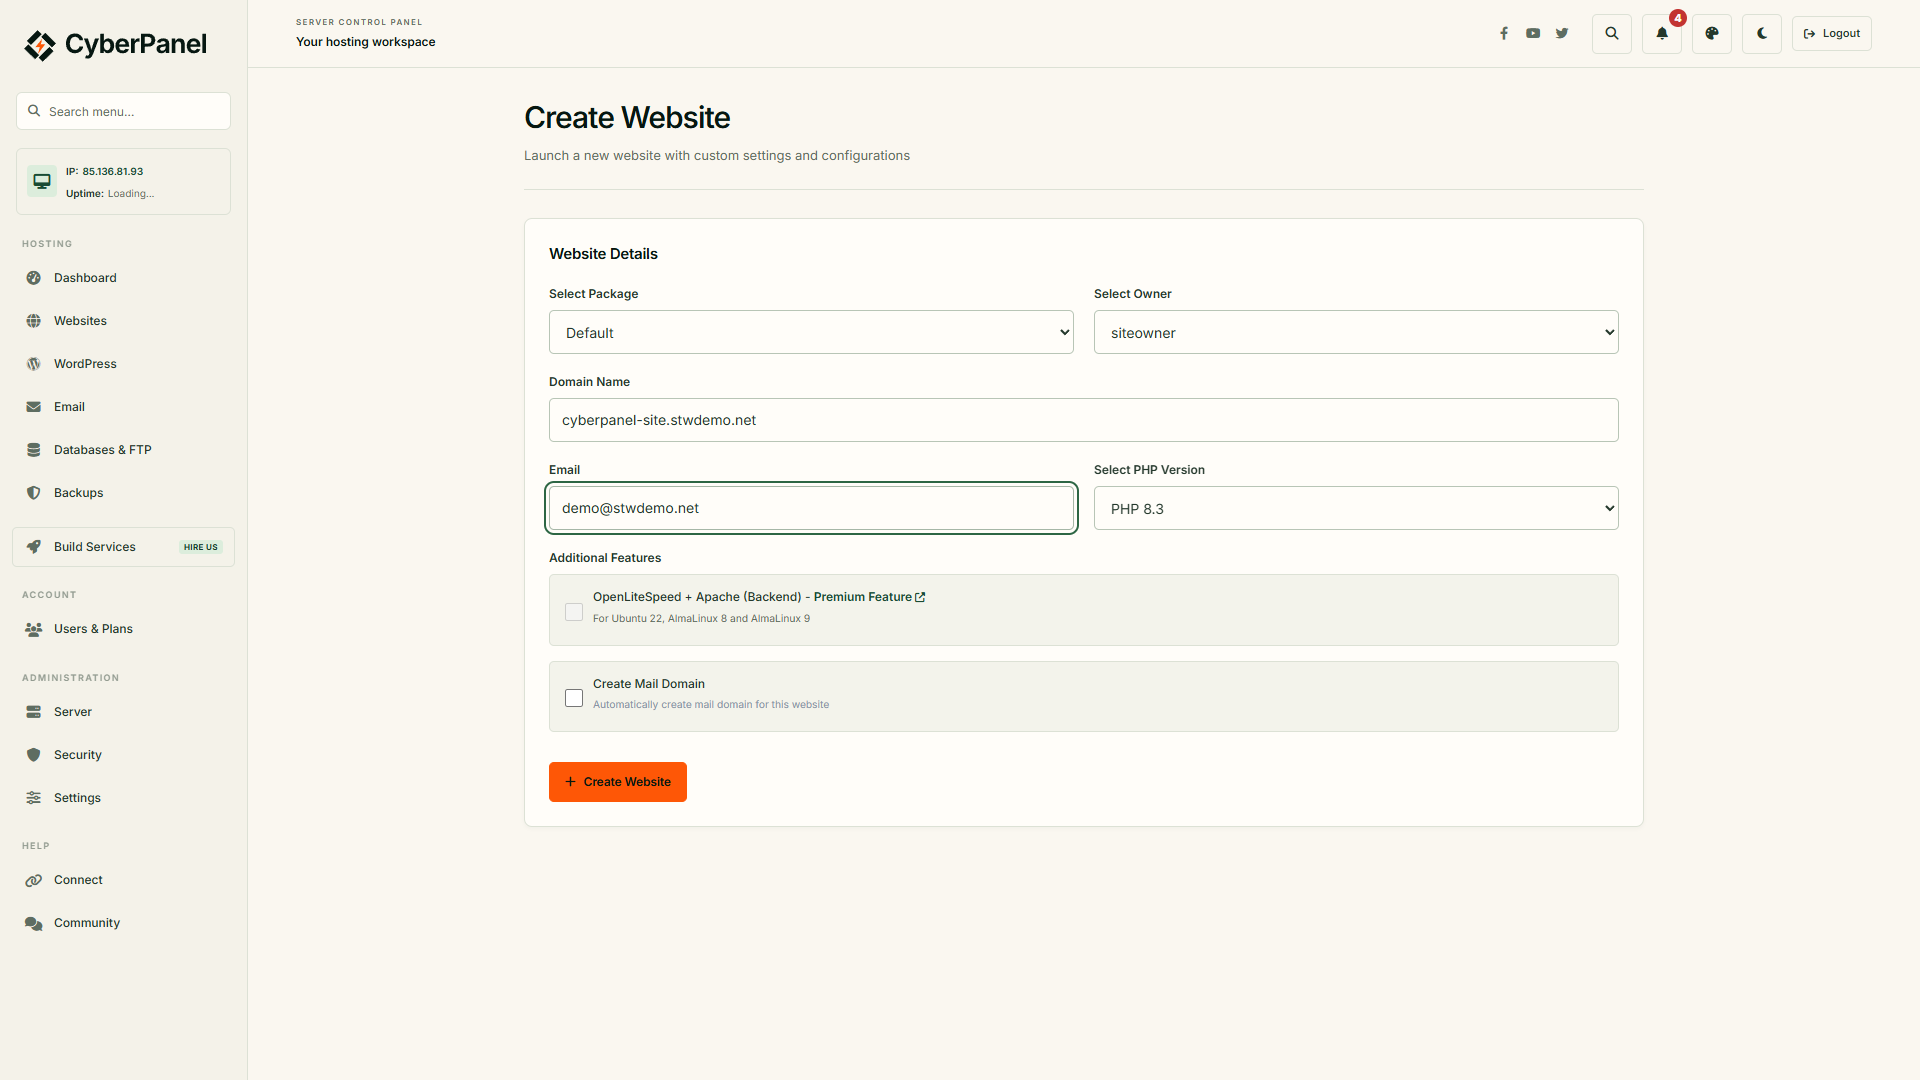
Now go to Websites → Create Website. Choose the Default package and your new owner, enter site.example.com and a contact email, and your choice of PHP version. Leave mail hosting unchecked, and skip the Apache option, which is a paid extra.
Click Create Website. Because the DNS record already points at the VPS, CyberPanel requests the site’s Let’s Encrypt certificate on its own.
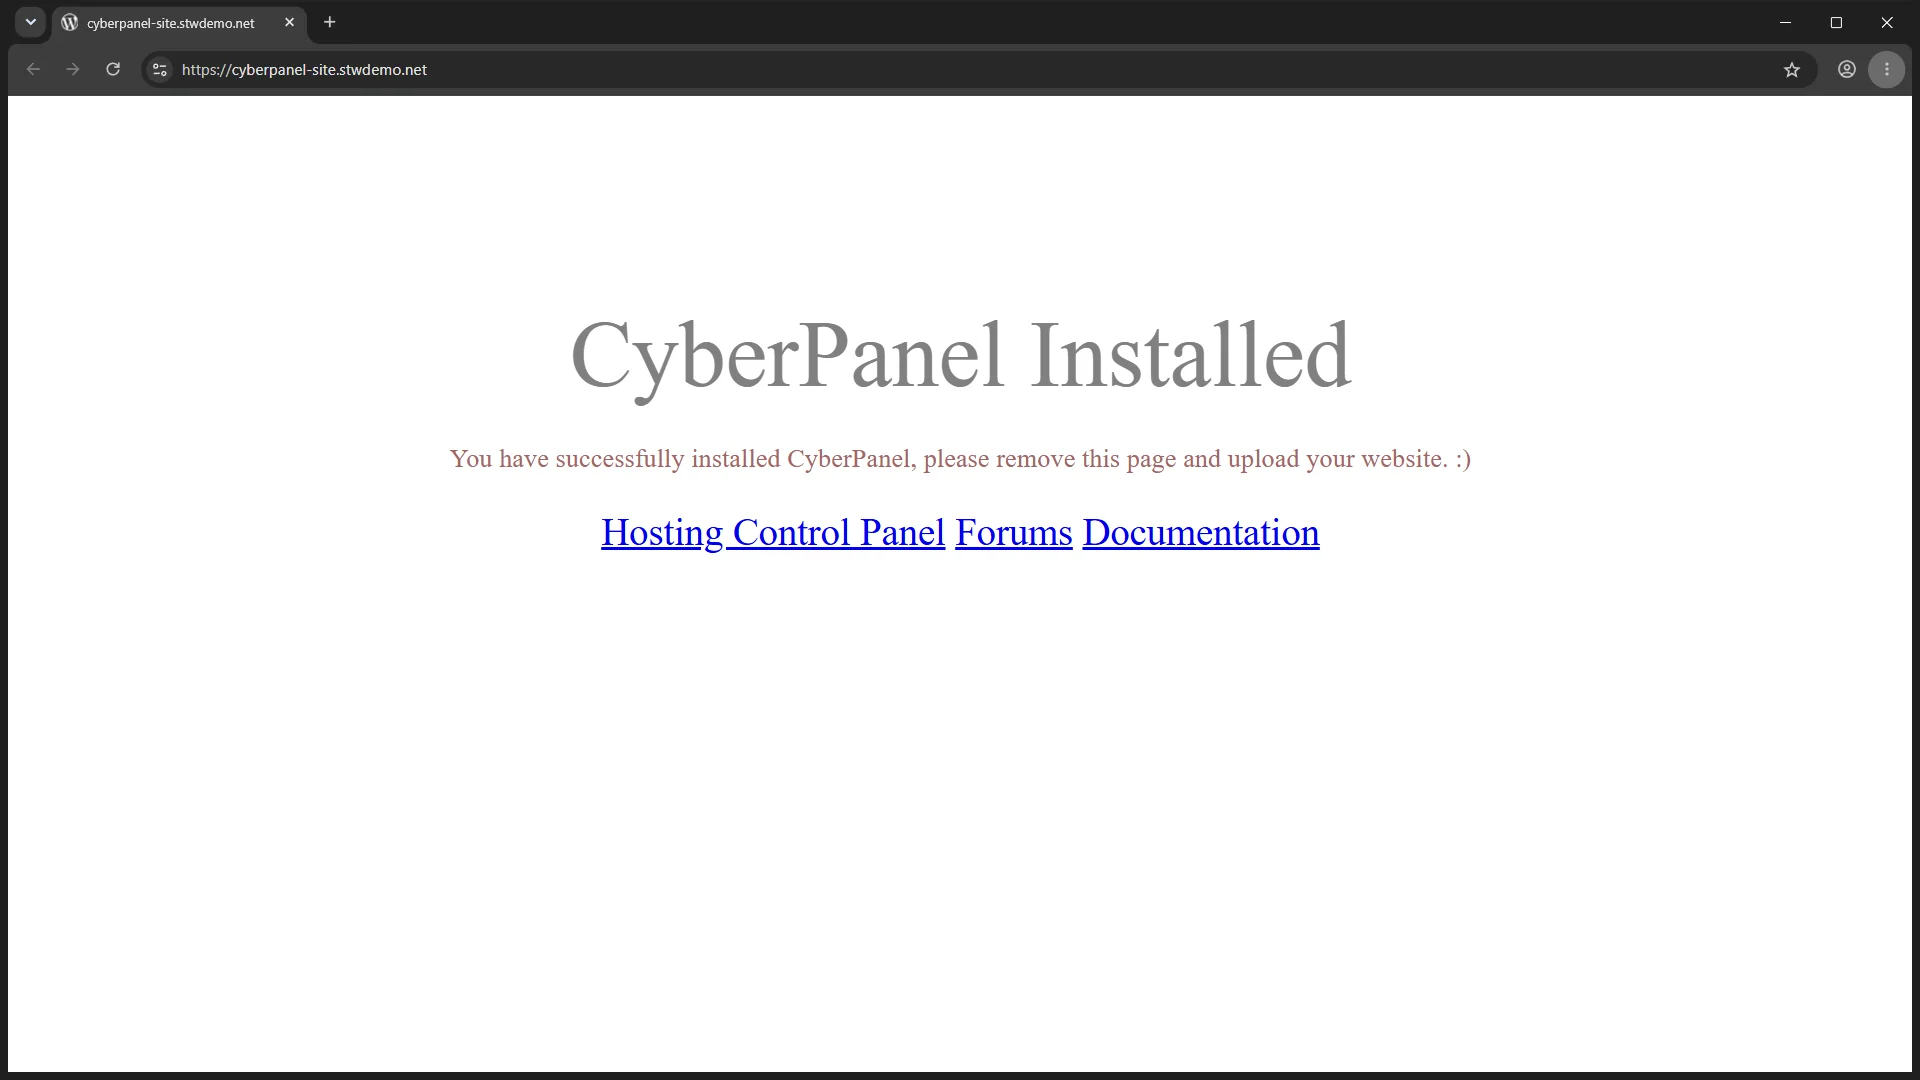
Now open https://site.example.com/. You should see CyberPanel’s placeholder page, CyberPanel Installed, with a padlock in the address bar and no certificate warning. Your site is live over HTTPS, ready for WordPress or your own files.
If the site shows a certificate warning, check that
site.example.comresolves to the VPS and that ports 80 and 443 are open. Then go to Websites and click Issue SSL** below the relevant site to request the certificate again.
CyberPanel doesn’t redirect plain HTTP to HTTPS by default, so a visitor who types http://site.example.com gets an unencrypted page. To send everyone to the secure address each time, go to Websites and click Settings beside your site. Open Config → Rewrite Rules, choose Force HTTP -> HTTPS in the Select Template dropdown, and click Save Rewrite Rules.
You can check the redirect from a terminal.
curl -IL http://site.example.com/The -L option makes curl follow the redirect, so you’ll see two sets of headers. The first should start with 302 (CyberPanel’s redirect code) and include Location: https://site.example.com/. The second should start with 200. A “maximum redirects” error means the site is redirecting in a loop.
Installing WordPress. CyberPanel’s one-click WordPress installer is part of a paid add-on. If you want to use WordPress, you can buy the add-on or install WordPress manually by following the manual method in our guide to installing WordPress.
Step 6 — Keep Ubuntu and CyberPanel Updated
CyberPanel doesn’t update itself, so keep an eye on its changelog for security releases. To upgrade, run its official upgrade script as root.
cd /root
curl -fsSL https://raw.githubusercontent.com/usmannasir/cyberpanel/stable/preUpgrade.sh -o preUpgrade.sh
sh preUpgrade.sh
Ubuntu packages update separately. If you install WordPress, it updates from its own dashboard, as our guide to updating WordPress core, plugins, and themes explains.
Conclusion
CyberPanel is now running with two-factor login and a tidy firewall, and your first site is live over HTTPS, ready for WordPress or your own files.
Set up backups under Backups before real visitors arrive. The default Home destination saves them on the same server, so copy them somewhere else too. Our guide to securing, updating, and backing up a VPS control panel covers backups and day-to-day upkeep.
Next steps: