

Introduction
CloudPanel is a control panel for running websites on nginx, the web server software that receives visitors’ requests and sends back your pages. Besides PHP sites such as WordPress, you can create Node.js and Python sites from the same new-site screen, and CloudPanel sets the language version and points nginx at your app for you. It’s free to use, though it isn’t open source.
We recommend considering CloudPanel if you host a handful of your own sites, especially when some are Node.js or Python apps. You can give someone a login for a single website, but there are no reseller accounts or hosting packages, so it isn’t built for selling hosting.
We’ll install CloudPanel on a fresh VPS, give its login a trusted HTTPS address, and get a PHP website serving its default page over HTTPS. A seperate optional security section shows how to add two-factor authentication and Basic Auth.
What You’ll Need
- A clean VPS. CloudPanel requires at least one CPU core, 2 GB of RAM, and 10 GB of disk space. Its supported systems include Ubuntu and Debian. We installed CloudPanel 2.5.4 on Ubuntu 24.04 LTS using an STW GP34, so the commands below follow Ubuntu.
- Root access to run the installation. You’ll run every command as root, over SSH or your provider’s browser console. On STW’s servers, the documentation covers adding a SSH key and opening the console.
- Two subdomains and access to their DNS records. The examples use
panel.example.comfor CloudPanel andsite.example.comfor the site itself. Substitute your own names and your VPS’s public IP address throughout.
CloudPanel has no mail or DNS server, so your DNS stays with its current host and email can go to a hosted service such as STWmail.
Step 1 — Get the Server Ready
Copy any files and database exports you need to another computer before you reinstall. A reinstall erases everything on the VPS, existing snapshots included.
For an STW GP3 VPS, open Products → Manage → Reinstallation in the STW control panel, choose a supported operating system, and confirm the rebuild.
Connect as root, install the updates and the tools CloudPanel’s installer needs, and reboot using the following commands:
apt update
apt -y upgrade
apt -y install curl wget sudo
reboot
Reconnect once the VPS has restarted. Then open Snapshots → Take Snapshot in the STW control panel, give the clean server a name like before-cloudpanel-install, leave Include RAM unchecked, and click Confirm.
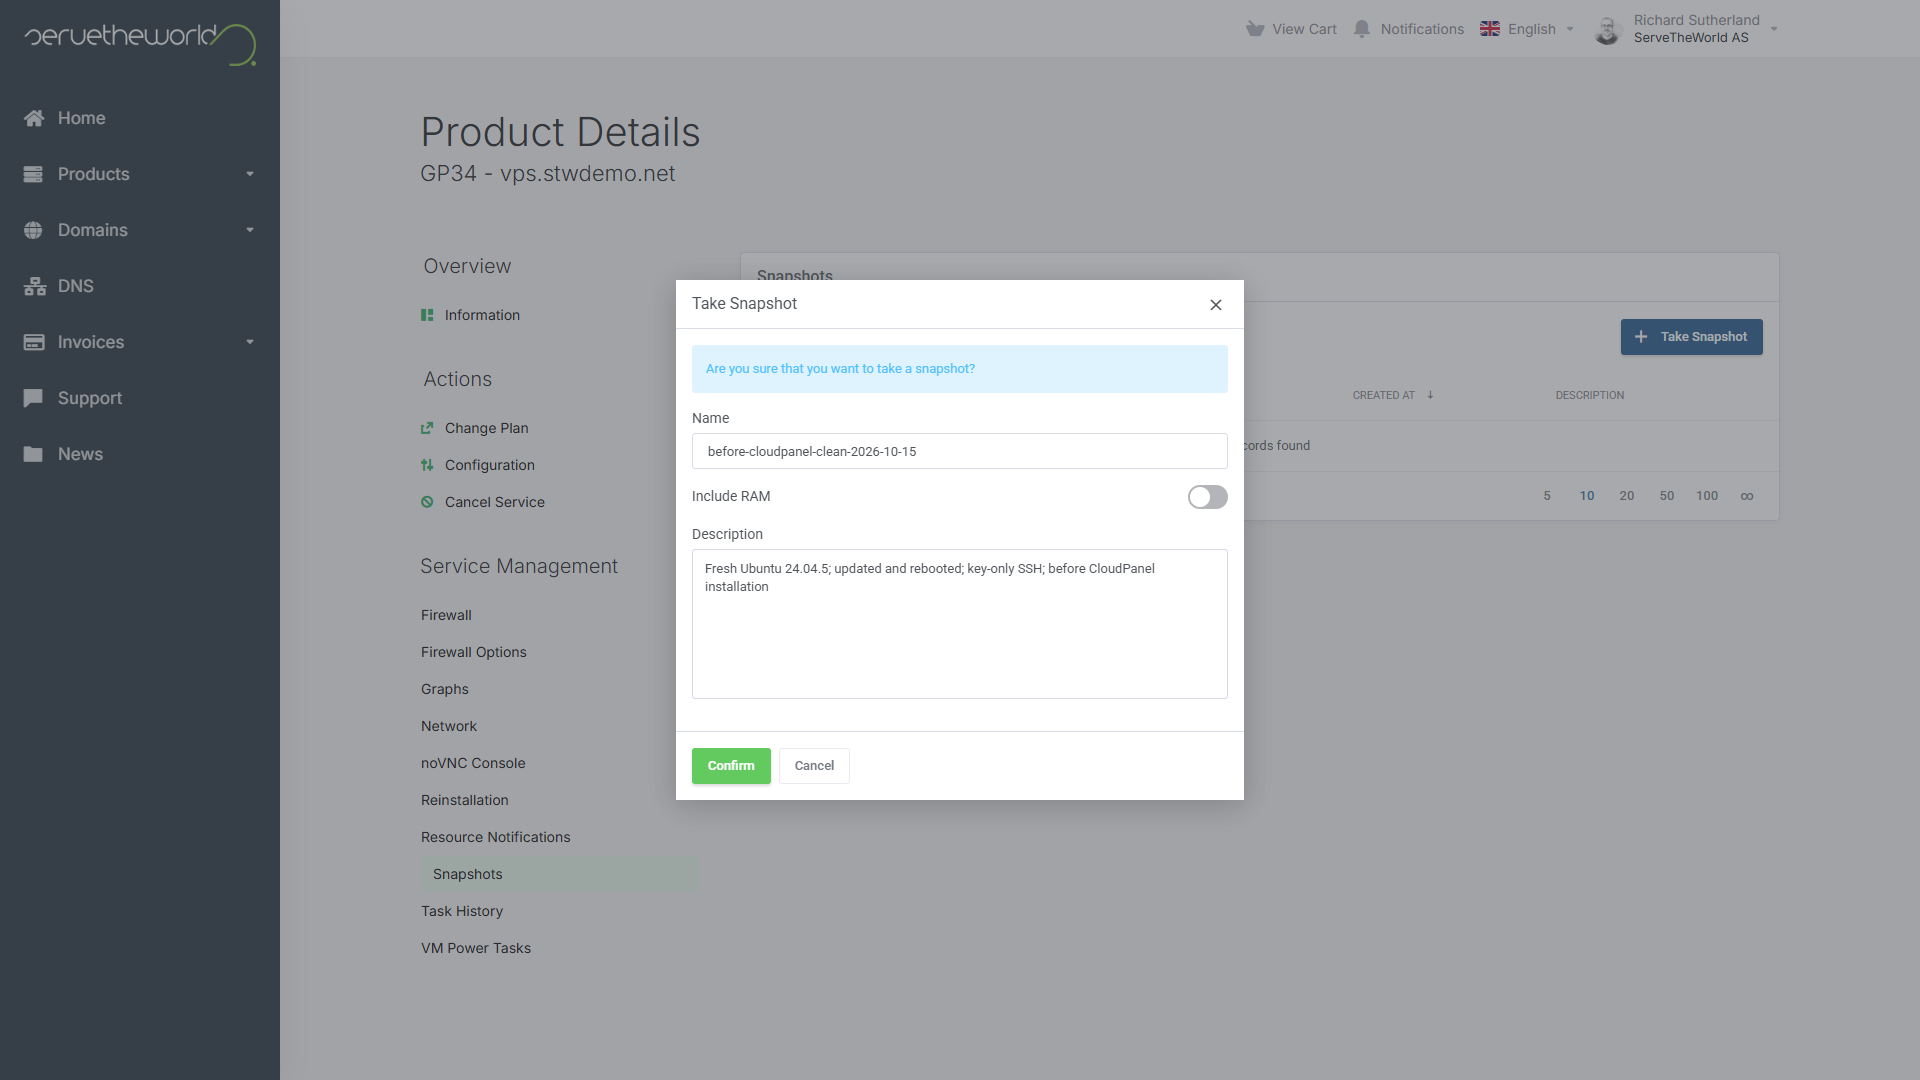
Now, should the installation go wrong, Rollback beside this snapshot returns the server to this clean state. Treat these snapshots as a short-term safety net, not a long-term backup.
The first installation guide in this series has more detail on performing these steps.
Step 2 — Add DNS Records and a Hostname
A browser trusts an HTTPS site only if the server shows a valid certificate for that exact name. CloudPanel requests its certificates from Let’s Encrypt, a free certificate authority that first confirms, over the internet, that the name reaches your server. That’s why we set up the DNS records first.
Add an A record for each name with your domain’s DNS host. An A record ties a name to an IPv4 address.
| Name | Type | Value |
|---|---|---|
panel.example.com |
A | Your VPS’s public IPv4 address |
site.example.com |
A | Your VPS’s public IPv4 address |
To do this on STW, open your domain in DNS, choose New record, and enter the subdomain in Name and the server’s address in IPv4 address. Add both records as drafts, then publish the changes. Our tutorial on editing DNS records at STW can walk you through using this editor in more detail.
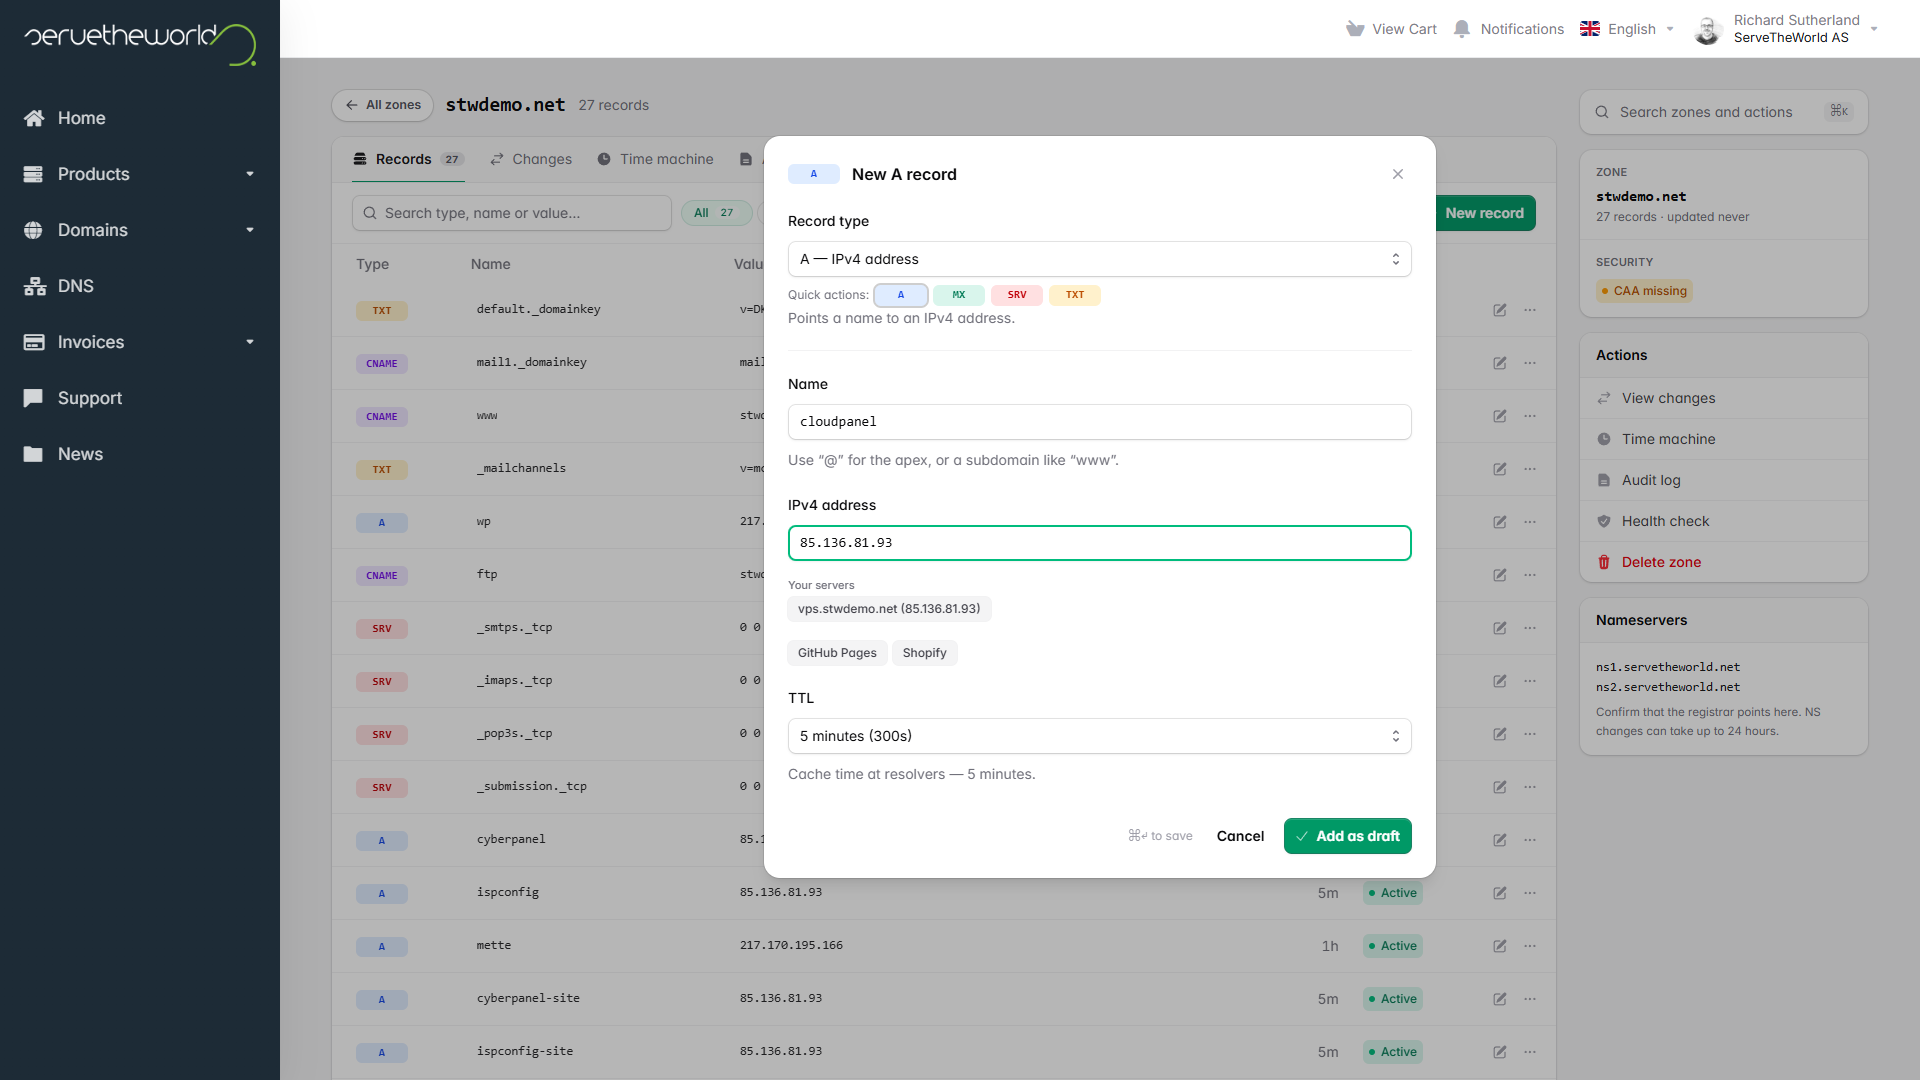
Check both names from your computer against 8.8.8.8, Google’s public resolver, which shows what other people’s browsers will see.
nslookup panel.example.com 8.8.8.8
nslookup site.example.com 8.8.8.8
The answers should contain your VPS’s IP address. If you get an older address, wait for its cached record to expire before requesting certificates.
dig +short panel.example.com @8.8.8.8anddig +short site.example.com @8.8.8.8do the same job on Linux and macOS, printing only the addresses.
Next, you can give the server itself a matching name. The hostname is what the machine calls itself, and its fully qualified domain name (FQDN) is that name plus the domain, as in panel.example.com. A matching name makes the server easy to recognise in your SSH prompt and logs.
Set the new name with hostnamectl, then edit /etc/hosts, a local list of names and addresses the server checks before it asks DNS:
hostnamectl set-hostname panel.example.com
nano /etc/hosts
Leave the localhost entries alone. On Ubuntu, the 127.0.1.1 line is where the machine looks up its own name. Replace that line with this one, using your own domain.
127.0.1.1 panel.example.com panelMost cloud images include cloud-init, a tool that configures the server each time it starts and may restore the original hostname. The following setting stops it touching yours, and hostname -f prints the full name to confirm the change:
printf 'preserve_hostname: true\n' > /etc/cloud/cloud.cfg.d/99-preserve-hostname.cfg
hostname -f
The last command should return panel.example.com.
On some Ubuntu images, cloud-init also rebuilds
/etc/hostsfrom a template at boot. To keep your entry, edit the127.0.1.1line in/etc/cloud/templates/hosts.debian.tmplto127.0.1.1 panel.example.com panel. After the next restart,hostname -fshould still printpanel.example.com.
Step 3 — Run the CloudPanel Installer
CloudPanel asks you to choose the database engine at installation. We’ll use MySQL 8.4, a long-term support release that suits most PHP applications. If you’re moving an existing application, check its database requirements first. The official installation page lists the MySQL and MariaDB choices for each operating system.
As root, download the installer and verify its SHA-256 checksum before you run it. A checksum works like a fingerprint for the file, so a match shows you have exactly the script CloudPanel published.
cd /root
curl -fsS https://installer.cloudpanel.io/ce/v2/install.sh -o install.sh
echo '8146dbe0a488e7088b04071b0c34d59aa0ab1fe9dcec382d395fd155c9e6c476  install.sh' | sha256sum -c -
You should see install.sh: OK. The checksum changes whenever CloudPanel updates the installer, so use the checksum posted by CloudPanel instead of copying the example above. Don’t run a file that fails the check.
Next, you’ll start the installation with your database choice. If your provider has a network firewall outside the VPS, you can block port 8443 to everyone but your own IP first, so nobody else can reach the setup page when it appears.
DB_ENGINE=MYSQL_8.4 bash install.shThe installer sets up nginx, MySQL, and PHP, and turns on UFW, Ubuntu’s firewall, with the ports CloudPanel needs. Installation takes about five minutes. Wait until it reports success and gives you the control panel address.
Create the administrator immediately
Open https://YOUR_VPS_IP:8443/ as soon as installation finishes. The first visitor creates the administrator account, so if you wait, a bot scanning for new installations could claim it before you do.
Expect an initial certificate warning. CloudPanel starts out with a self-signed certificate, which encrypts the connection but has no trusted issuer to confirm the server’s identity. Check that you’re opening your VPS’s IP address, then use the browser’s advanced option to continue. We’ll set up a trusted certificate in step 4.
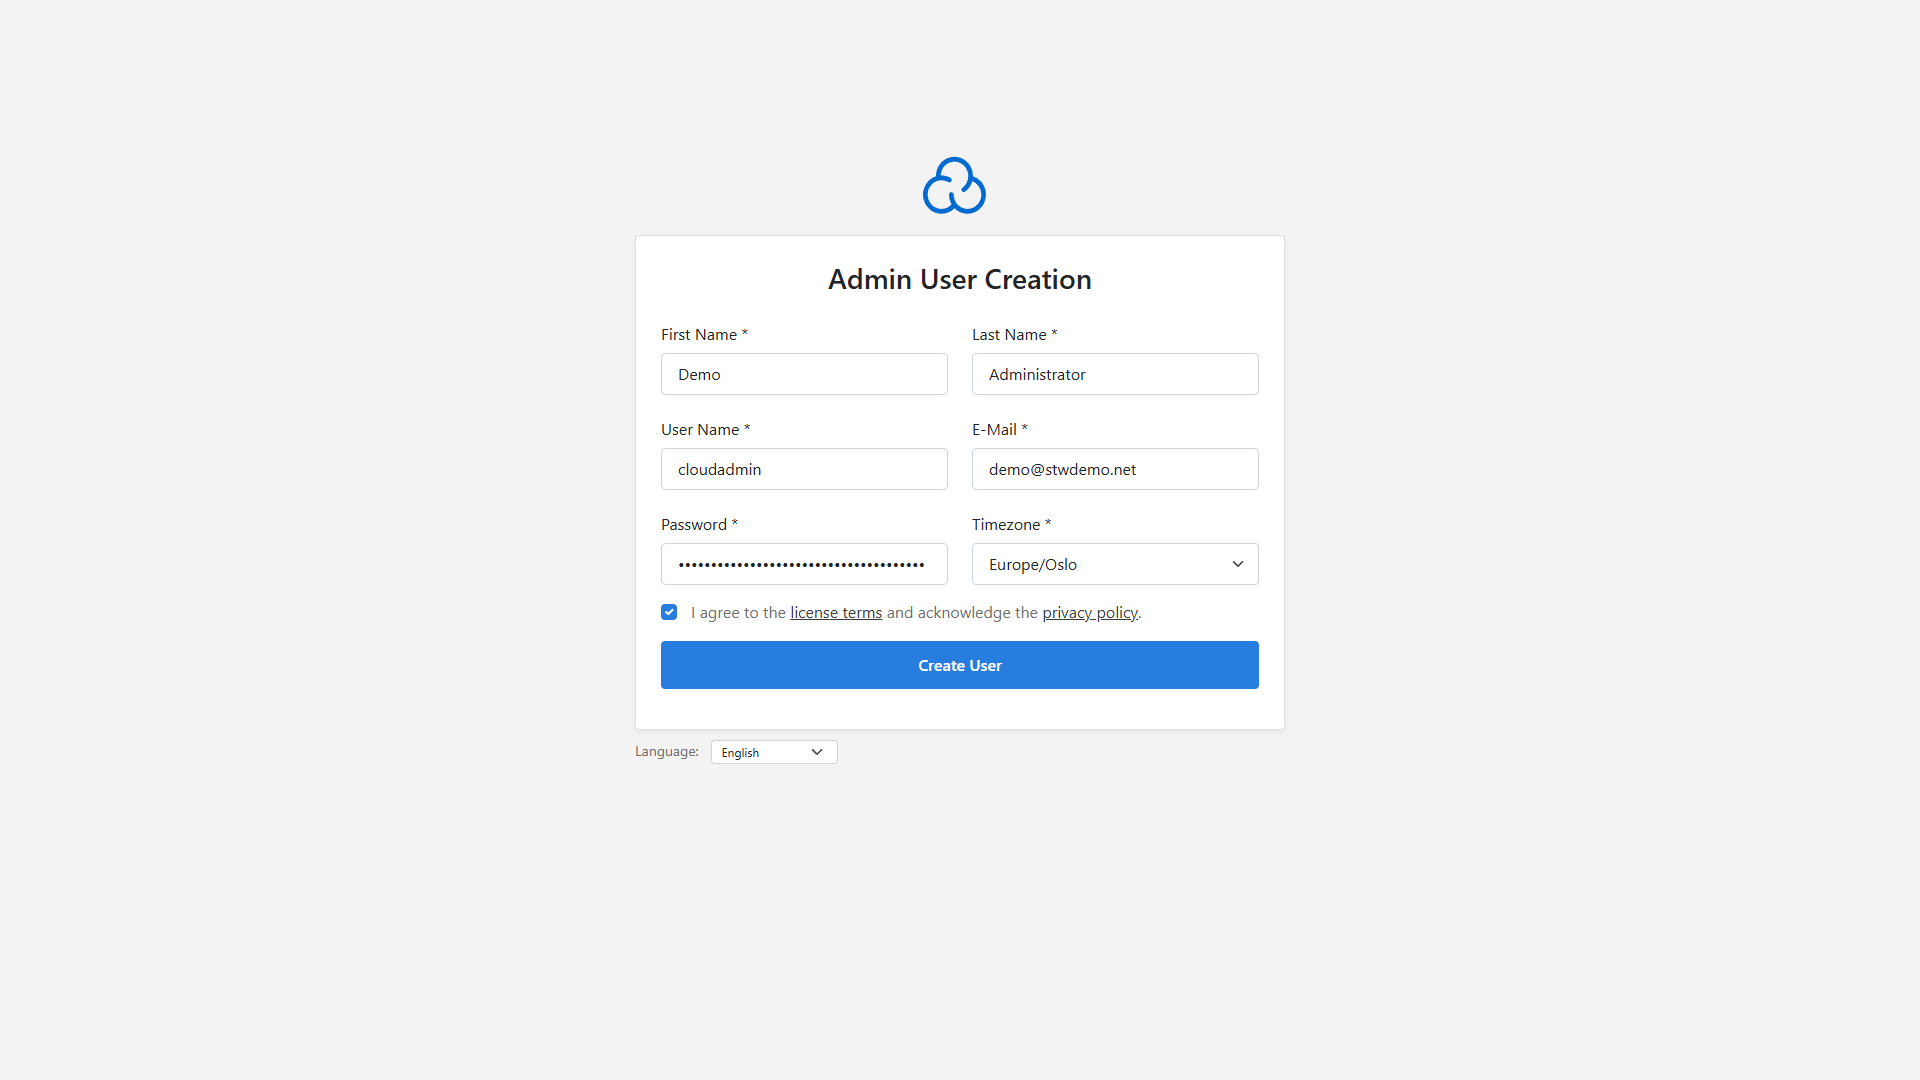
Enter an administrator username and a strong password, along with your name, email, and timezone. Accept the terms, create the account, and sign in with it.
Step 4 — Secure Access to CloudPanel
Use your domain with a trusted certificate
Open Admin Area → Settings → General. Under CloudPanel Custom Domain, enter panel.example.com without https:// and click Save.
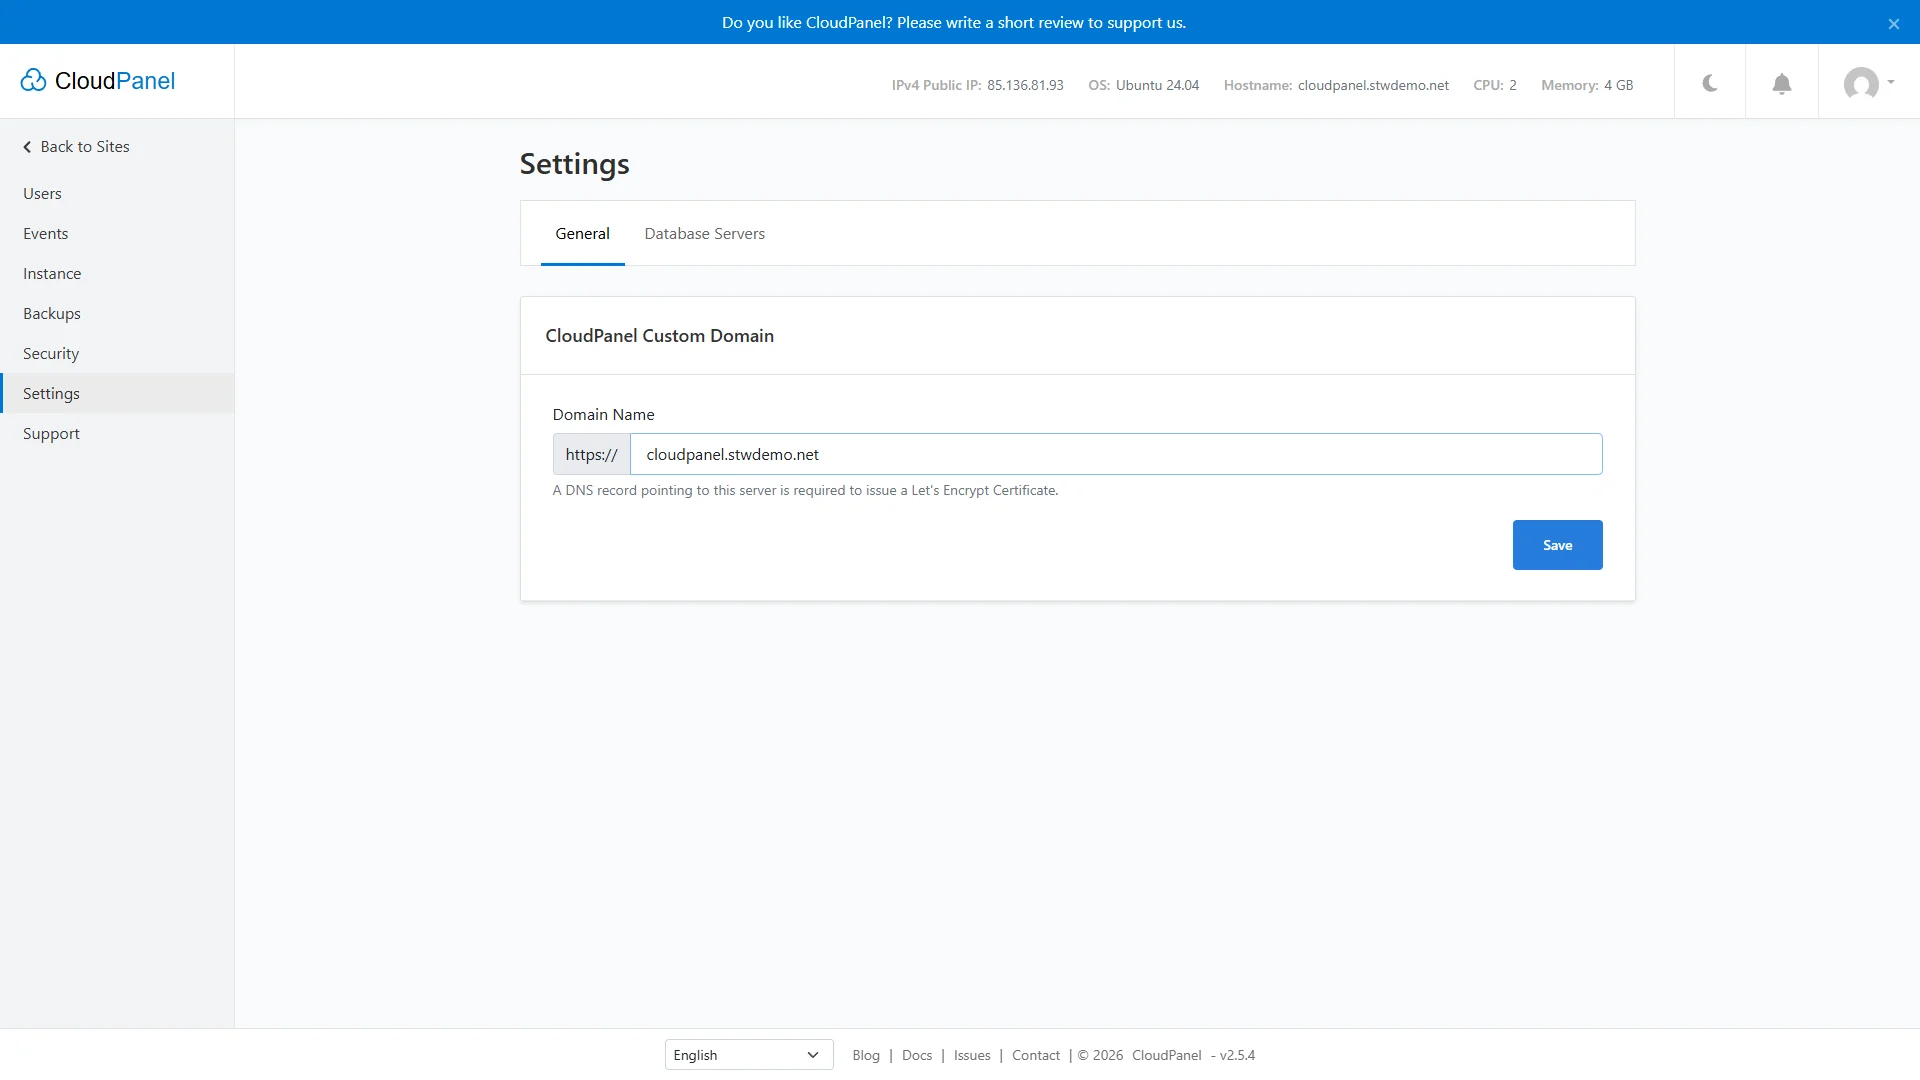
CloudPanel then asks Let’s Encrypt for a certificate and serves the control panel on the standard HTTPS port. Open https://panel.example.com/ in a fresh browser window. You don’t need :8443 on the custom domain, and the browser should accept the certificate with no warning.
If certificate validation fails, check DNS and the firewall. Repeat the
nslookup panel.example.com 8.8.8.8lookup to make sure it still returns the VPS’s address, and allow incoming TCP ports80and443through UFW and any provider firewall. Then click Save again.
Review the firewall
The installer has already set up the firewall, which you can review under Admin Area → Security → Firewall. Leave SSH on TCP 22, web traffic on TCP 80 and 443, and TCP 8443 if you want the direct control panel address available. CloudPanel also opens UDP 443, which browsers can use for HTTP/3.
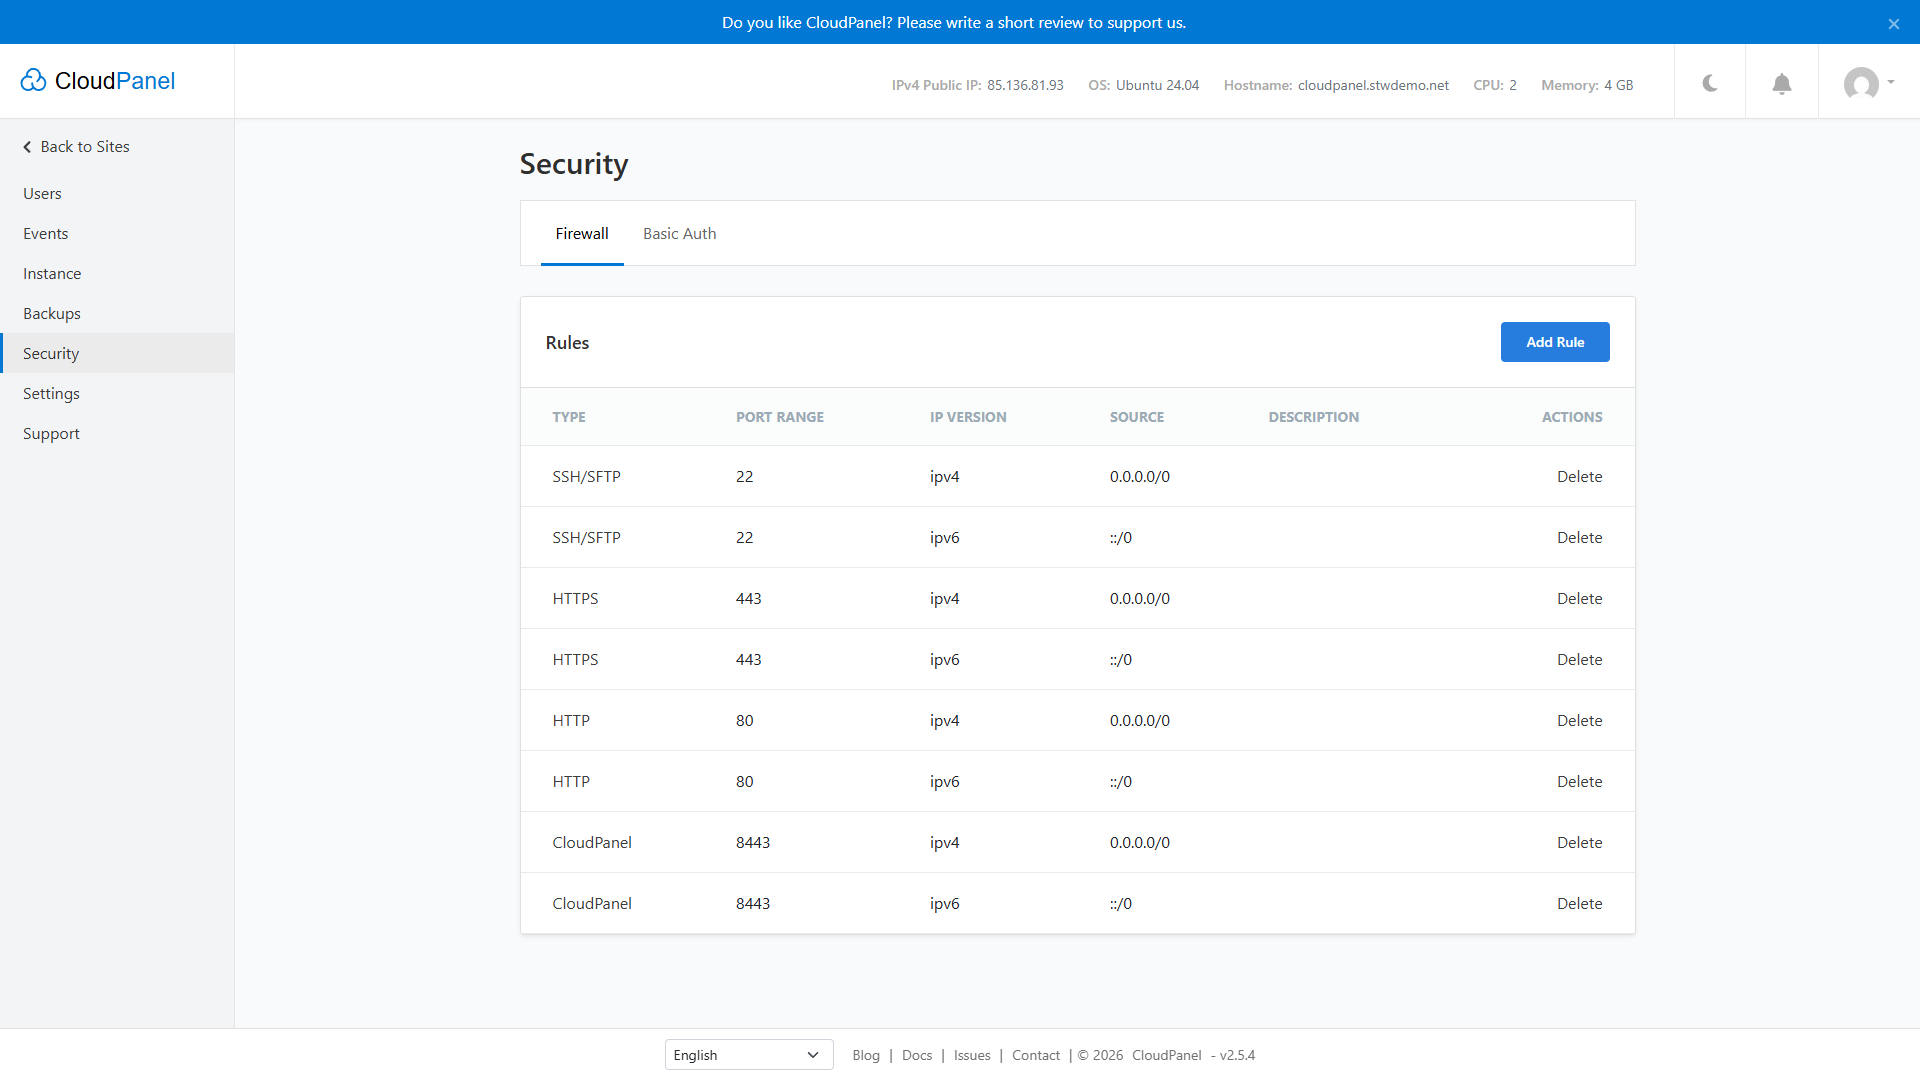
Restricting the control panel port by IP. If your IP address is fixed, setting the CloudPanel rule’s Source to it shuts everyone else out of port 8443. Restrict or remove its IPv6 rule too. The IP rule doesn’t cover the custom domain, which shares port 443 with your websites. Leave port 443 open for website visitors; the optional Basic Auth below can protect the control panel’s login on that address.
Step 5 — Add a PHP Site and Its Owner
Go back to Sites, click + Add Site, and choose Create a PHP Site. A generic PHP site is the simplest way to prove the hosting works before you add an application.
Set Application to Generic, enter site.example.com as Domain Name, and choose a PHP version supported by the application you plan to run.
Give the site a Site User, such as siteuser, and a strong Site User Password, then click Create. CloudPanel creates a Linux account that owns the site’s files and can connect over SSH or SFTP.
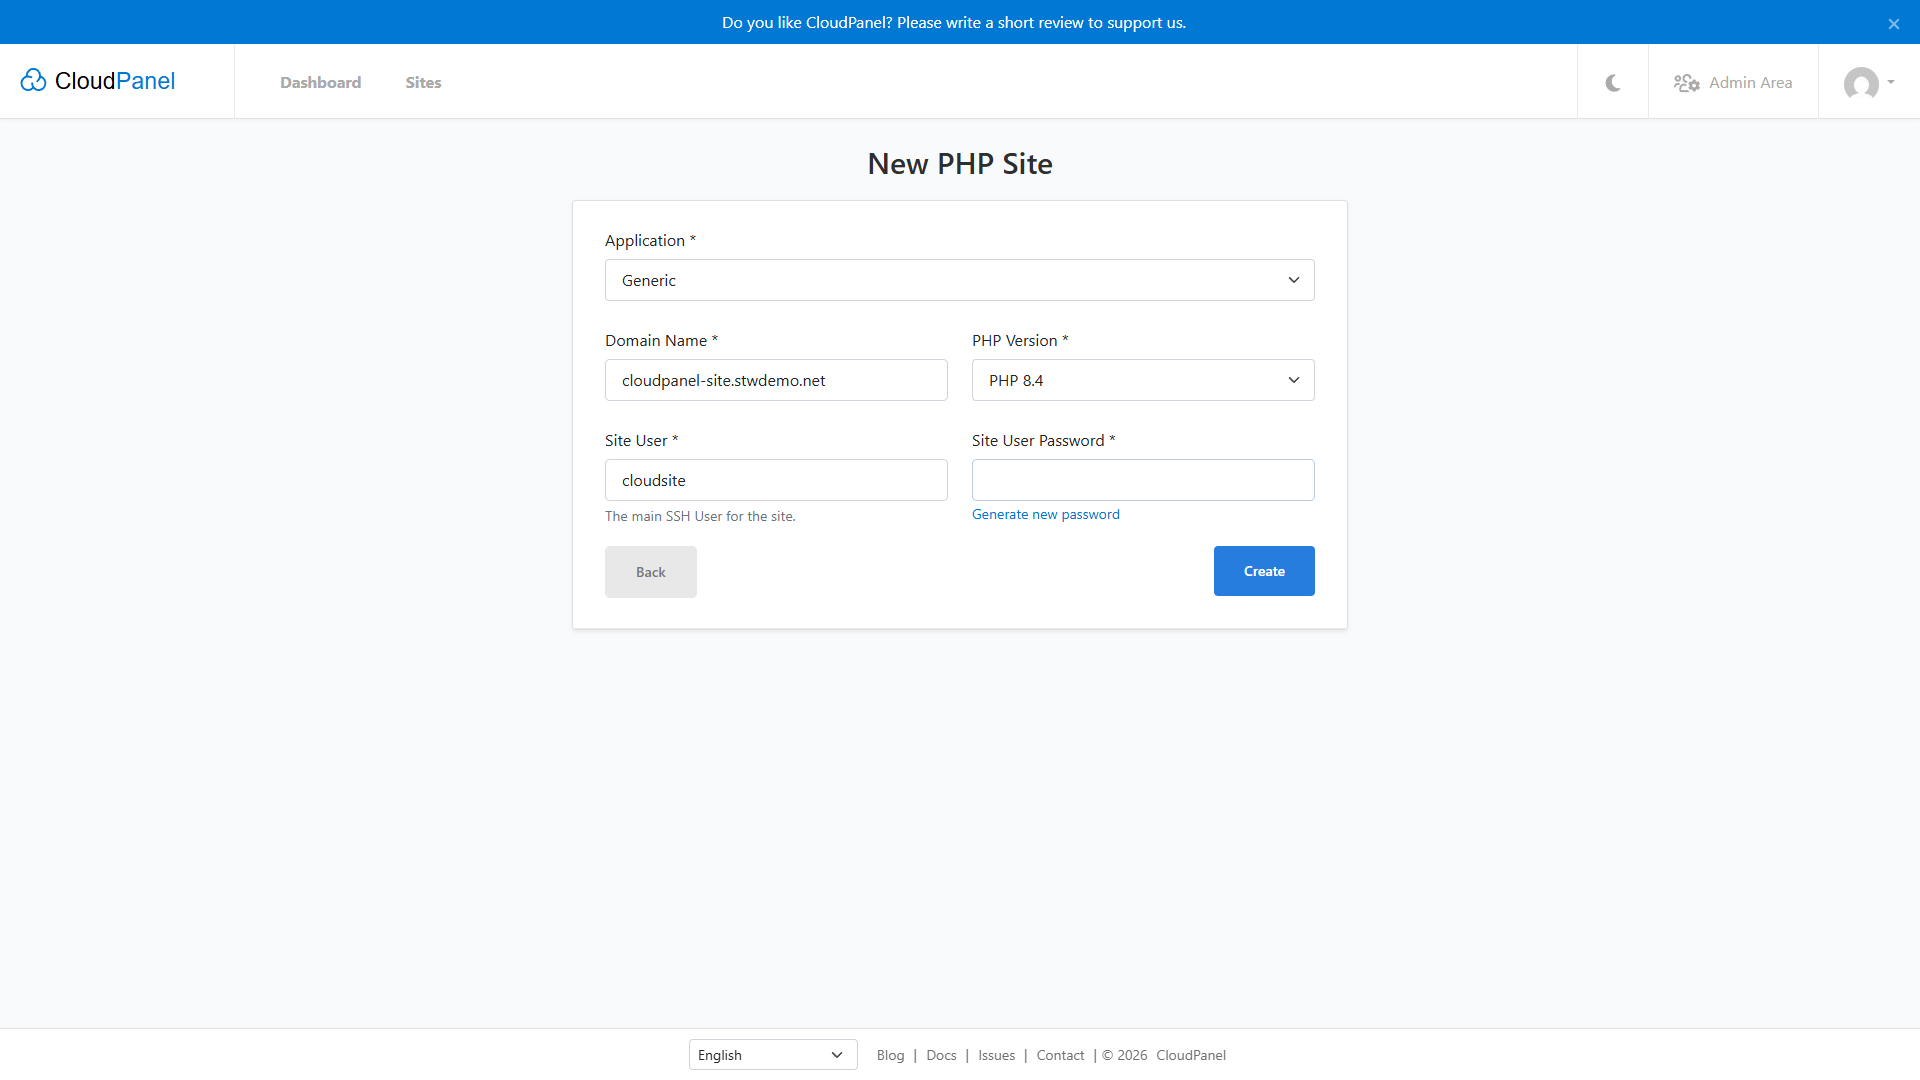
Issue the website’s certificate
Click Manage beside the new site and open SSL/TLS → Actions → New Let’s Encrypt Certificate. Check that site.example.com is listed, then click Create and Install. Add other names only if their DNS already points to this VPS.
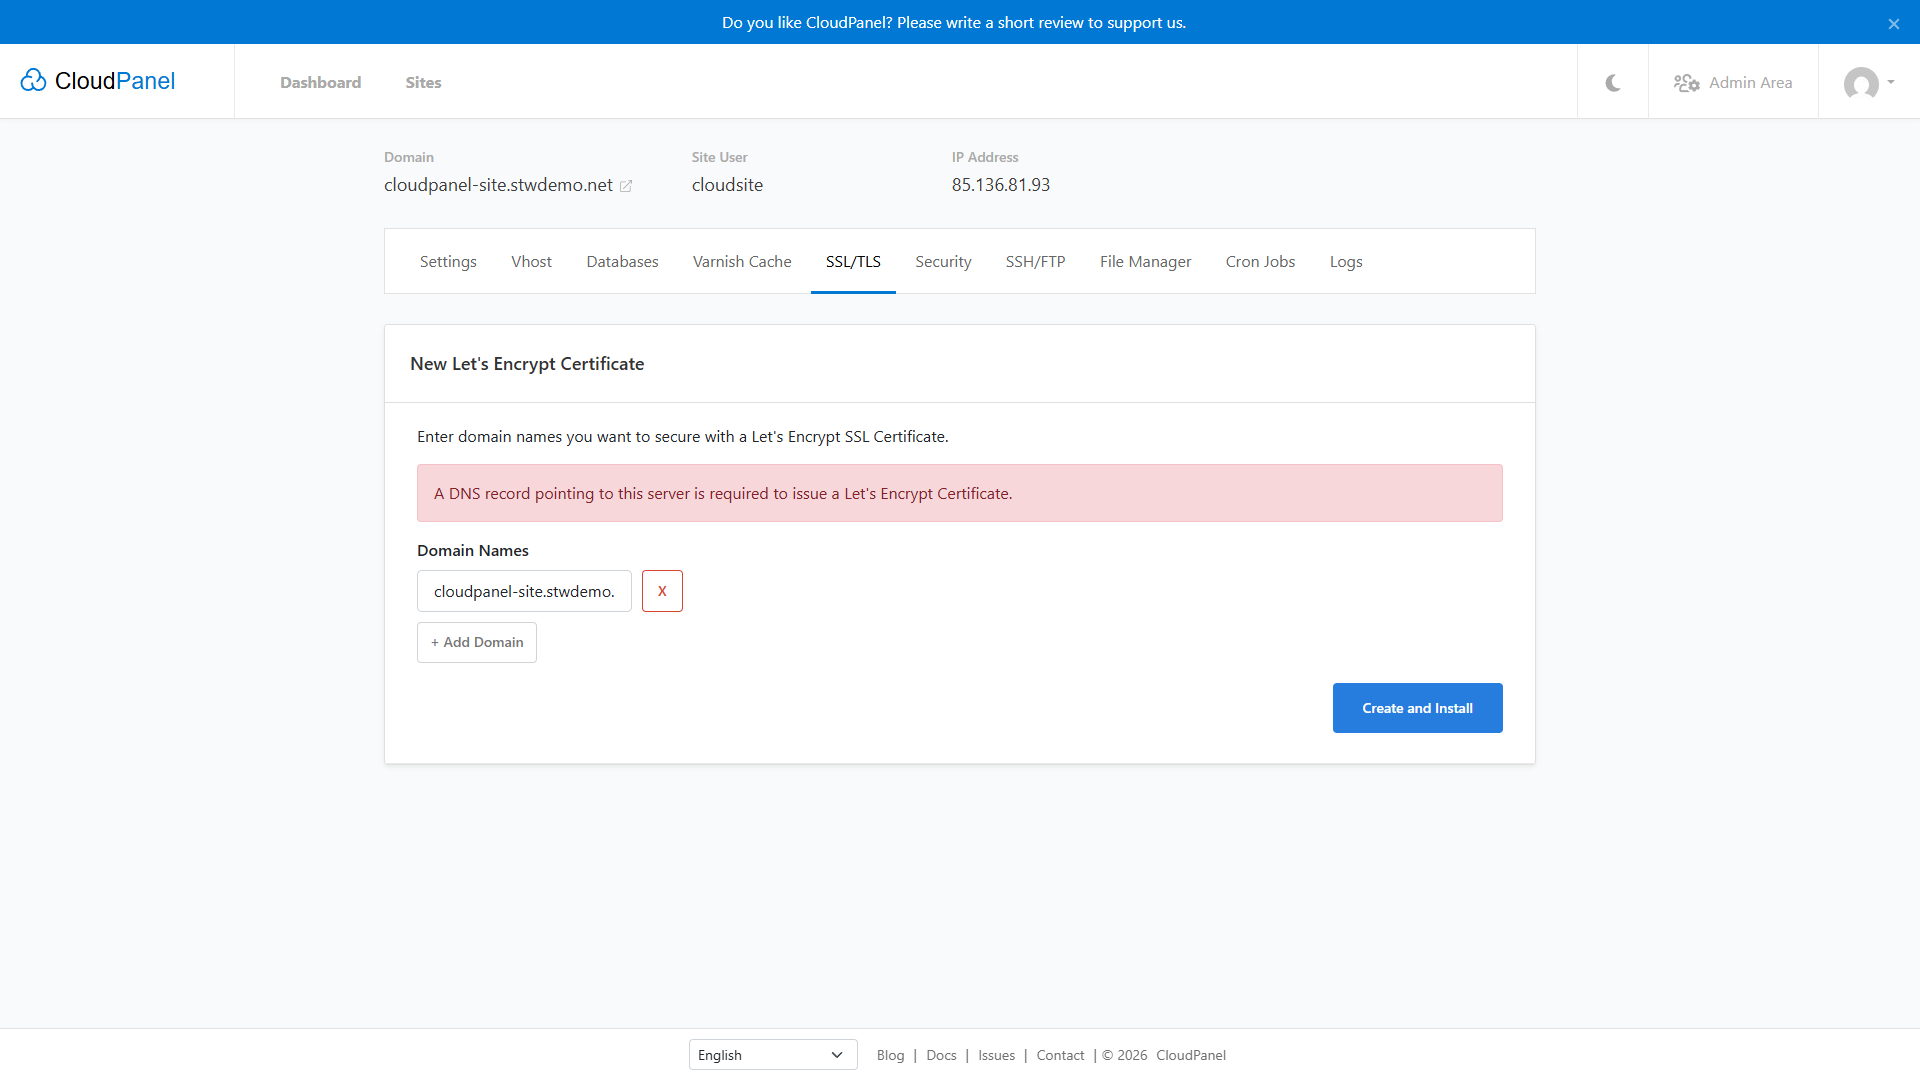
Wait for the certificate to appear with Installed set to Yes. Now visit https://site.example.com/. The generic PHP site’s default page says Hello World 🙂, and it should load without a certificate warning.
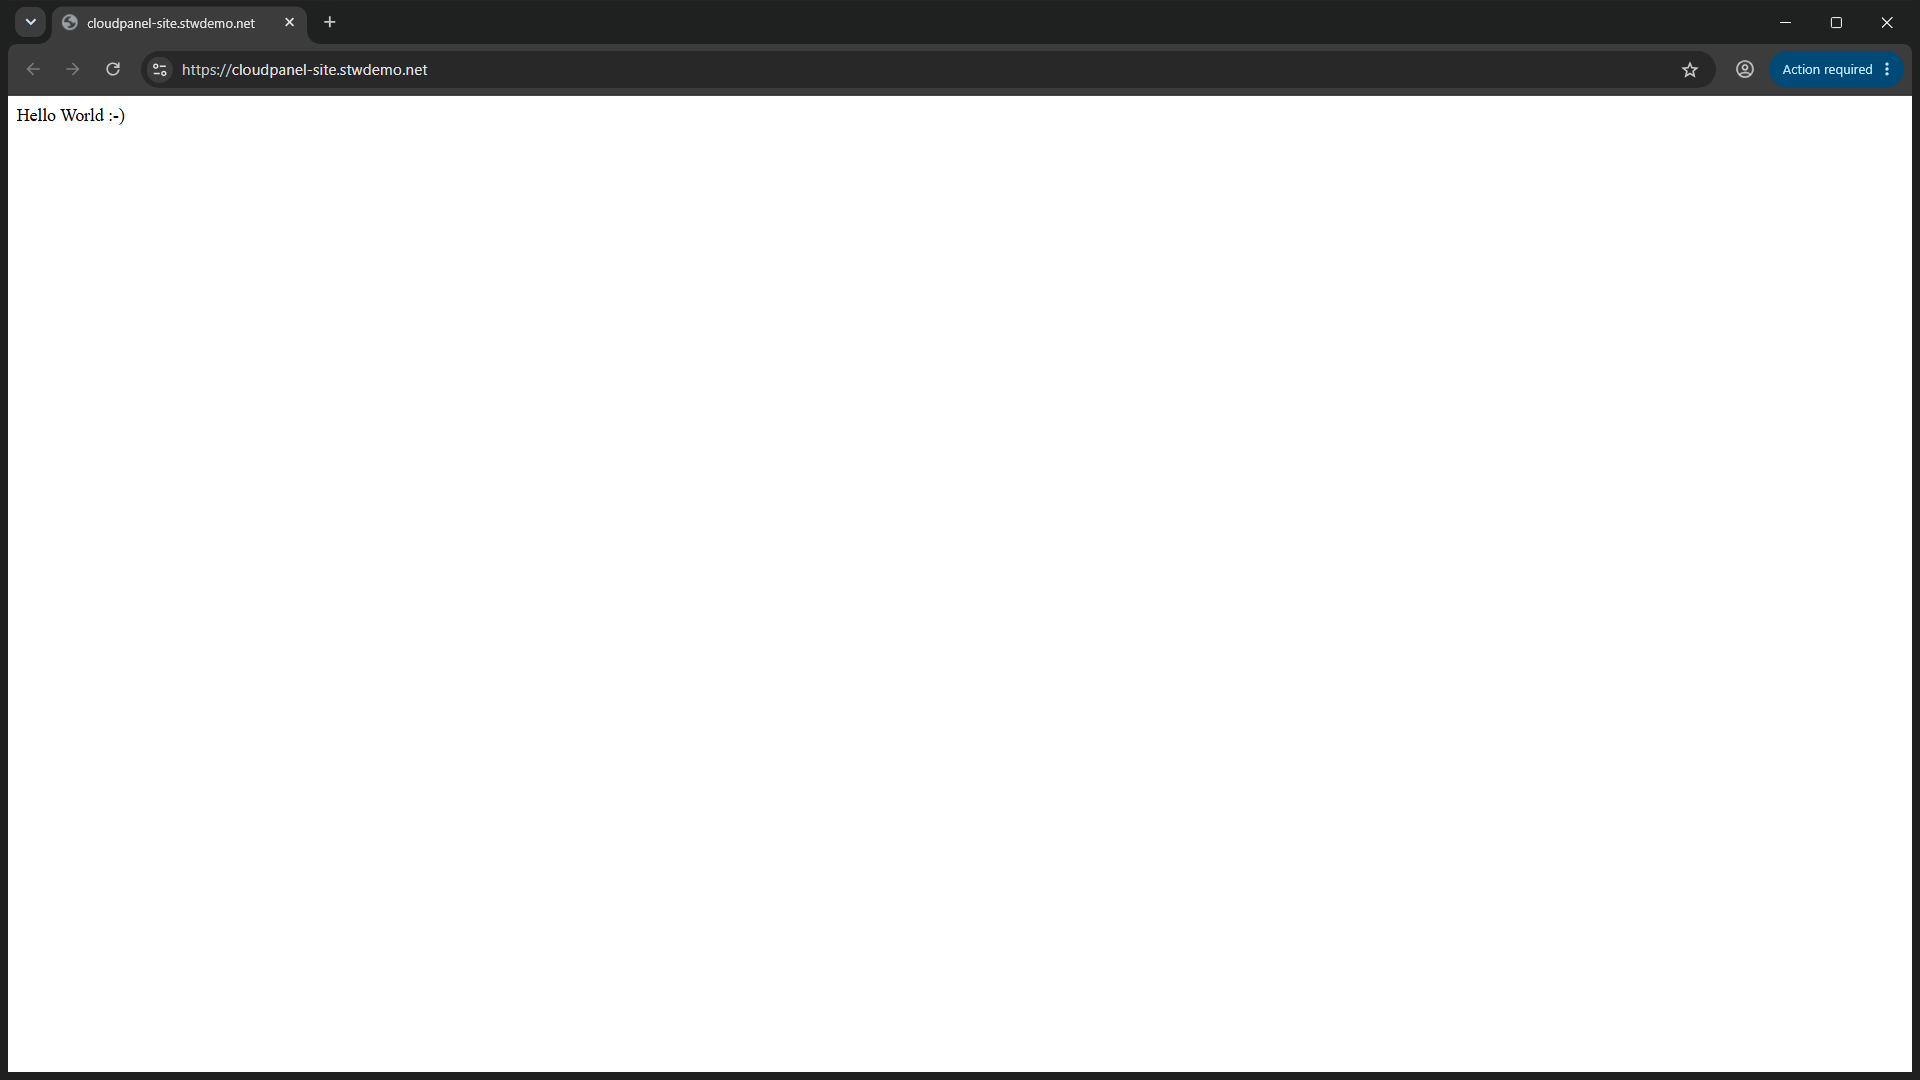
CloudPanel’s generic configuration already redirects HTTP to HTTPS. A terminal confirms both the redirect and the certificate.
curl -IL http://site.example.com/The -L option makes curl follow the redirect, so you’ll see two sets of headers. The first should start with 301 and include Location: https://site.example.com/. The second should start with 200. A “maximum redirects” error means the site is redirecting in a loop. Because curl checks certificates by default, that 200 also confirms the certificate is valid.
If Let’s Encrypt can’t issue the site’s certificate, check the site’s DNS address and incoming ports 80 and 443, then request it again from SSL/TLS. If the certificate is installed but your page returns an error, the site’s Logs tab contains nginx and PHP logs for diagnosing the application.
Give the owner a separate browser login
The Linux site user and a CloudPanel login are different accounts. To let someone manage this website without administering the server, open Admin Area → Users → Add User.
Fill in the owner’s account details, including a password, keep Status set to Active, and choose User under Role. Tick site.example.com under Sites, choose the timezone, and click Add User. The User role can only reach the sites you tick, while Site Manager can manage every site.
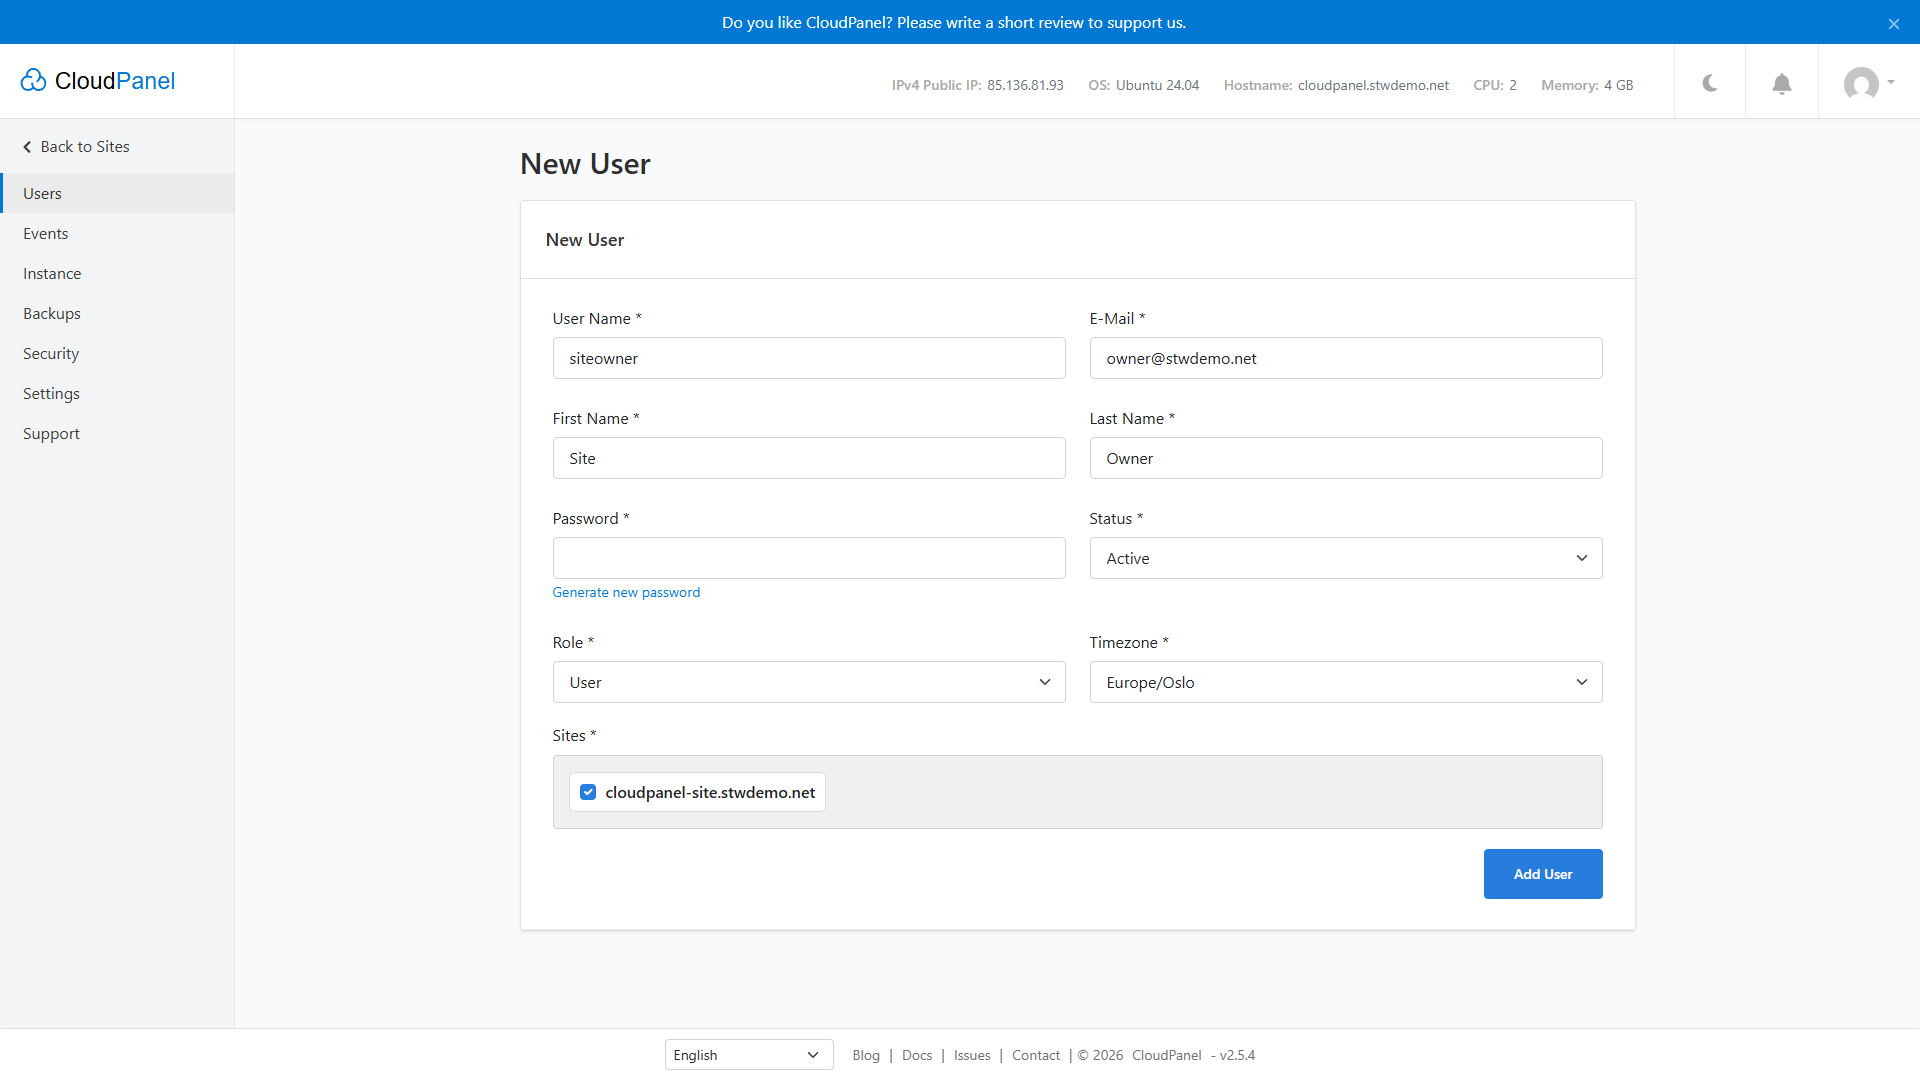
Sign in as the owner in another browser profile or private window. You should see the assigned site and no Admin Area link.
Adding your own content. Open the site’s File Manager, or connect by SFTP as its Linux site user. The generic site’s document root is typically
/home/siteuser/htdocs/site.example.com/, and your application’s files replace the defaultindex.phpthere. For WordPress, CloudPanel also has Create a WordPress Site on the new-site screen, with a dedicated installation form.
Hosting a Node.js app instead
The CloudPanel installation, DNS, and HTTPS setup also apply to Node.js. Choose Create a Node.js Site rather than Create a PHP Site, select the Node.js version your app needs, and set App Port to the port your app listens on. CloudPanel configures nginx to forward requests to that port, a setup called a reverse proxy. Request the site’s certificate from SSL/TLS as above.
You’ll also need to upload your application and install its dependencies as the Linux site user over SSH. CloudPanel’s Node.js deployment instructions cover those steps, including a reboot check. Creating the site in CloudPanel alone doesn’t deploy or start your app.
Optional Security Measures
CloudPanel and your website can run without two-factor authentication or Basic Auth. However, we recommend adding these protections. Two-factor authentication protects your account, while Basic Auth restricts access to the control panel’s login page. CloudPanel also recommends Basic Auth when you can’t restrict access by IP.
Add an authenticator code (optional)
Two-factor authentication adds a changing six-digit code after your password, so a stolen password alone won’t let someone into your account. If you enable it, you’ll need an authenticator app such as Google Authenticator or Microsoft Authenticator on your phone.
Click your account icon at the top right, choose Settings, and open Security → Enable Two-Factor Authentication. Use your authenticator app to scan the QR code, enter the current six-digit code, and click Save. The QR code holds the secret your app uses to make codes, so keep it out of screenshots and shared screens.
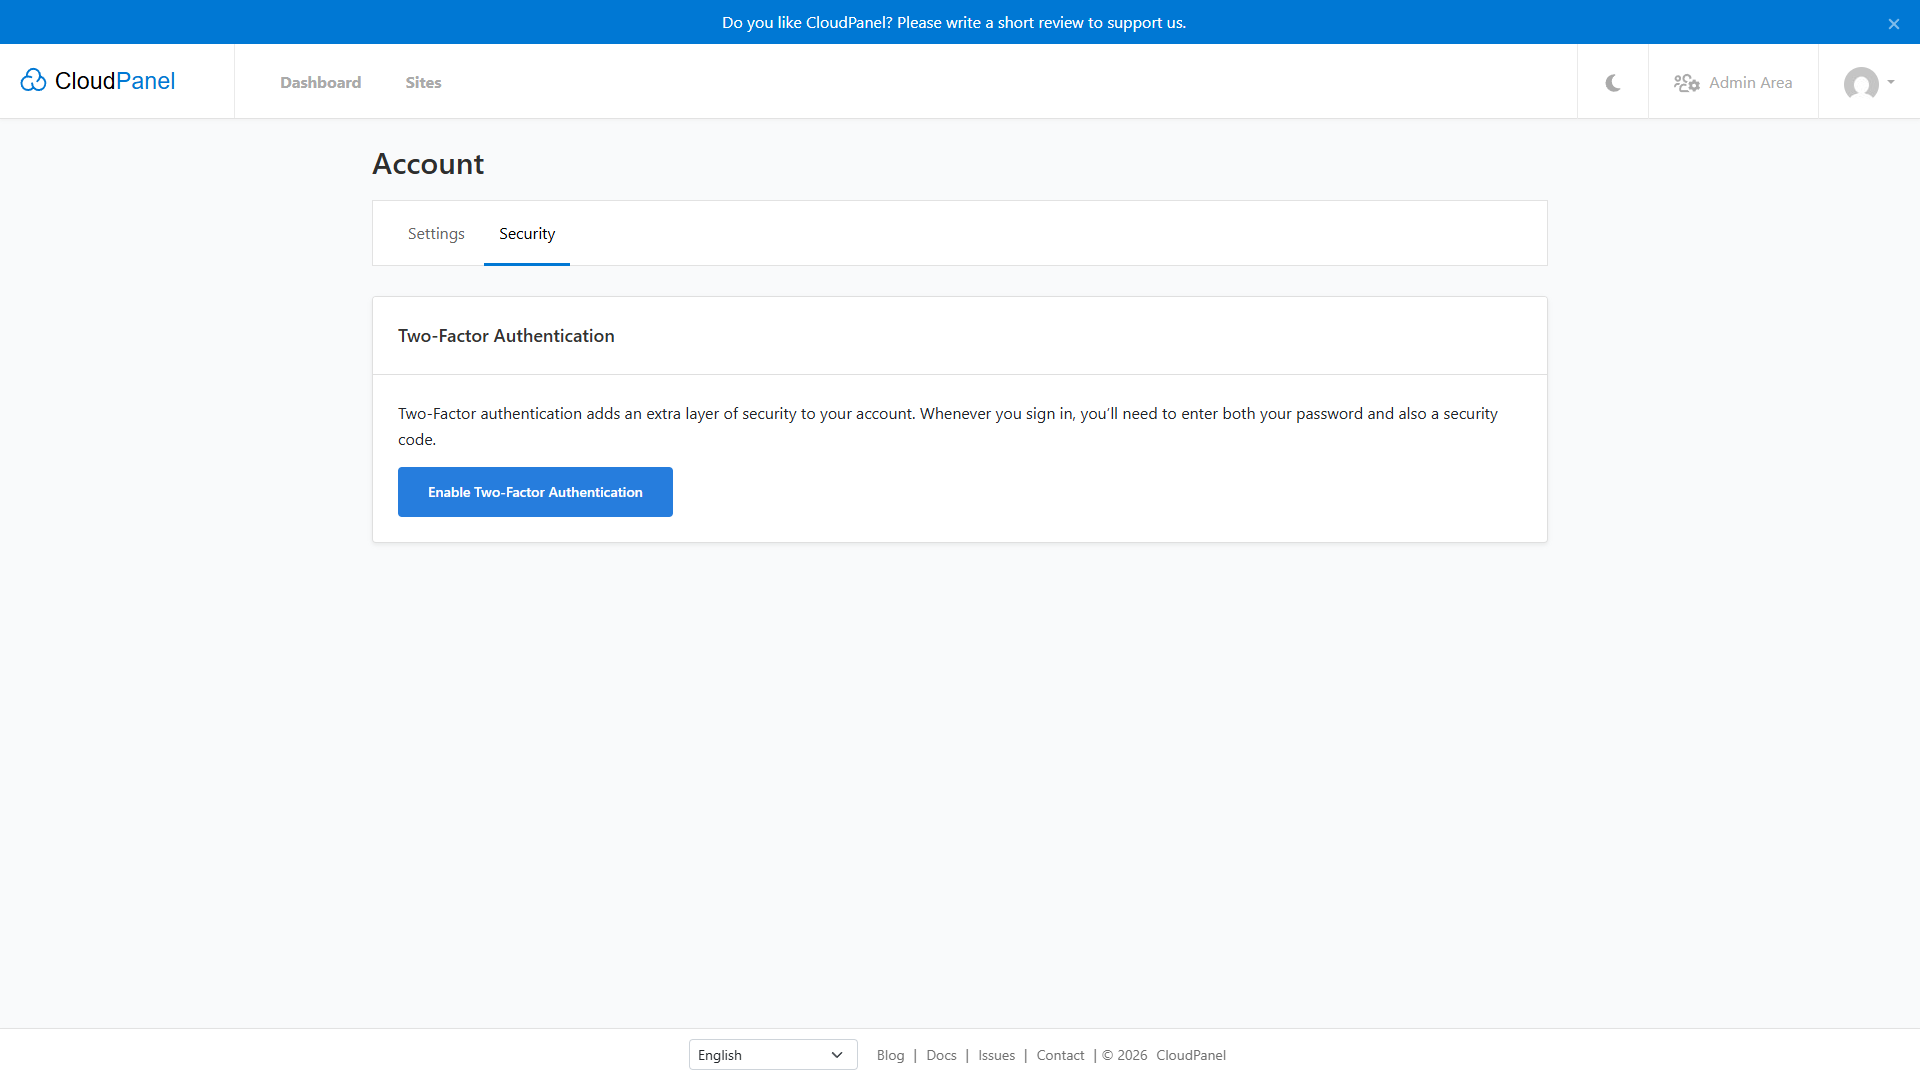
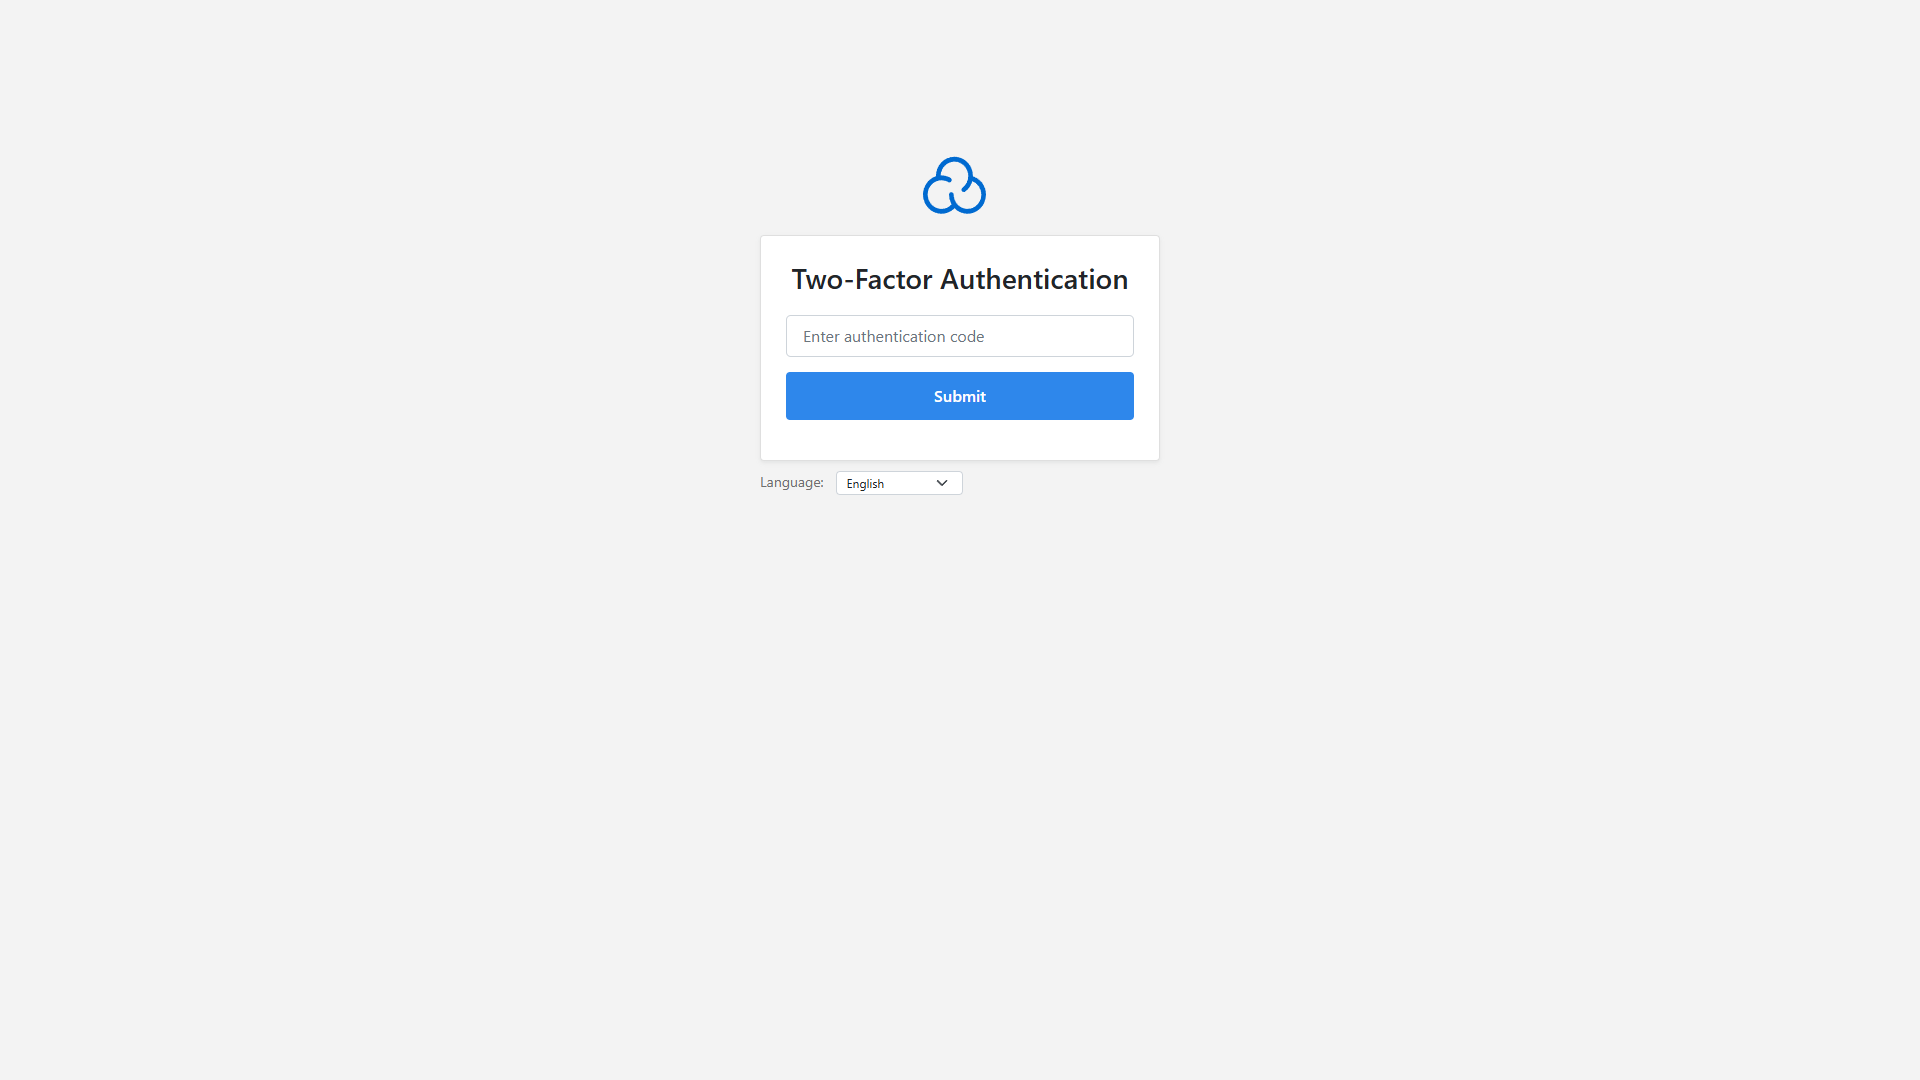
Once CloudPanel confirms two-factor authentication is on, test the login in a private window before you sign out. After the password, it should ask for a six-digit code.
Protect the login with Basic Auth (optional)
Basic Auth puts a second username and password in front of CloudPanel’s login page, so anyone probing the address gets turned away before they see a login form. Unlike an IP restriction, it keeps working when your IP address changes.
Under Admin Area → Security → Basic Auth, select Enable Basic Auth. Choose a username and password that differ from your administrator account, click Save, and keep them somewhere safe.
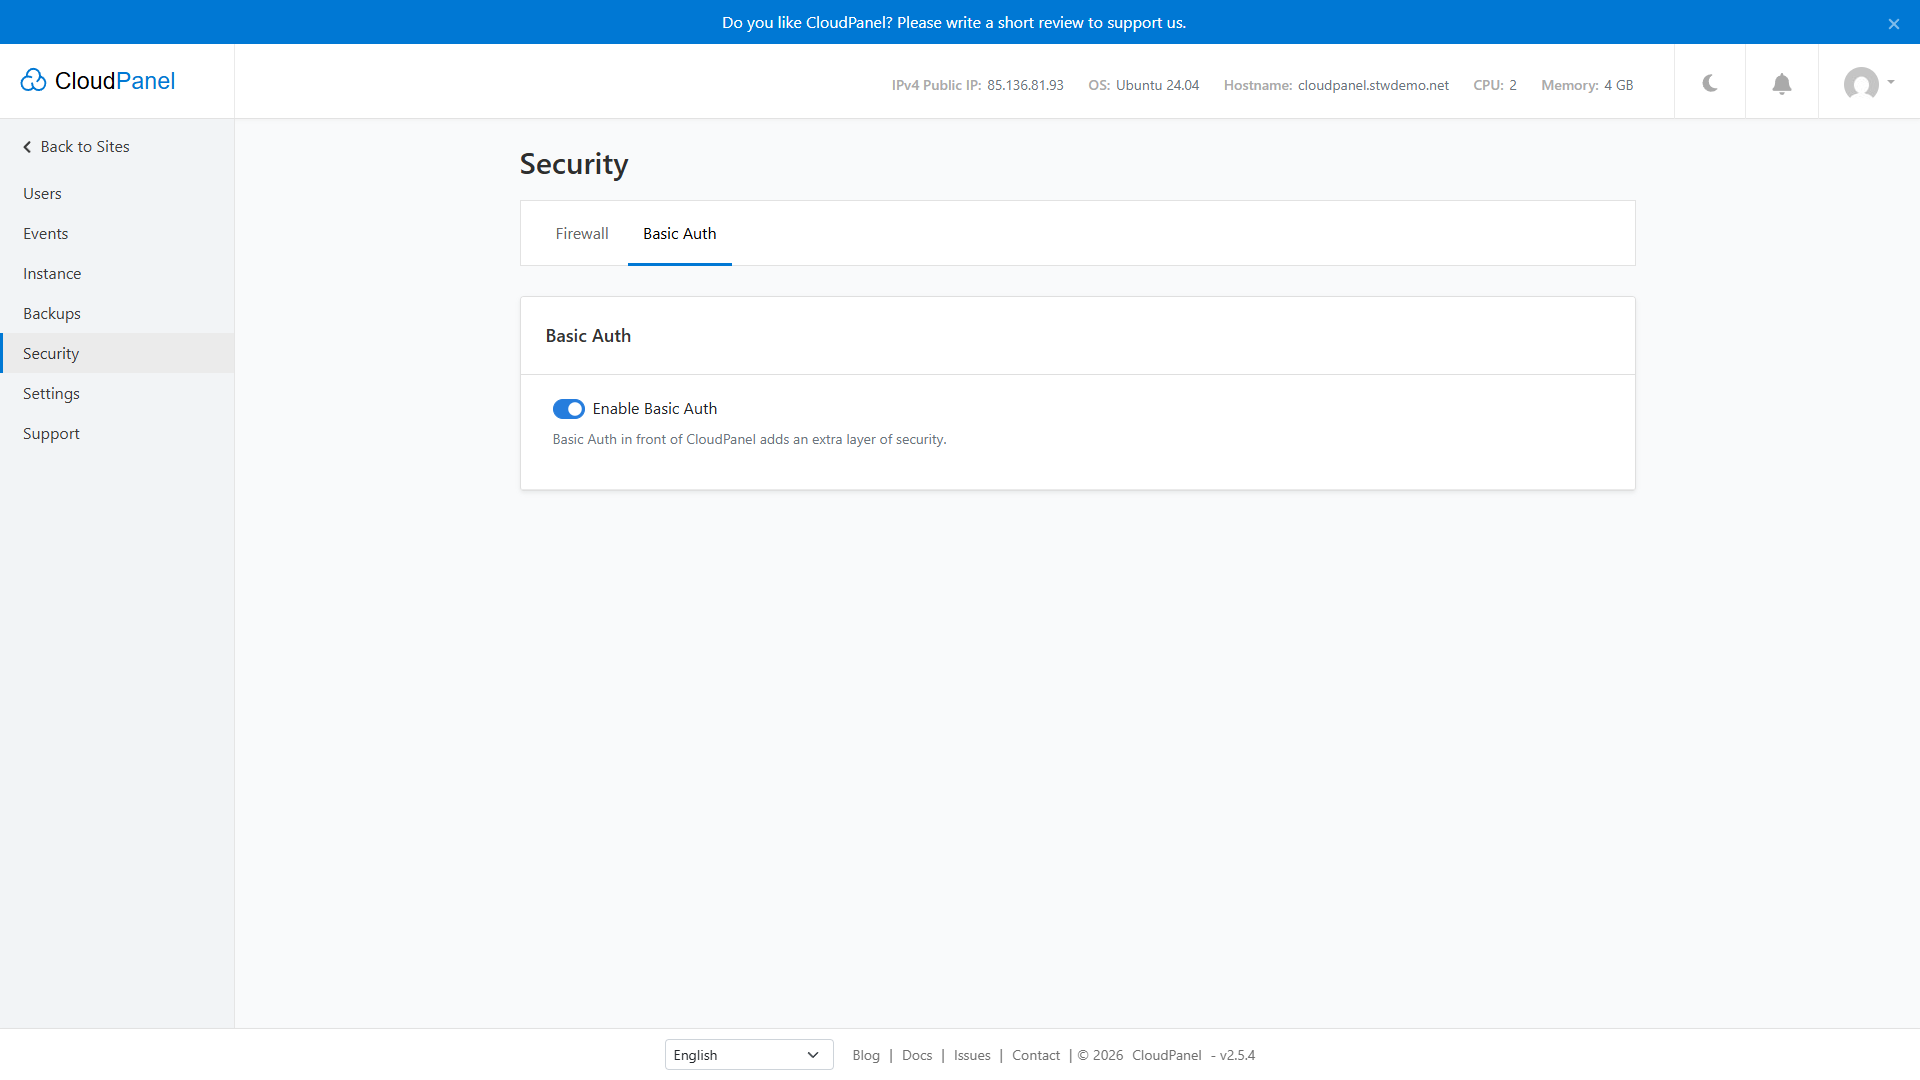
To check it, open https://panel.example.com/ in a private window. Your browser should ask for the Basic Auth credentials before CloudPanel’s login. If you also enabled two-factor authentication, CloudPanel then asks for your authenticator code.
Conclusion
CloudPanel now has its own trusted HTTPS address, with Basic Auth and a two-factor code guarding the administrator login. Your website serves its default page over HTTPS, with its own Linux account and an owner login that can’t reach the server settings.
Before you put real content on the server, configure Admin Area → Backups with an off-server destination. CloudPanel can send backups to services including Amazon S3, Google Drive, and SFTP. Our guide to securing, updating, and backing up a VPS control panel covers how to plan backups and check that you can restore them.
Next steps: