

Introduction
ISPConfig is a control panel primarily aimed at hosting websites on behalf of clients. It’s free and open source. Each client gets their own login and only sees their own sites, and you set limits on each client’s disk space and number of sites. It can also handle resellers and manage several servers from one control panel.
If you’re a freelancer or agency hosting sites for customers and don’t want to pay for a cPanel or Plesk licence, ISPConfig may be a good free option, as we explained in our guide to choosing a VPS control panel. It’s less suitable if you just run a few sites of your own. For example, it has no one-click WordPress installer, so you set each site up yourself.
In this install guide, we’ll go from a fresh server to a client account with its own HTTPS website, locking down the admin login and firewall along the way.
What You’ll Need
- A fresh VPS with root access. ISPConfig’s autoinstaller runs on Debian or Ubuntu. We used ISPConfig 3.3.2p1 on an STW GP34 VPS running Ubuntu 24.04 LTS. The autoinstaller sets up its own web server, so it needs a server with nothing else installed. Keep your VPS’s public IP address handy for the DNS records.
- A domain and access to its DNS. You’ll add one subdomain for the control panel and one for the website. We use
panel.example.comandsite.example.comin this guide, though the screenshots show our demo domain. - A way to run commands on the server. You’ll typically log in as root over SSH. STW’s GP3 servers use an SSH key for this (a key file on your computer instead of a password), and STW’s GP3 documentation shows how to add one. If you’d rather not use SSH, the browser console in the STW control panel works too.
We’ll leave out ISPConfig’s mailbox and DNS hosting and keep both with your current providers (or a hosted service like STWmail), for the reasons we cover in our guide on choosing a VPS control panel.
Step 1 — Start With a Fresh Server
Start by giving the VPS a clean operating system. Reinstalling erases everything on the server, including existing snapshots, so copy off anything you want to keep first.
On STW, you’ll find the reinstall option in the STW control panel. Go to Products, click Manage on your VPS, open Reinstallation, and choose a template for a system ISPConfig supports, such as Ubuntu. Once the rebuild finishes, log in as root and install the latest updates with the following commands:
apt update
apt full-upgrade
reboot
The first installation guide in this series walks through each of these screens in more detail.
Step 2 — Prepare DNS and the Server Hostname
The installer requests an HTTPS certificate for the control panel while it runs, so the panel’s name needs to point at your VPS before you start. The certificate comes from Let’s Encrypt, which only issues one after it has reached the name over the internet and found your server answering.
You’ll need two A records, which point a name at an IPv4 address. One is for the control panel and one is for the website, which needs its own certificate later.
| Record Type | Name | Value | TTL |
|---|---|---|---|
| A | panel |
Your VPS’s IPv4 address | 300 |
| A | site |
Your VPS’s IPv4 address | 300 |
Add them wherever your domain’s DNS is hosted. If that’s STW, our guide to updating DNS shows how.
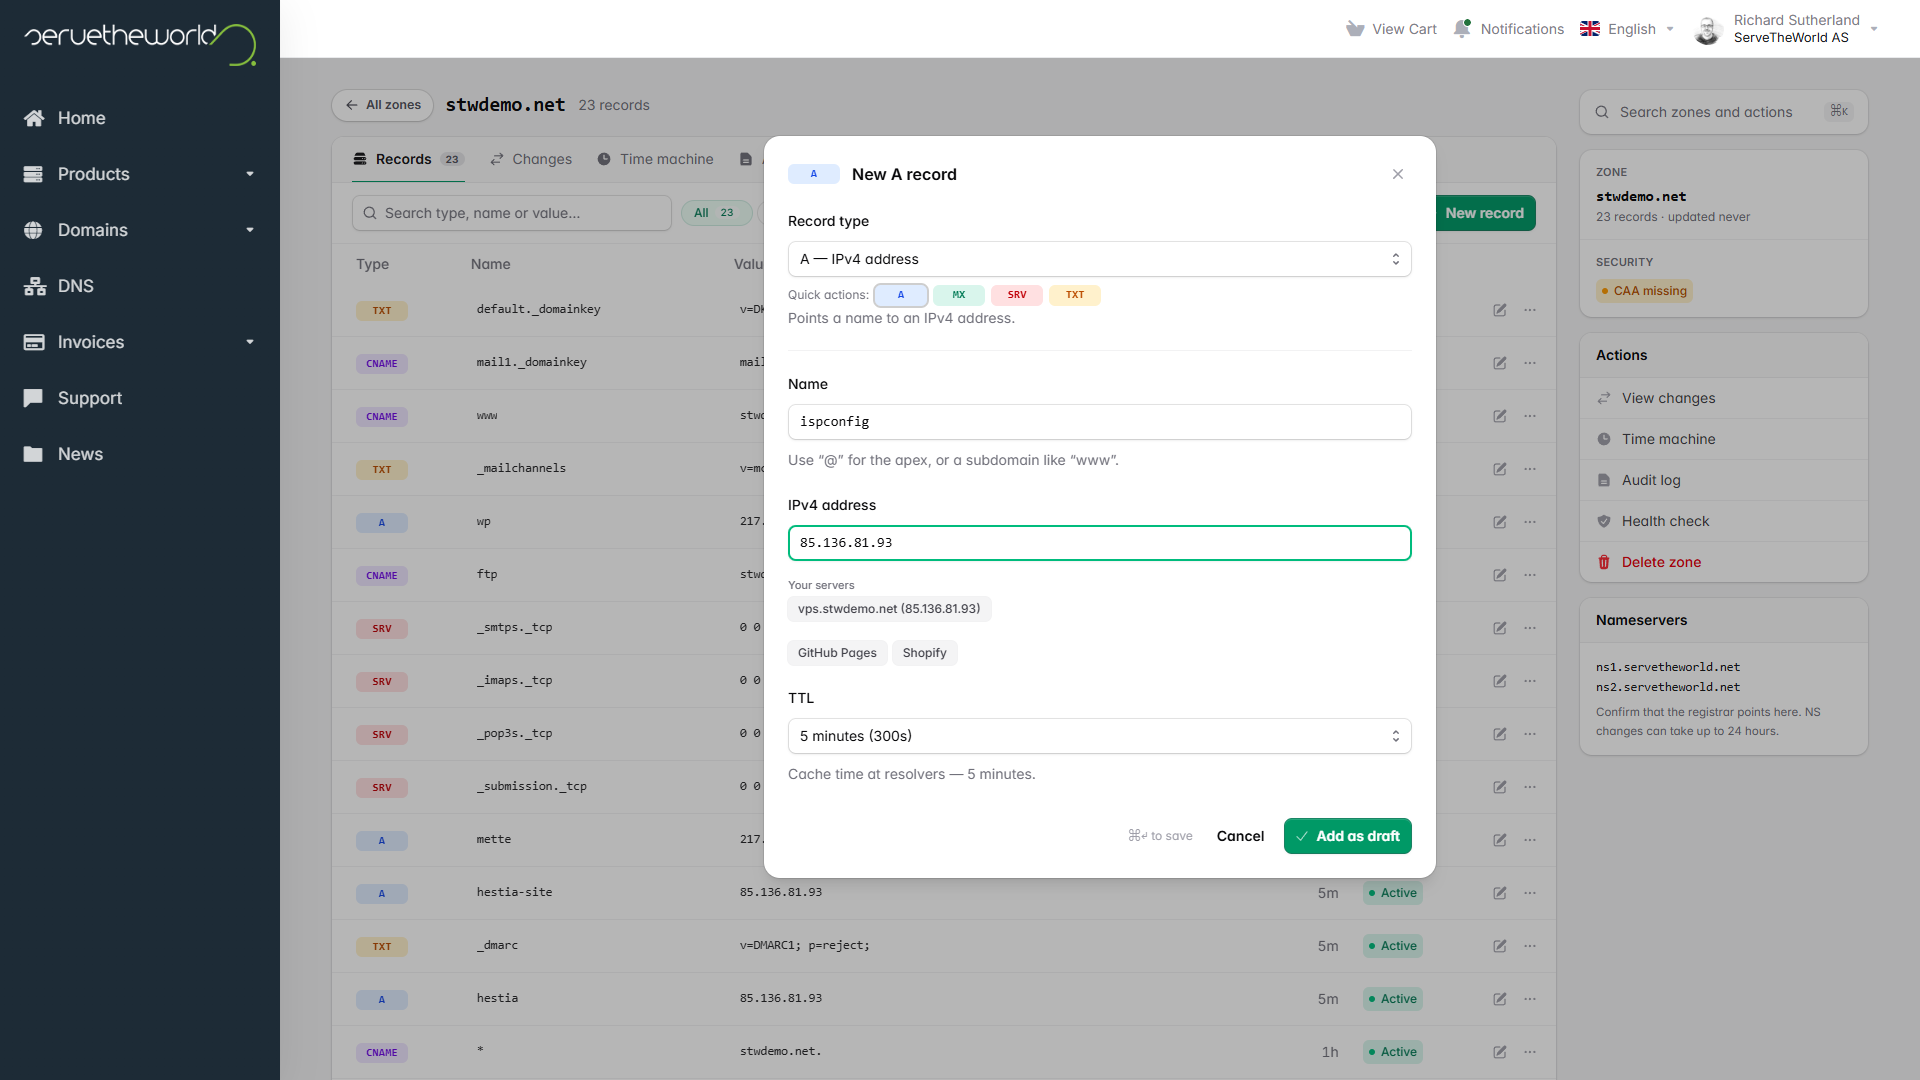
Once they’re saved, check from your own computer that the names resolve. The commands below ask Google’s public DNS server (8.8.8.8), because your computer may have the old answer cached.
nslookup panel.example.com 8.8.8.8
nslookup site.example.com 8.8.8.8
On Linux or macOS? You can use
diginstead, which prints just the address. Rundig +short panel.example.com @8.8.8.8, and the same forsite.example.com.
When both names return your VPS’s IP address, you’re ready to move on. New records usually appear within minutes. If you changed an existing record, the old address can stick around until its TTL runs out.
Set a hostname that survives a reboot
Next, change the server’s hostname, which is the name the server uses for itself. ISPConfig uses the hostname as the control panel’s address and requests the panel’s certificate for it, so the hostname has to be the full name you just set up in DNS, panel.example.com.
On the VPS, set the new hostname, then open the hosts file. The hosts file lets the server look up its own name without asking DNS.
hostnamectl set-hostname panel.example.com
nano /etc/hosts
Leave the localhost lines alone. Ubuntu and Debian use the 127.0.1.1 line to point the server’s own name back at itself, so change it to the full name followed by the short one.
127.0.1.1 panel.example.com panelMany VPS images, including STW’s, run cloud-init each time the server boots. Cloud-init is a setup tool that writes the hostname and hosts file, so it can put the old values back after a restart. You can stop it with a small settings file created by running this command:
cat > /etc/cloud/cloud.cfg.d/99-panel-hostname.cfg <<'EOF'
preserve_hostname: true
manage_etc_hosts: false
EOF
Cloud-init also keeps a template of the hosts file and can rebuild the file from it, for example after you roll back a snapshot. Open the template too.
nano /etc/cloud/templates/hosts.debian.tmplNear the middle of the file, you’ll find this line.
127.0.1.1 {{fqdn}} {{hostname}}The {{fqdn}} and {{hostname}} parts are placeholders that cloud-init fills in with the hostname your provider set up, so a rebuild would bring back the old name. Replace the placeholders with your own names, the same as in /etc/hosts, and leave the rest of the file alone.
127.0.1.1 panel.example.com panelNow reboot, reconnect, and check the hostname.
reboothostname -fYou should see panel.example.com. The installer checks this first and stops if it doesn’t match.
If
hostname -freturns only the short name, the127.0.1.1line is probably missing the full name or lists the short name first. If it returns the old name, runhostnamectlto check the static hostname, then make sure the cloud-init settings file exists. Fix whichever is wrong and reboot again.
Step 3 — Take the Installation Snapshot
With the hostname set, take a snapshot so you can come back to this point if the installation goes wrong. In the STW control panel, open Snapshots, click Take Snapshot, and give it a name like before-ispconfig-install. Leave Include RAM unchecked, confirm, and wait for it to show Active. STW’s guide to GP3 snapshots has more detail.
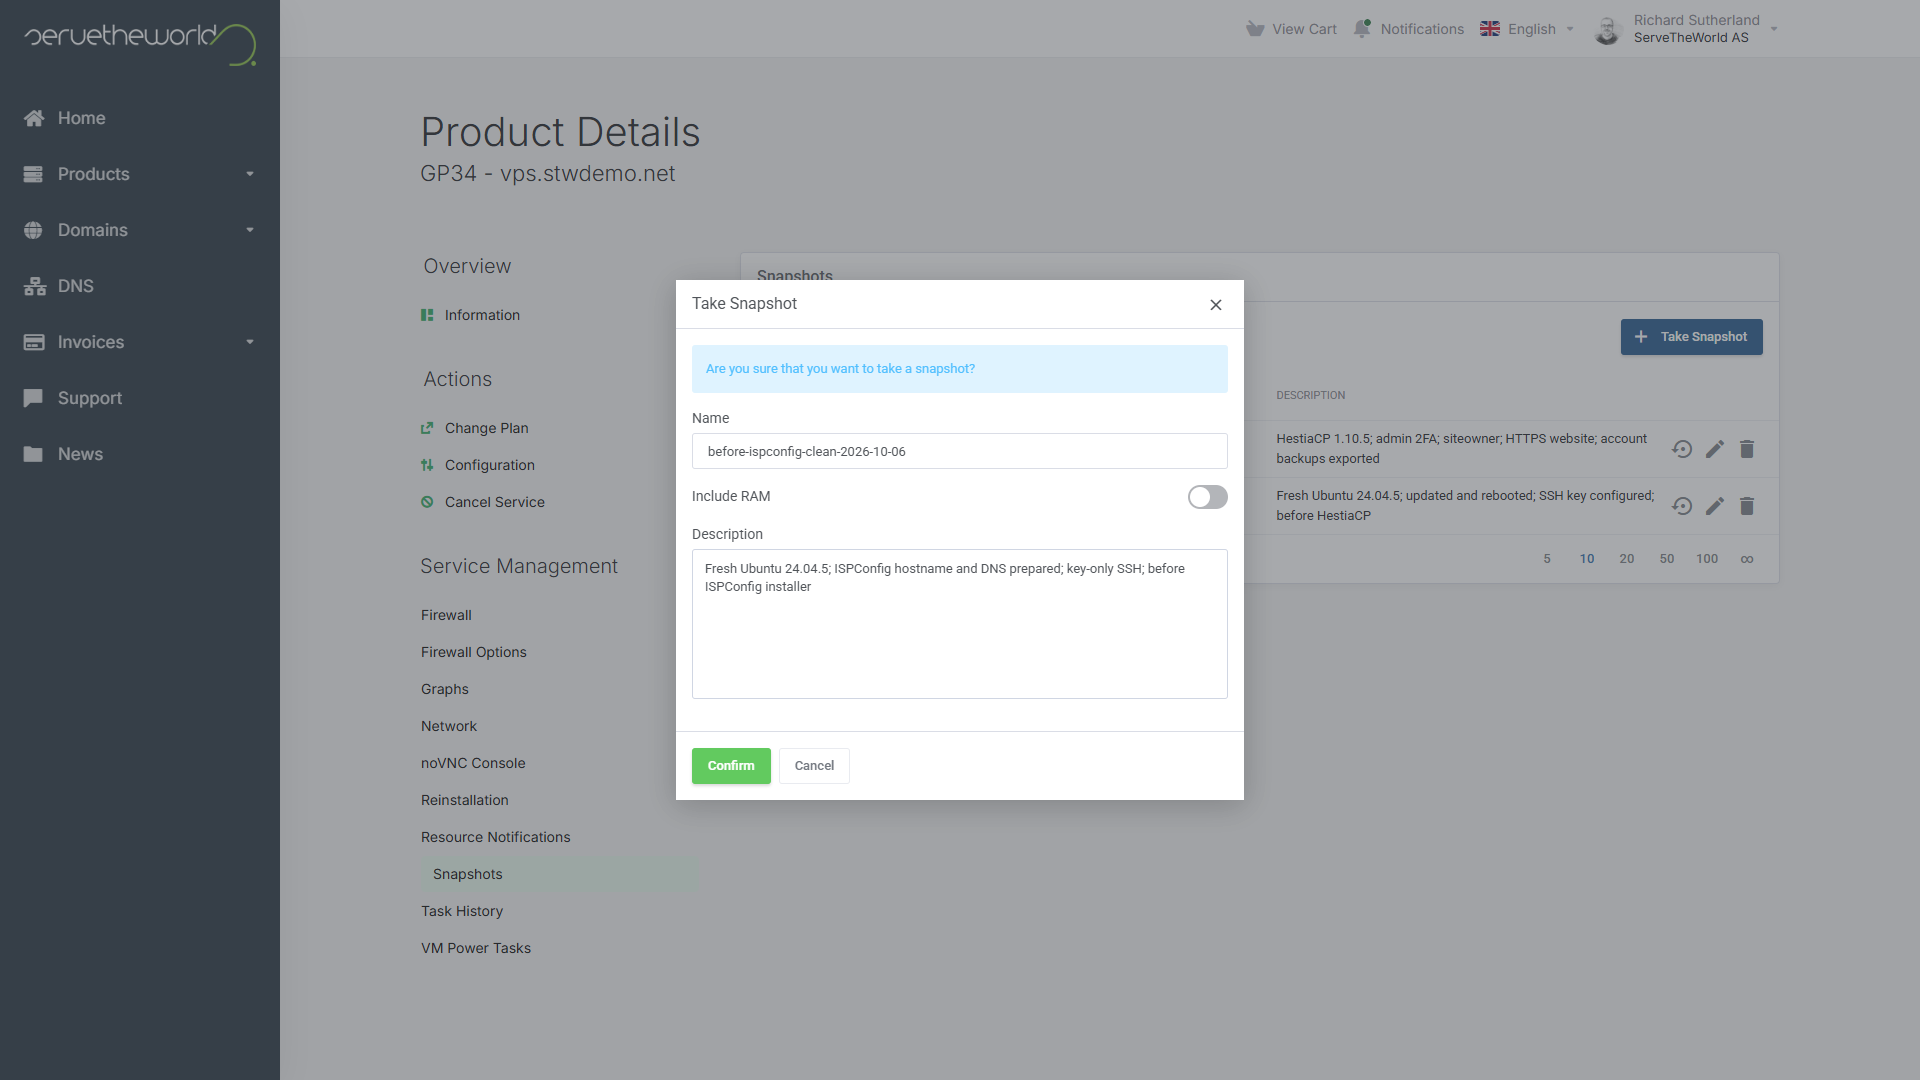
If you need to start over, roll back to the snapshot and run hostname -f before reinstalling, because a rollback is when cloud-init is most likely to rewrite the hosts file.
Step 4 — Run the Official Autoinstaller
ISPConfig’s autoinstaller script installs ISPConfig along with the web server, database, and other software it manages. We’ll keep its default Apache web server and MariaDB database and use the PHP version that comes with your operating system. The options below switch off everything else we don’t need. Run the commands as root.
umask 0022
wget -O ispc3-ai.sh https://get.ispconfig.org
sh ispc3-ai.sh \
  --use-php=system \
  --no-mail \
  --no-dns \
  --no-local-dns \
  --no-roundcube \
  --no-ftp \
  --ssh-permit-root=without-password \
  --ssh-password-authentication=no \
  --unattended-upgrades
The options set up the server as follows.
umask 0022makes sure the files the installer creates get normal permissions.- The
--no-options leave out mail, webmail, DNS, and FTP. --use-php=systemuses the built-in PHP, which gets security fixes through normal system updates.- The two SSH options let root log in with an SSH key and switch password logins off. STW servers already work this way. If you’ve turned password logins on and use a password to connect, set up and test a key first, because after the install your password won’t get you in over SSH. The browser console still works if you get locked out.
--unattended-upgradesinstalls operating system security updates automatically. ISPConfig itself still needs updating by hand.
The installer opens with a warning that it’s meant for fresh servers only. Once you confirm, the rest runs on its own, including requesting the control panel’s certificate.
At the end, it prints two passwords. The ISPConfig admin password logs you in to the control panel, and the MySQL root password gives full control of the database server. Keep both somewhere safe.
The installer also saves a full log of the installation in /root/ispconfig-install-log/, and the log includes both passwords in plain text. Once you’ve stored the passwords, delete the log files, as the installer’s closing warning suggests.
rm /root/ispconfig-install-log/setup-*Step 5 — Secure the Administrator and Enable the Firewall
ISPConfig’s control panel runs on port 8080, so open https://panel.example.com:8080/. It should load with a padlock in the address bar, which means the installer got its Let’s Encrypt certificate.
If your browser warns that the connection isn’t private, the certificate request failed and ISPConfig fell back to a self-signed certificate, one it made for itself. The connection is still encrypted, but your browser can’t confirm it’s really talking to your server, so fix the certificate before you type in your password.
Let’s Encrypt checks the name over plain HTTP on port 80, so a failed request usually means it couldn’t reach the server. Check that
nslookup panel.example.com 8.8.8.8returns your VPS’s address and that your provider isn’t blocking port 80. Then run ISPConfig’s update script,ispconfig_update.sh --force, as root. When it asks whether to create a new ISPConfig SSL certificate, answeryesso it requests one from Let’s Encrypt, and accept the defaults for the other questions.
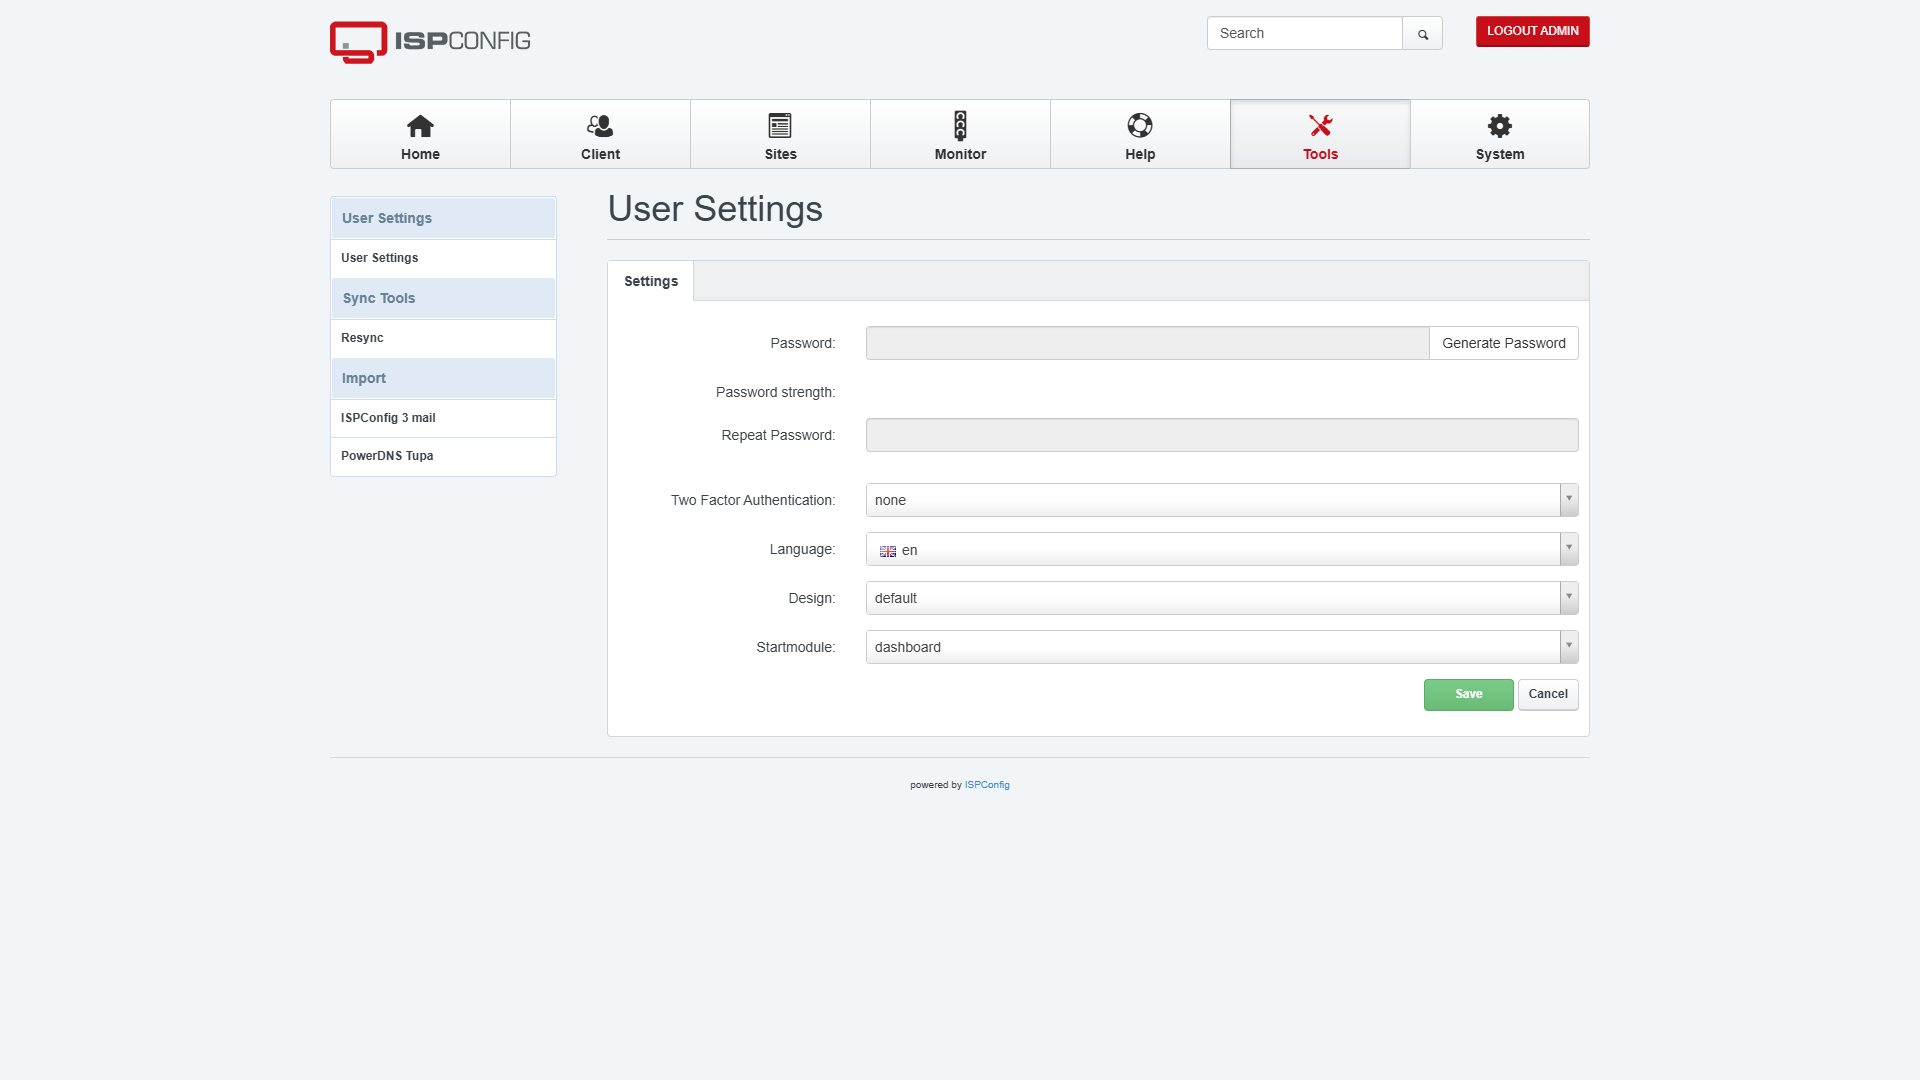
Once the padlock shows, log in as admin with the generated password. Change the password to one of your own under Tools → User Settings, because the generated one has been shown on screen and may still be in your terminal’s scrollback. Click Save, then log out and back in to make sure the new password works.
Open only the ports this setup uses
ISPConfig manages its firewall through UFW, a simple Linux firewall. STW’s Ubuntu image already includes UFW, and the autoinstaller makes sure it’s installed, but it stays switched off until you add a firewall record in ISPConfig. To set it up, go to System → Firewall → Add Firewall record, select your server, and replace the Open TCP ports list with these ports.
22,80,443,8080,8081Port 22 is for SSH, 80 and 443 are for websites, 8080 is the control panel, and 8081 serves phpMyAdmin and other installed apps. If your SSH server uses a different port, swap it in for 22. Leave Open UDP ports empty and click Save.
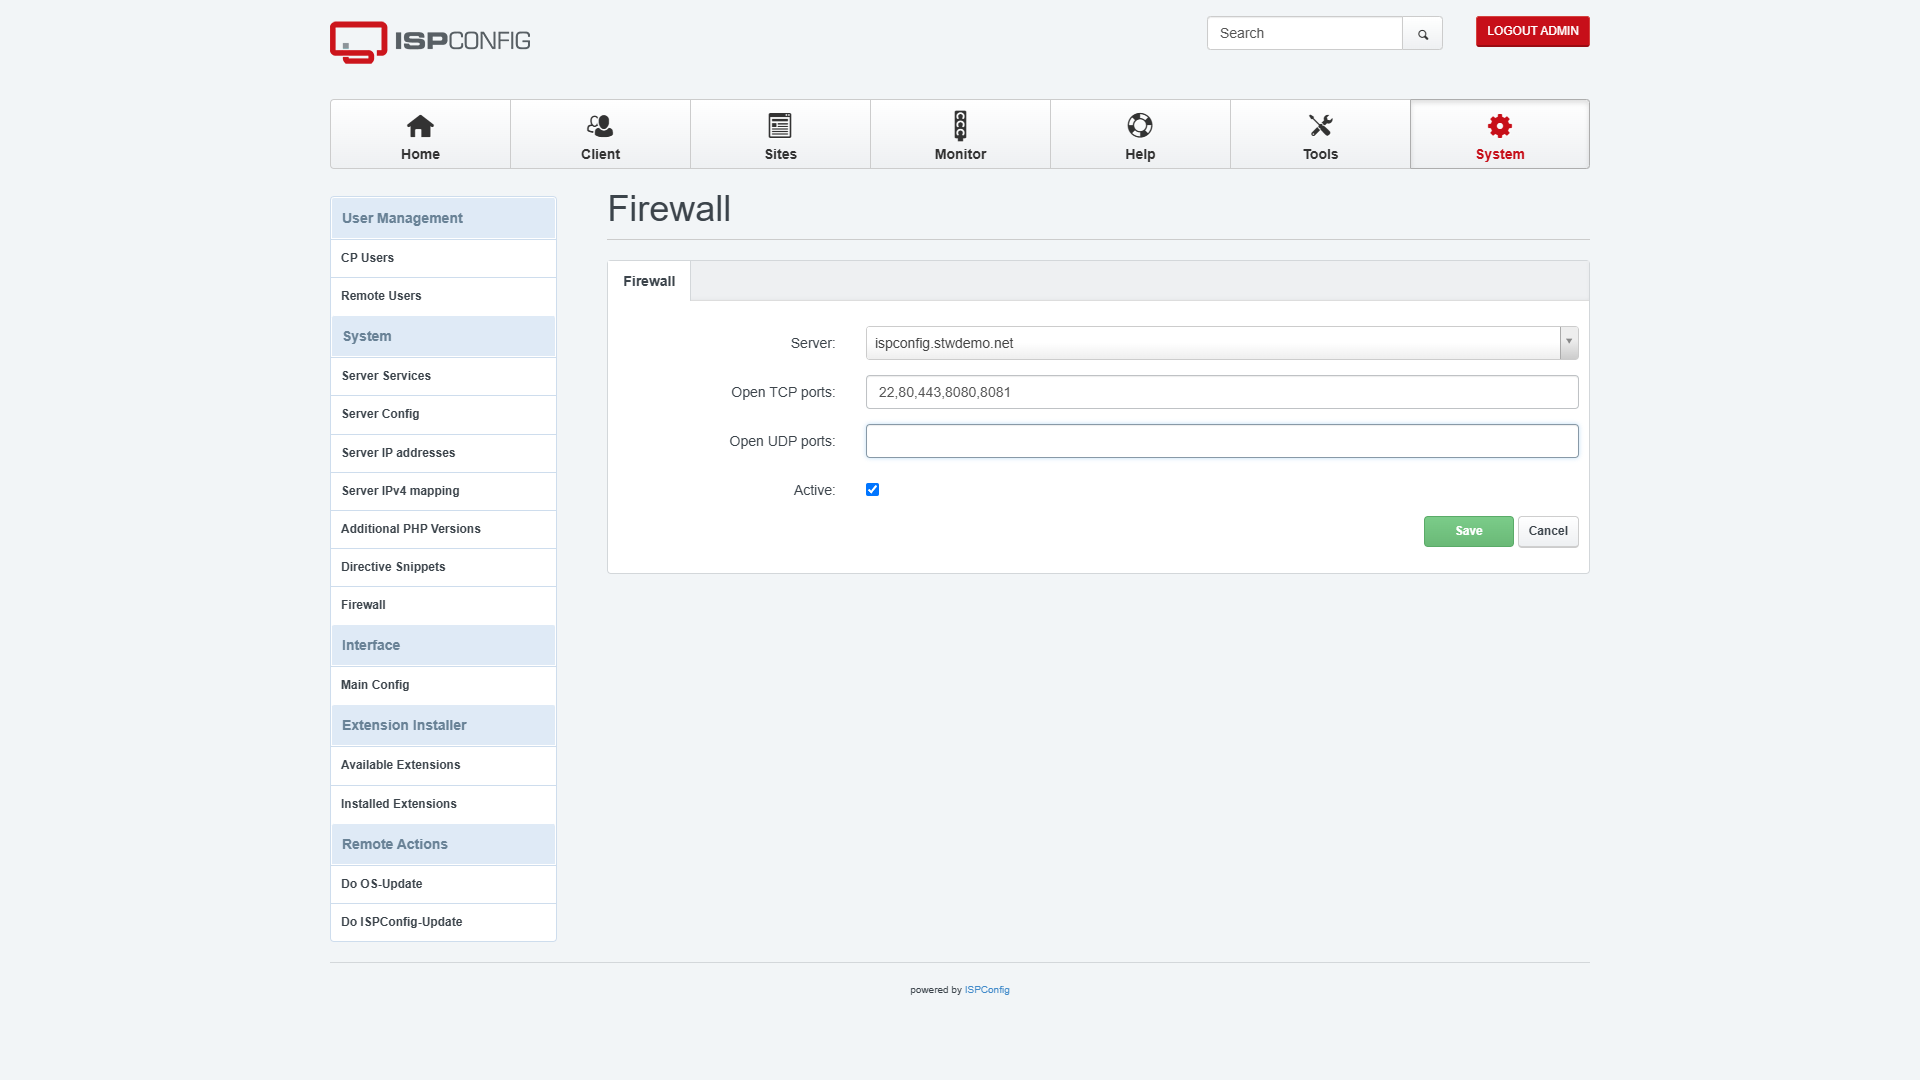
ISPConfig applies changes in the background, usually within a minute. Once it’s done, you can check the firewall over SSH.
ufw status verboseYou should see Status: active and your list of ports. Before you close your SSH session, open a second one to make sure you can still get in.
If you always connect from the same static IP address, you can limit port 8080 to that address for extra protection. Just bear in mind that you’ll lose access to the control panel if your address changes.
Step 6 — Create a Client Account
In ISPConfig, every website belongs to a client. A client is an account for one customer, who can log in to manage their own sites but can’t see anyone else’s or change server settings. Even if all the sites are yours, putting them under a client account keeps everyday website work away from the admin login.
To create one, go to Client → Add new client. Fill in the Contact name, a username such as siteowner, an Email address, and a password, and pick a country. You can skip the billing fields.
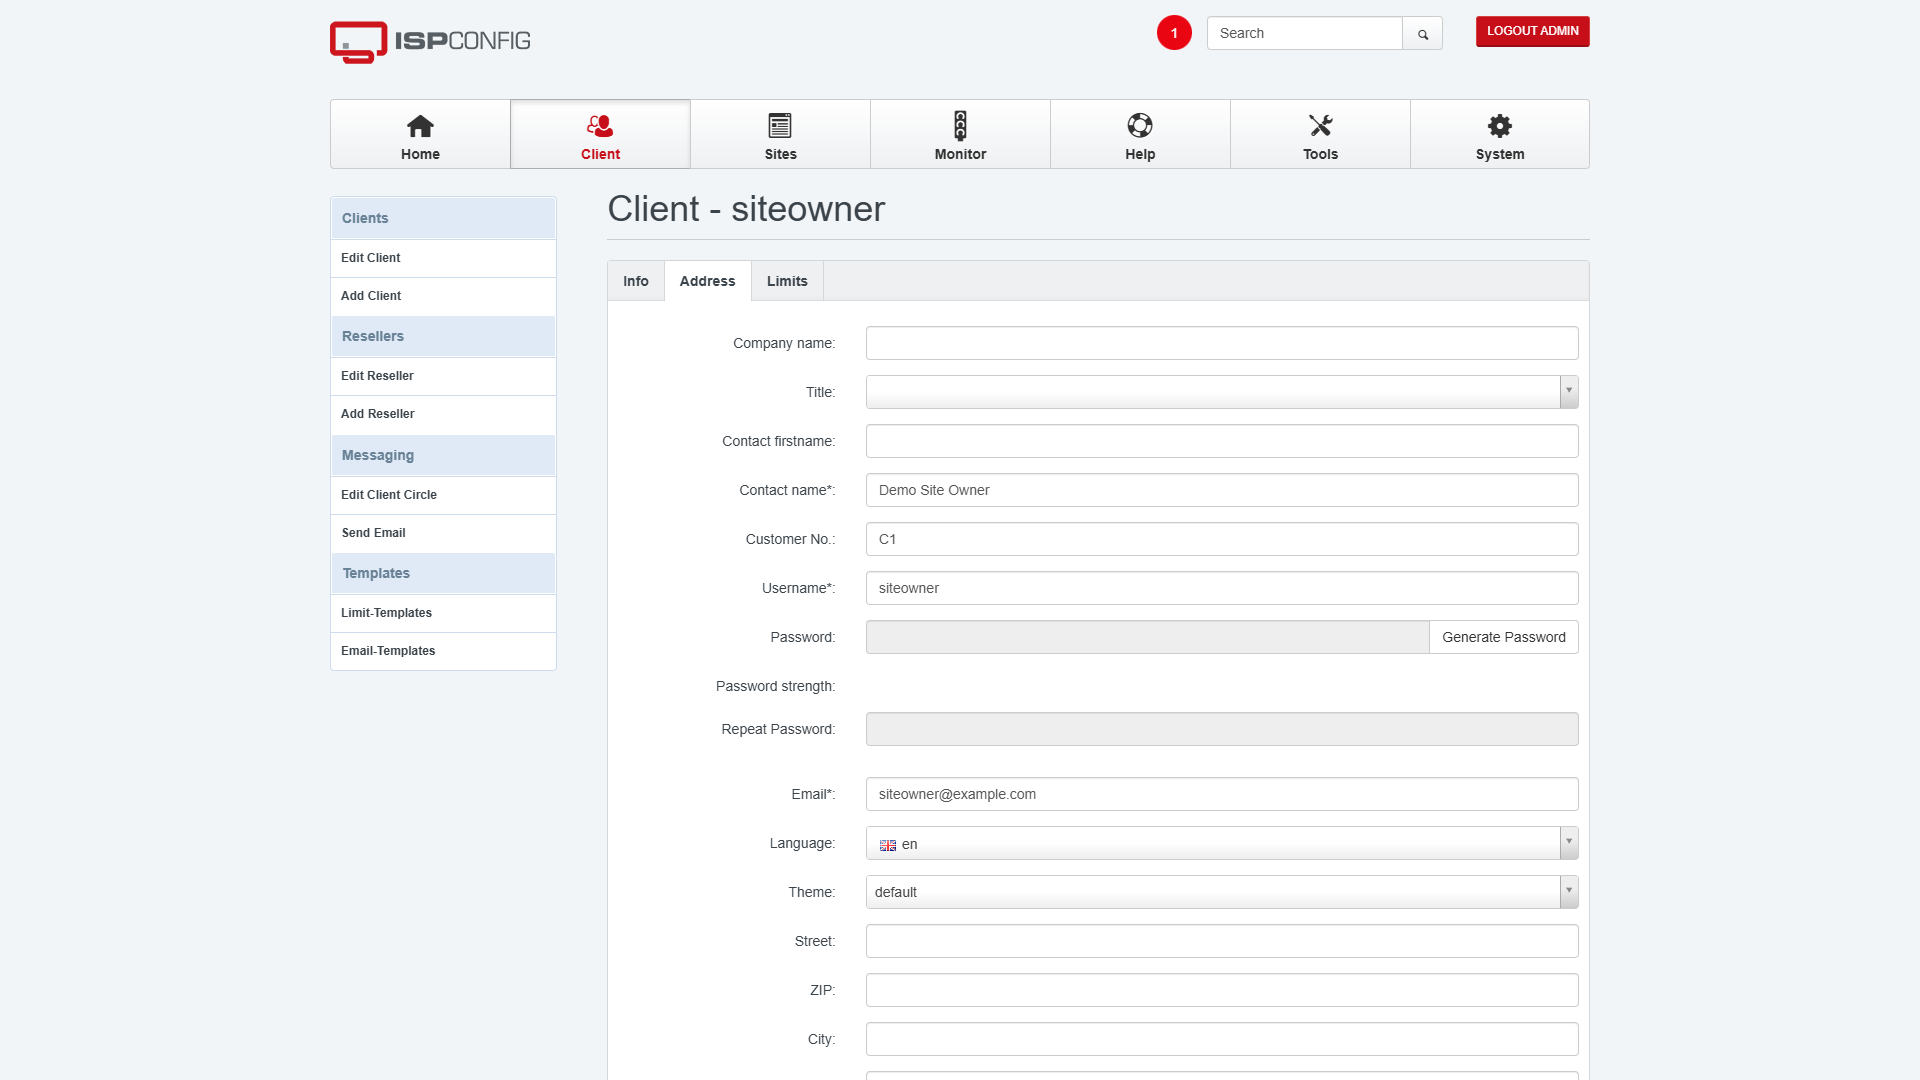
The Limits tab is where you’d cap a customer’s disk space and number of sites. The defaults are fine for a test, so click Save. The client’s password works in the control panel only, and SSH or file uploads need a separate account, which we’ll come to at the end.
Step 7 — Create the Website With a Let’s Encrypt Certificate
Now you can add the website. Go to Sites → Website → Add new website and fill in the Domain tab with these settings.
| Setting | Value |
|---|---|
| Server | Your ISPConfig server |
| Client | The client created above |
| IPv4-Address | * for this single-server setup |
| IPv6-Address | Empty unless IPv6 is configured |
| Domain | site.example.com |
| Auto-Subdomain | None |
| SSL | Checked |
| Let’s Encrypt SSL | Checked |
| PHP | PHP-FPM |
| Active | Checked |
The * address means the site answers on any of the server’s IP addresses. Set Auto-Subdomain to None, because otherwise ISPConfig adds www.site.example.com, which has no DNS record and would make the certificate request fail.
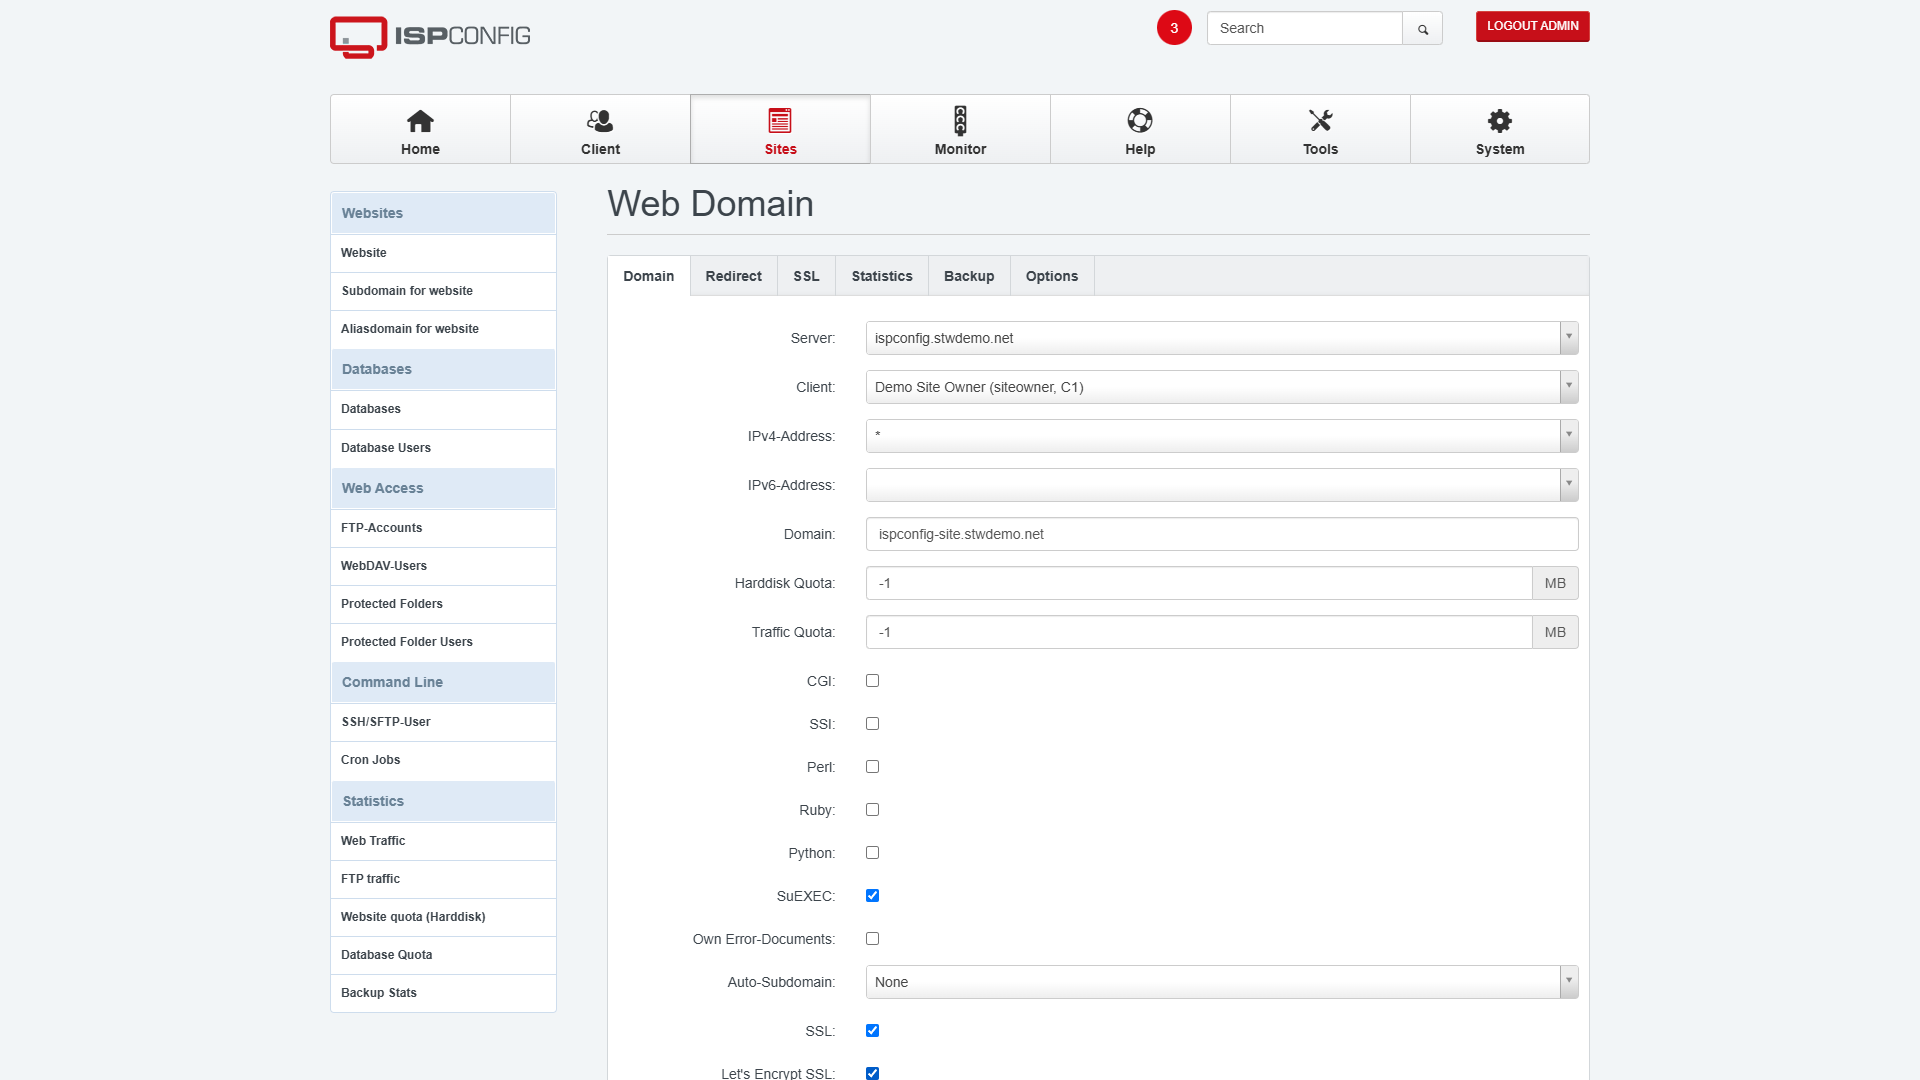
Further down the same tab, ticking SSL and Let’s Encrypt SSL tells ISPConfig to request a certificate for the site as soon as you save. PHP-FPM runs PHP for the site under its own user, which keeps each site’s PHP processes separate from the others. You can leave the other options at their defaults.
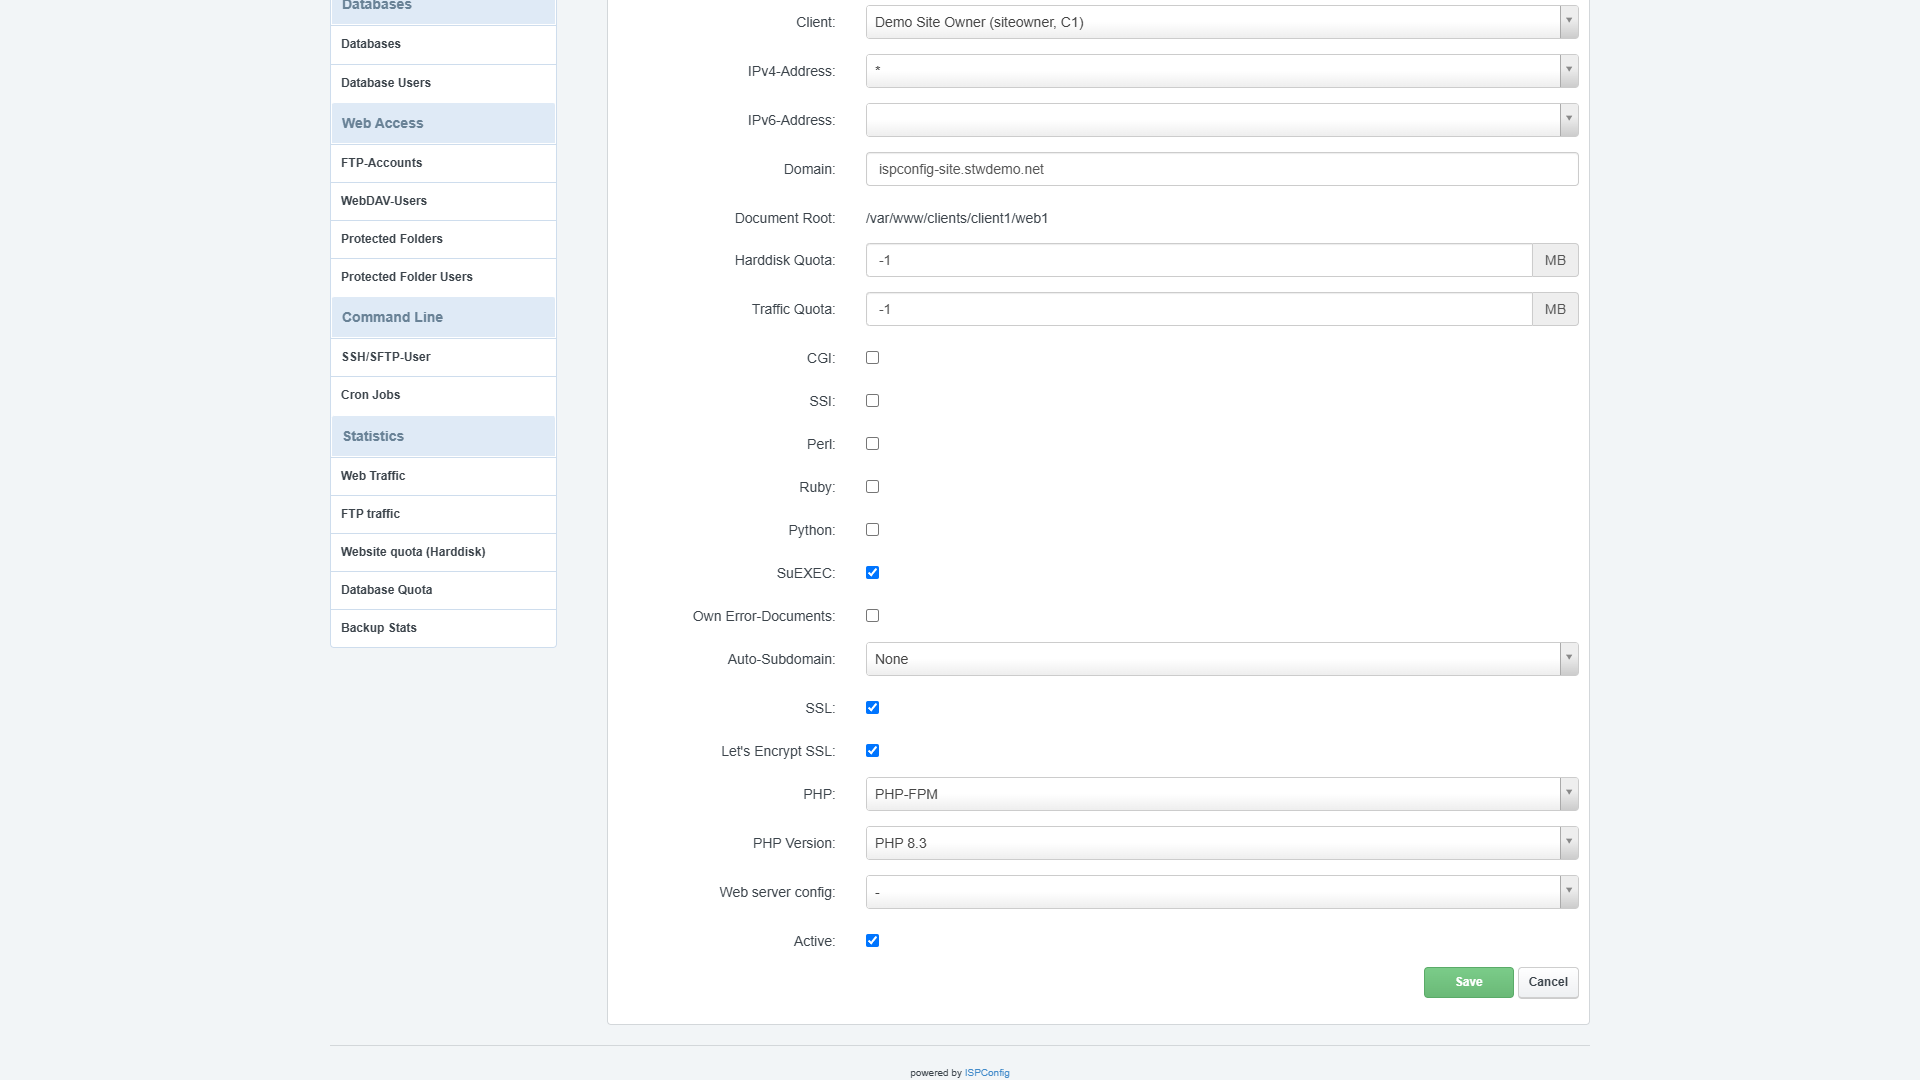
Click Save, give ISPConfig a minute, and reload the config page. If Let’s Encrypt SSL is still checked, the certificate worked.
If Let’s Encrypt SSL has unchecked itself, the certificate request failed. The server logs the reason in
/var/log/ispconfig/acme.log. The usual causes are a DNS record that doesn’t point at the VPS yet, or an extra name likewwwwithout its own record. Once you’ve fixed the cause, tick Let’s Encrypt SSL again and click Save to retry.
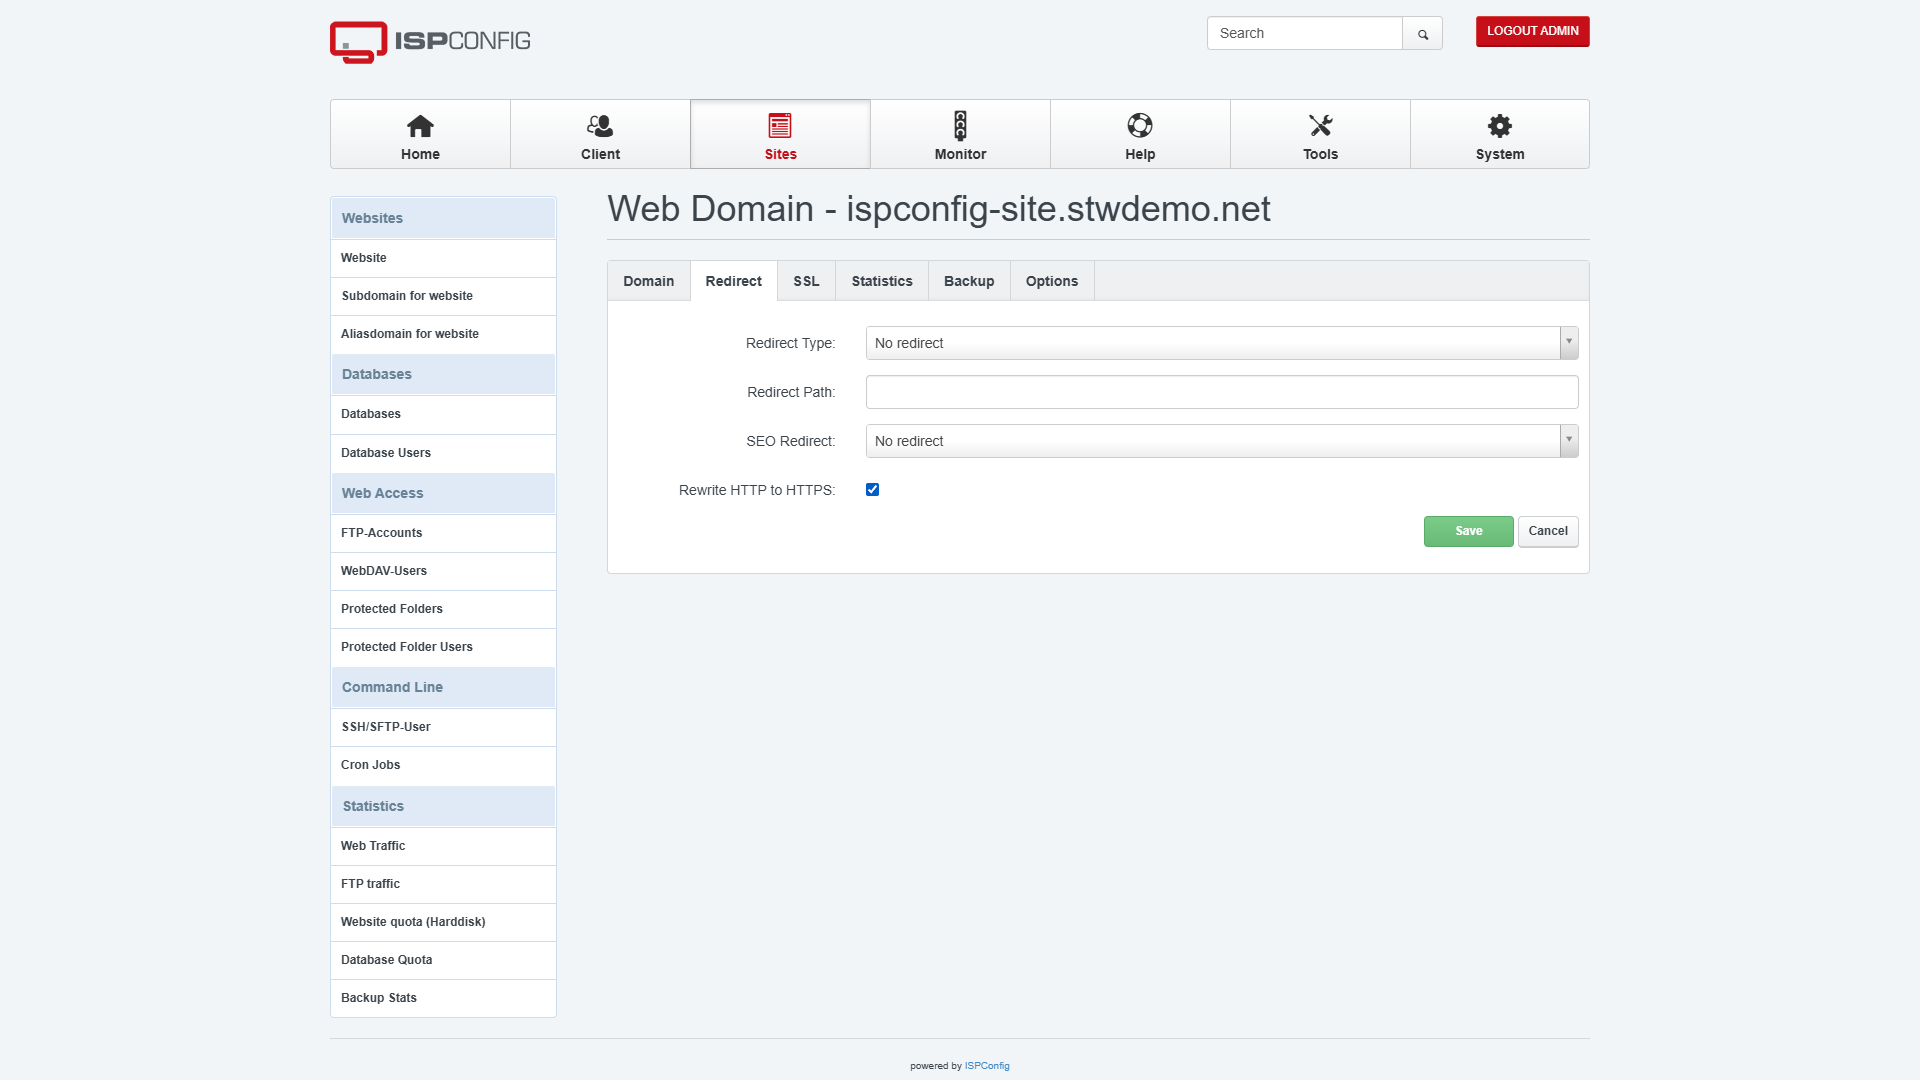
Then open the Redirect tab, check Rewrite HTTP to HTTPS, and click Save, so visitors who type the plain address end up on the secure one.
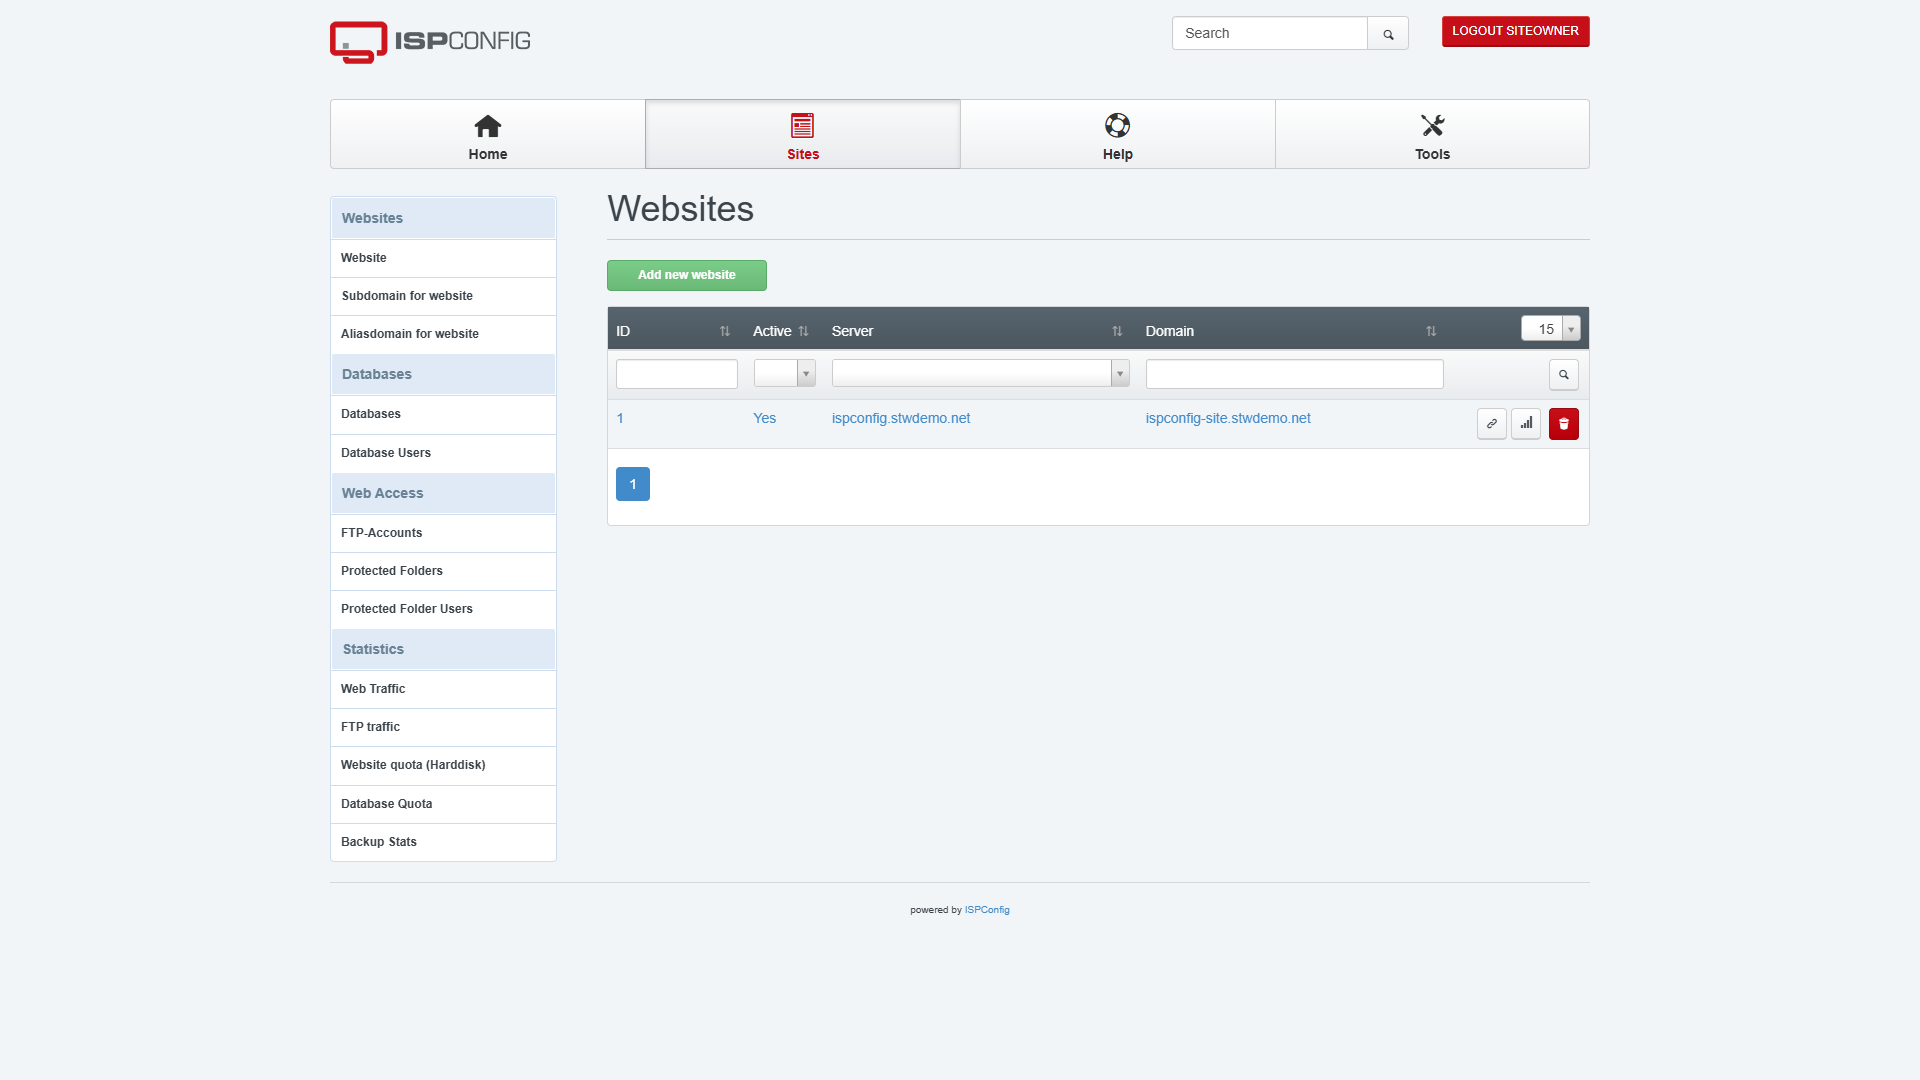
To see what your customer sees, log in with the client account. The website appears under Sites → Website, and nothing else on the server is visible.
Step 8 — Confirm the Site Loads Securely
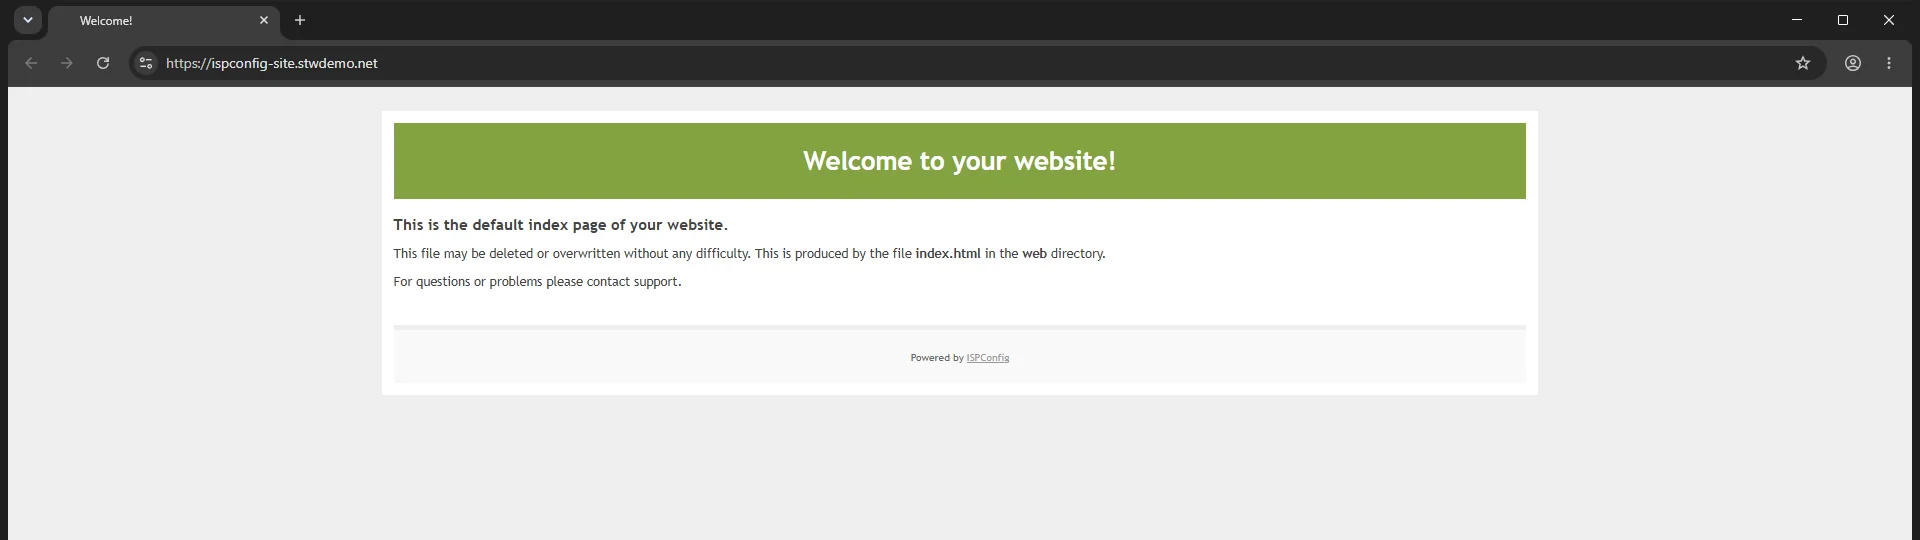
Visit https://site.example.com/. You should see ISPConfig’s Welcome to your website! page, with a padlock and no certificate warning.
To check the redirect, you can use curl to look at the response headers.
curl -IL http://site.example.com/The -L option makes curl follow the redirect, so you’ll see two sets of headers. The first should start with 301 and include Location: https://site.example.com/. The second should start with 200. A “maximum redirects” error means the site is redirecting in a loop.
Finally, reboot the VPS once to make sure the setup survives a restart. When it’s back, run hostname -f again to confirm it still returns panel.example.com, then reload the control panel and the website.
Uploading your own files. Your site’s files go in its
webfolder, where you’ll find the defaultindex.html. ISPConfig has no browser file manager, so create an account under Sites → SSH/SFTP-User and upload with an SFTP client.
Moving an existing site. ISPConfig’s paid Migration Toolkit can import sites from other control panels, though its cPanel support is still in beta. Our guide to migrating a website from cPanel or Plesk covers your options.
Conclusion
ISPConfig is now running behind a firewall, and your first client has a website on HTTPS. Adding more customers is a matter of repeating Steps 6 and 7.
Before you move real sites in, set up backups from each website’s Backup tab and keep copies off the server. The operating system installs its security updates automatically, but you’ll need to update ISPConfig yourself. Our guide to securing, updating, and backing up a VPS control panel goes through both in detail.
Next steps: