

Introduction
DirectAdmin is a commercial control panel that organises a server into three levels of account. The administrator runs the server, resellers can sell hosting to customers of their own, and users manage their own domains and files. Each user’s limits come from a hosting package, so a customer can’t take more disk space or domains than you’ve given them.
DirectAdmin isn’t free; the licence is a recurring cost on top of the VPS, and you still maintain the server yourself. Our guide to choosing a VPS control panel weighs it against the available free panels.
The setup needs a licence key for the installer and at least 4 GB of swap space. Once both are in place, we’ll lock down the admin level and give a website to its own user.
What You’ll Need
- A DirectAdmin licence. The cheapest of the licences, Personal PLUS, covers the administrator plus one user and includes installation help only, while Lite and Standard add ongoing support.
- A VPS with at least 4 GB of RAM. DirectAdmin’s system requirements also ask for at least 4 GB of swap and 2 GB of free disk space after installing the OS. Allow another 4 GiB if you need to create the swap file below, plus space for your websites. It runs on current Debian, Ubuntu, and RHEL-compatible releases. We installed DirectAdmin 1.712 on Ubuntu 24.04 LTS, on an STW GP34.
- Root access over SSH or a browser console. On STW’s GP3 servers, root signs in using an SSH key. The GP3 documentation explains how to add one or use the browser console in our control panel.
- Two subdomains for the panel and the website. Throughout,
directadmin.example.comis the control panel’s address andsite.example.comis the website’s. - A phone authenticator app for the administrator’s two-step login.
DirectAdmin installs a mail server (Exim and Dovecot) and a DNS server (BIND), but you can leave both unused and move your email to an outside provider such as STWmail.
Step 1 — Prepare a Clean Server With Swap
DirectAdmin builds its own web server, PHP, and database, so the server must be free of other hosting software. If you’re reusing a VPS, save the files and databases you still need elsewhere.
To quickly install a valid image on STW, in the STW control panel, select your VPS under Products and choose Manage → Reinstallation, which erases the disk and any existing snapshots. Then, choose a new image to install. The first installation guide in this series covers this process in more depth.
Once the fresh system is up, log in as root, update it, add the download tools the installer uses, and reboot.
apt update
apt -y upgrade
apt -y install curl wget sudo
reboot
Add 4 GB of swap
Swap is another name for disk space Linux uses as overflow when RAM runs short. DirectAdmin requires 4 GB of swap on top of the RAM. After reconnecting, check what your server has.
free -h
swapon --show
If you already have at least 4 GB of swap, skip these commands. Otherwise, add (at least) a 4 GiB swap file, switch it on, and add it to /etc/fstab so it returns after every reboot.
fallocate -l 4G /swapfile
chmod 600 /swapfile
mkswap /swapfile
swapon /swapfile
printf '/swapfile none swap sw 0 0\n' >> /etc/fstab
free -h
The final free -h should now show about 4.0Gi or more on its Swap: row.
Keep a clean rollback point
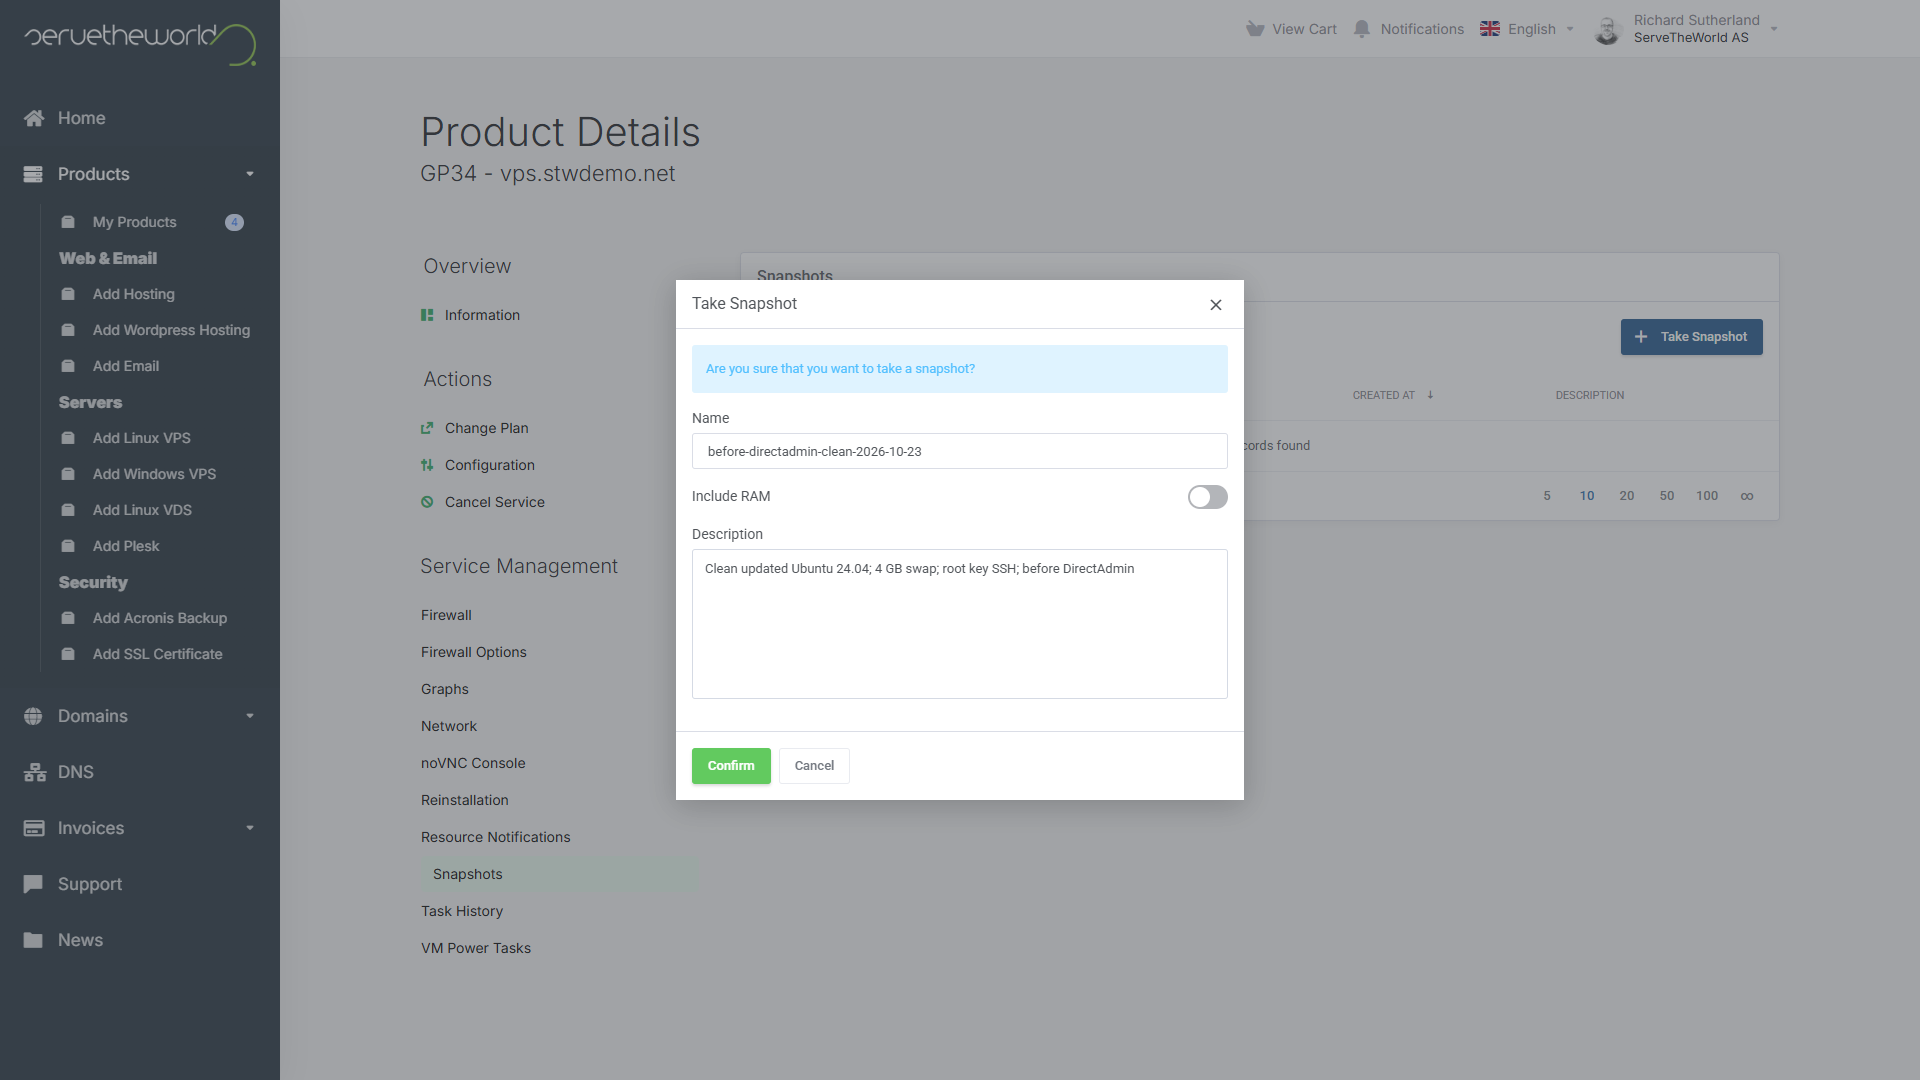
In the STW control panel, open Snapshots → Take Snapshot, enter a memorable name like before-directadmin-install, leave Include RAM off, and click Confirm. Wait until it shows Active.
Step 2 — Set Up DNS Before You Install
DirectAdmin fetches the panel’s certificate during installation, and Let’s Encrypt only issues one after connecting to the name and finding your server. So your sites’ domain names need to point at the VPS before you start. Each needs an A record at your DNS provider, mapping it to the server’s IPv4 address.
| Name | Record type | Destination |
|---|---|---|
directadmin.example.com |
A | Your VPS’s public IPv4 address |
site.example.com |
A | Your VPS’s public IPv4 address |
In STW’s DNS, select the domain, click New record, enter the name and IPv4 address, and choose Add as draft. Repeat for the second name, then click Publish changes. Our tutorial on A records and subdomains explains the fields.
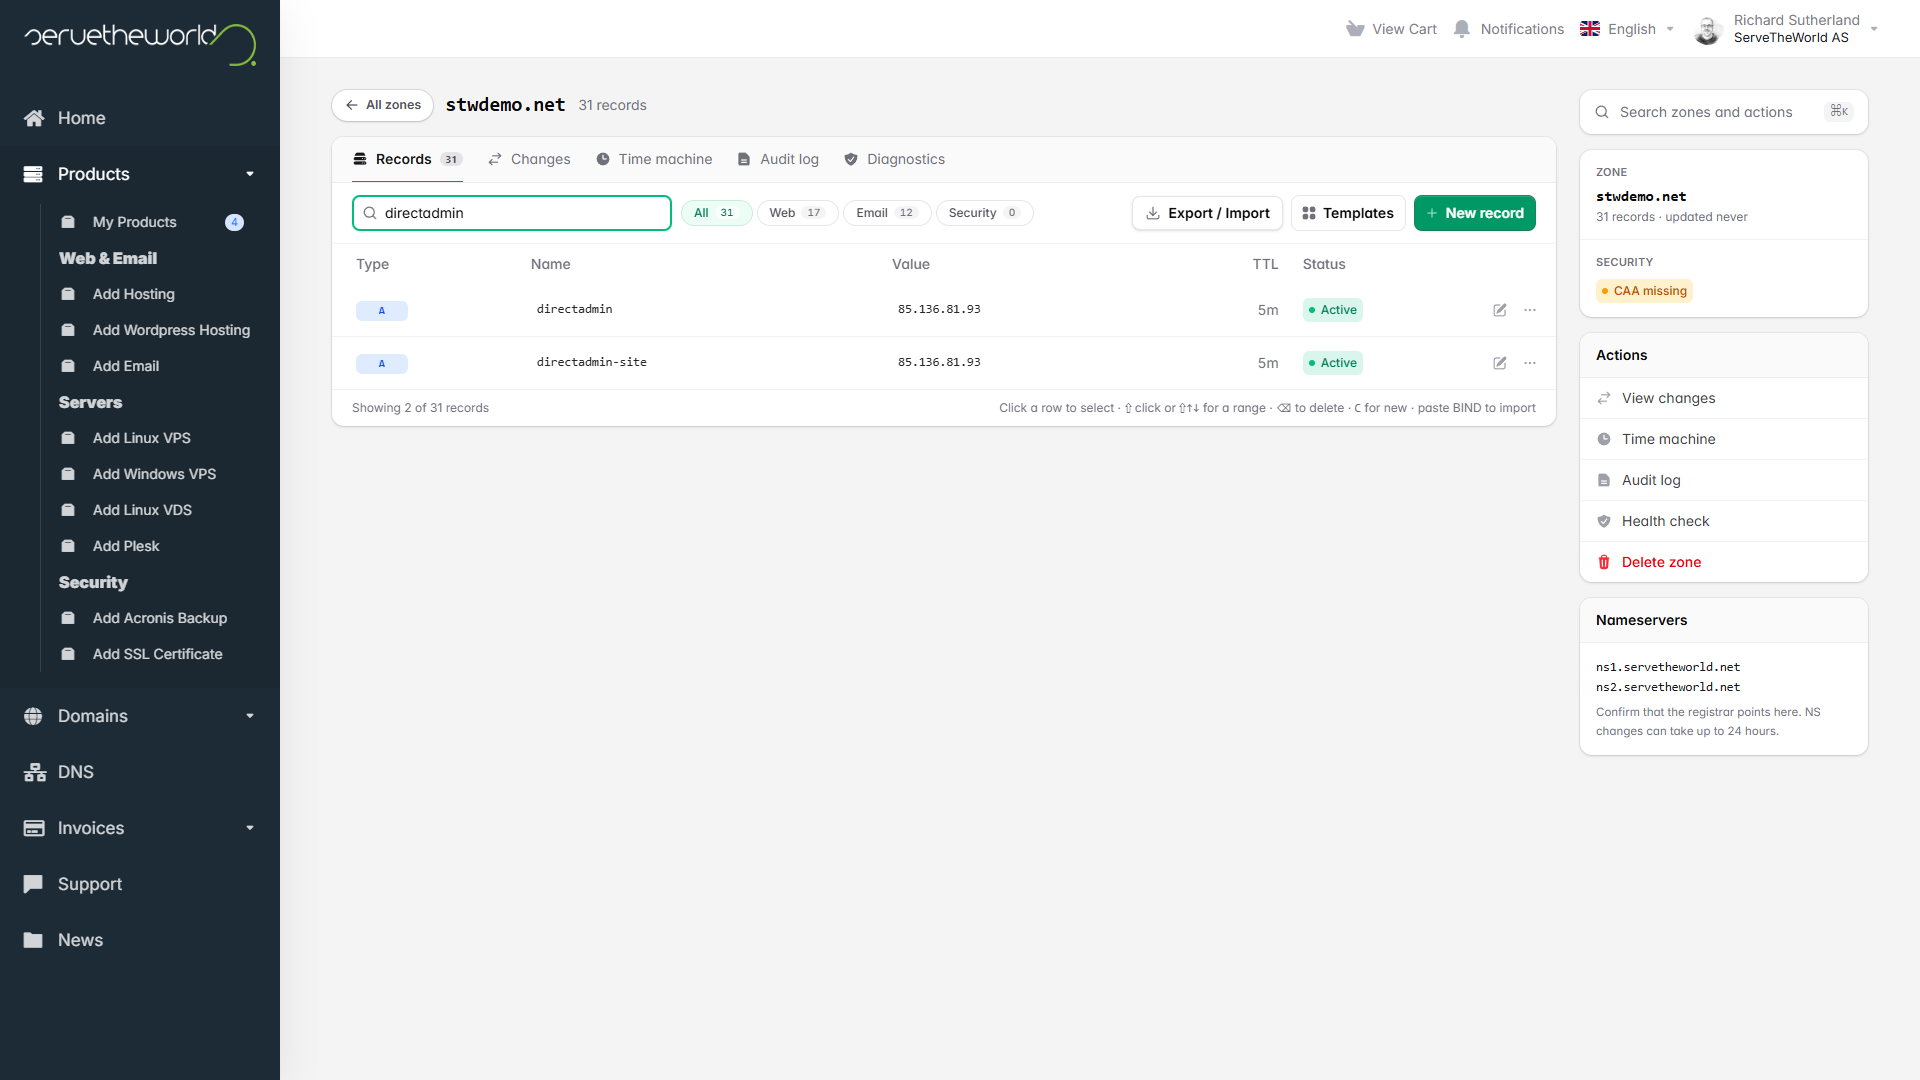
Then look both names up from your computer through Google’s resolver, which skips your local cache.
nslookup directadmin.example.com 8.8.8.8
nslookup site.example.com 8.8.8.8
Each should return the VPS’s address. If one still shows an old address, wait for the cached answer to expire before installing.
On Linux and macOS,
dig +short directadmin.example.com @8.8.8.8gives the same answer in one line. If either name also has an AAAA (IPv6) record pointing elsewhere, update or delete it, because Let’s Encrypt may try that address and fail.
DirectAdmin also runs a DNS server, but your domain’s current nameservers stay authoritative, meaning you should keep making DNS changes there, as our explainer on registrars, registries, and DNS hosting describes.
Give the server its permanent name
DirectAdmin issues the panel’s certificate for the server’s hostname, so set the hostname to the full panel name.
hostnamectl set-hostname directadmin.example.com
printf 'preserve_hostname: true\n' > /etc/cloud/cloud.cfg.d/99-preserve-hostname.cfg
hostname -f
The second line stops cloud-init, the setup tool cloud images run at startup, from restoring the provider’s name.
hostname -f should print directadmin.example.com. If it prints only directadmin, change /etc/hosts so its 127.0.1.1 line reads 127.0.1.1 directadmin.example.com directadmin.
Step 3 — Run the Installer With Your Licence Key
Copy your licence key from the licence details in DirectAdmin’s client area. It’s the long key, not the numeric licence ID. Then download the official installer to root’s home directory.
cd /root
curl -fsSL https://download.directadmin.com/setup.sh -o setup.sh
Next, run the installer with the following command, passing it the correct hostname, an administrator username, and an email address. Replace YOUR_LICENCE_KEY with your key.
DA_HOSTNAME=directadmin.example.com \
DA_ADMIN_USER=daadmin \
DA_EMAIL=you@example.com \
DA_FOREGROUND_CUSTOMBUILD=true \
bash setup.sh 'YOUR_LICENCE_KEY'
These predefined options keep DirectAdmin’s default software, which means Apache, PHP-FPM, and MariaDB will be installed.
CustomBuild, DirectAdmin’s tool for building that software, normally finishes in the background, so the login page can appear before the web server is ready. DA_FOREGROUND_CUSTOMBUILD=true makes the installer wait until it’s done, which keeps the installation process simple.
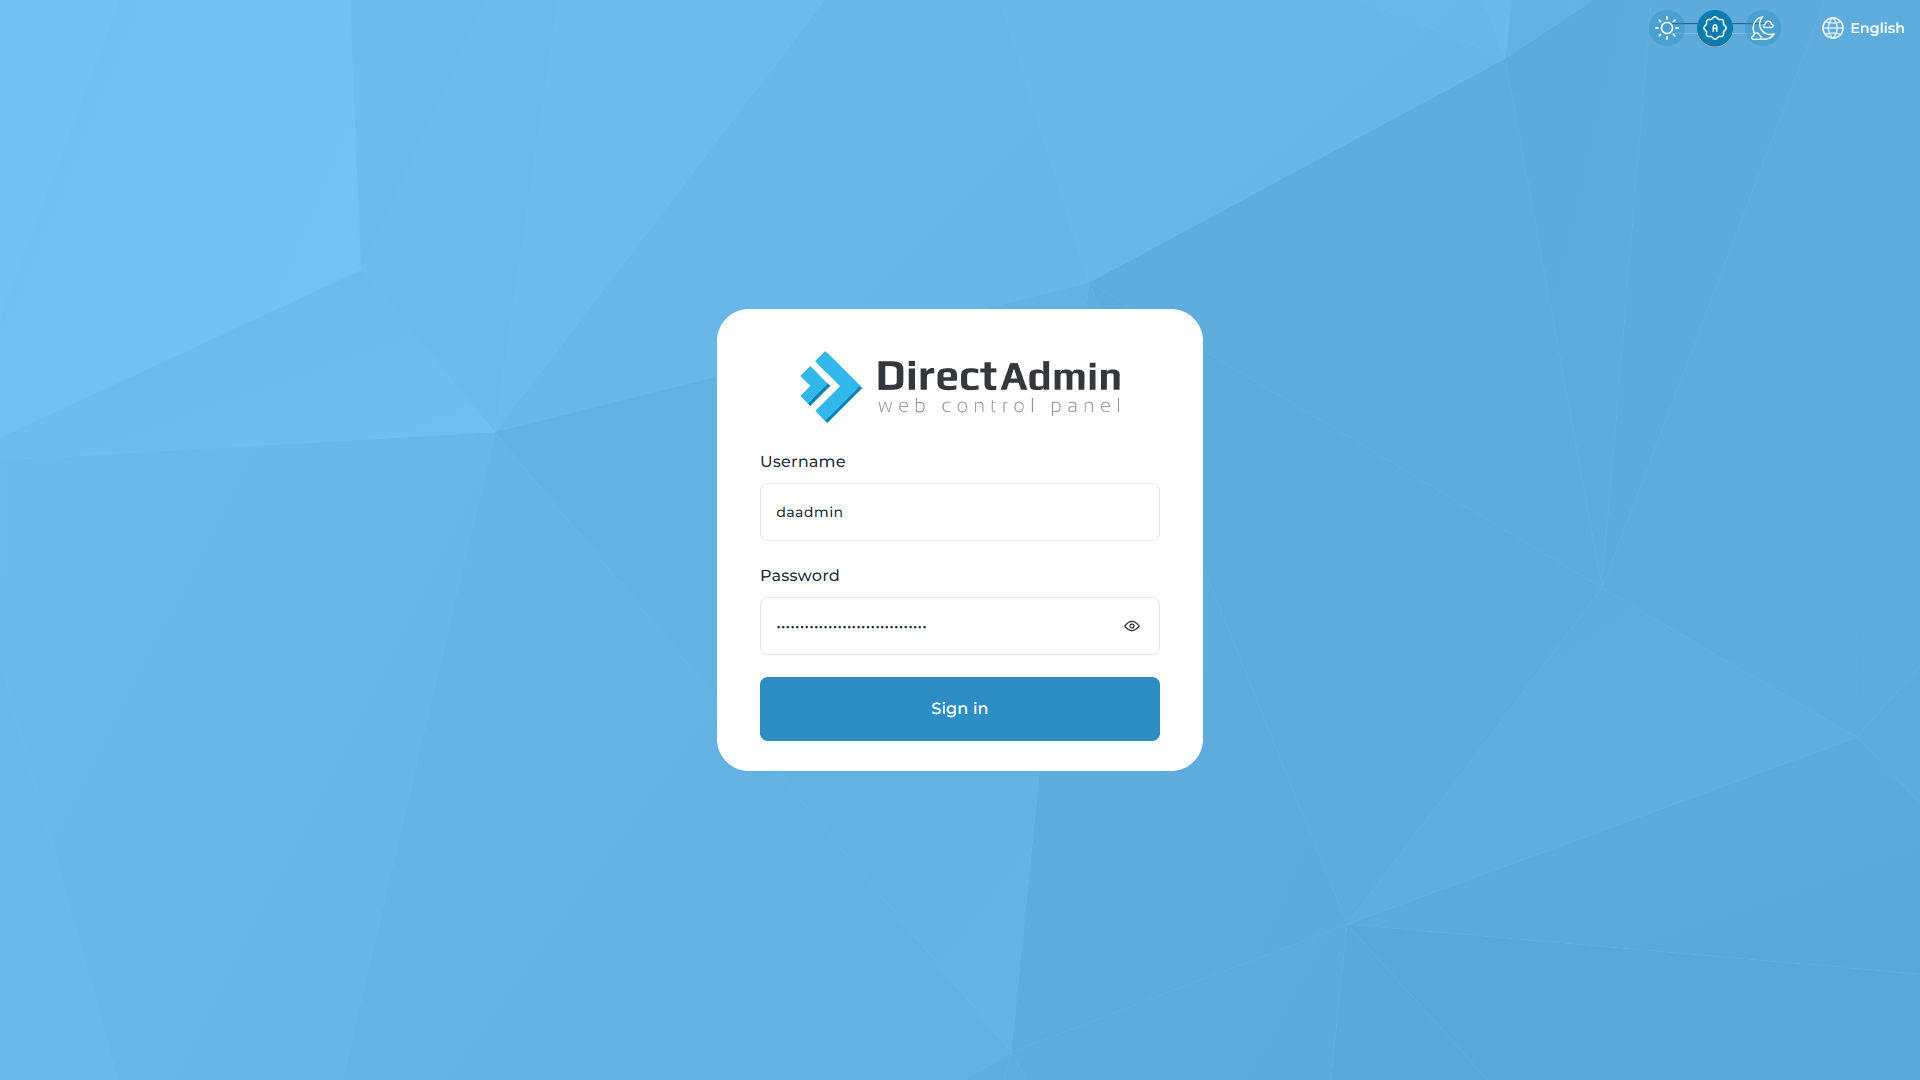
At the end, the installer prints the administrator’s generated password, which it also saves in /usr/local/directadmin/conf/setup.txt. Open https://directadmin.example.com:2222/ and sign in as daadmin. Port 2222 is the control panel’s own port, separate from the websites on 443.
Step 4 — Lock Down the Admin Level
Confirm the control panel’s certificate
DirectAdmin can open at the user level, because the administrator has a hosting account of its own. Switch to Admin for the server settings, then open Server Manager → Server TLS Certificate. The key and certificate should read Valid, with DirectAdmin Panel Over HTTPS and Automatic Certificates on. The installer should have already fetched a valid certificate.
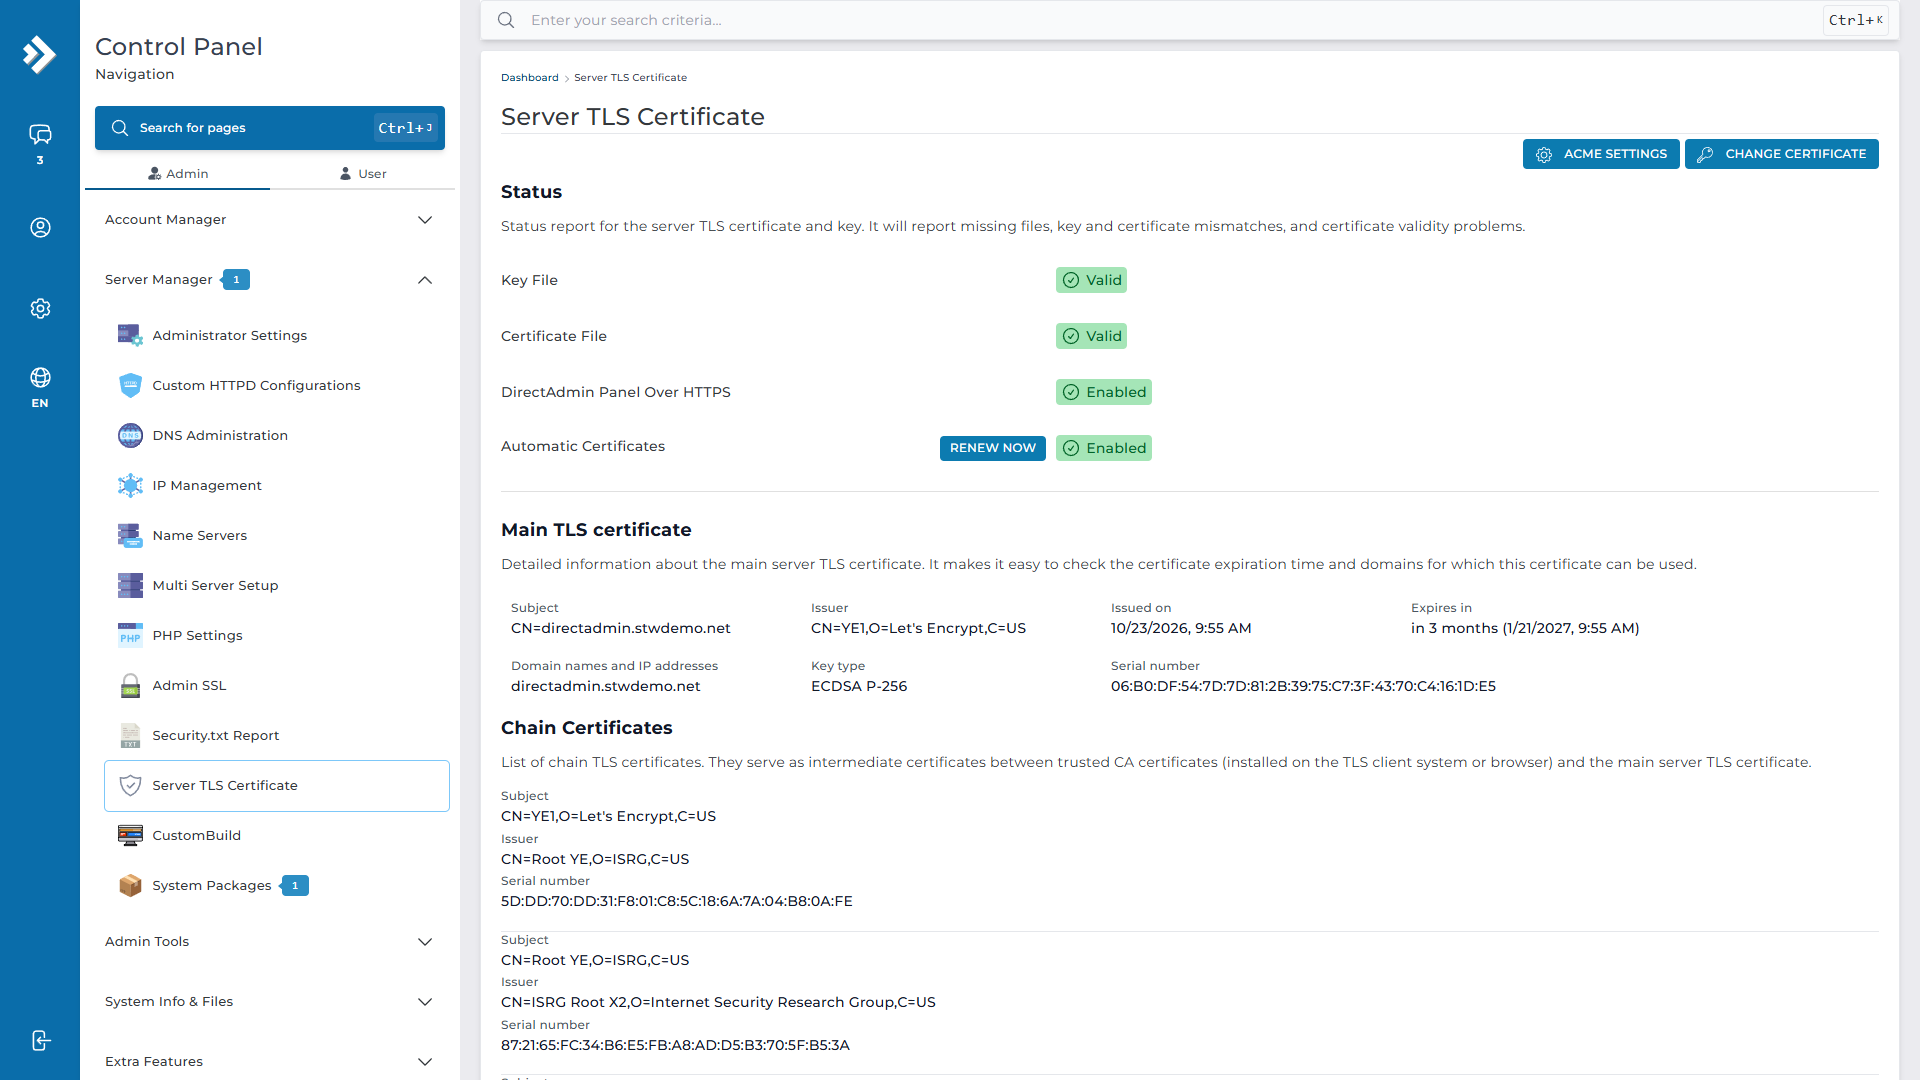
If the certificate wasn’t issued, DirectAdmin reports it in the administrator message system. Repeat the
nslookupordigcheck and make sure inbound TCP port 80 is open in every firewall, then run DirectAdmin’s hostname certificate script,/usr/local/directadmin/scripts/letsencrypt.sh server_cert, as root.
Turn on two-step authentication
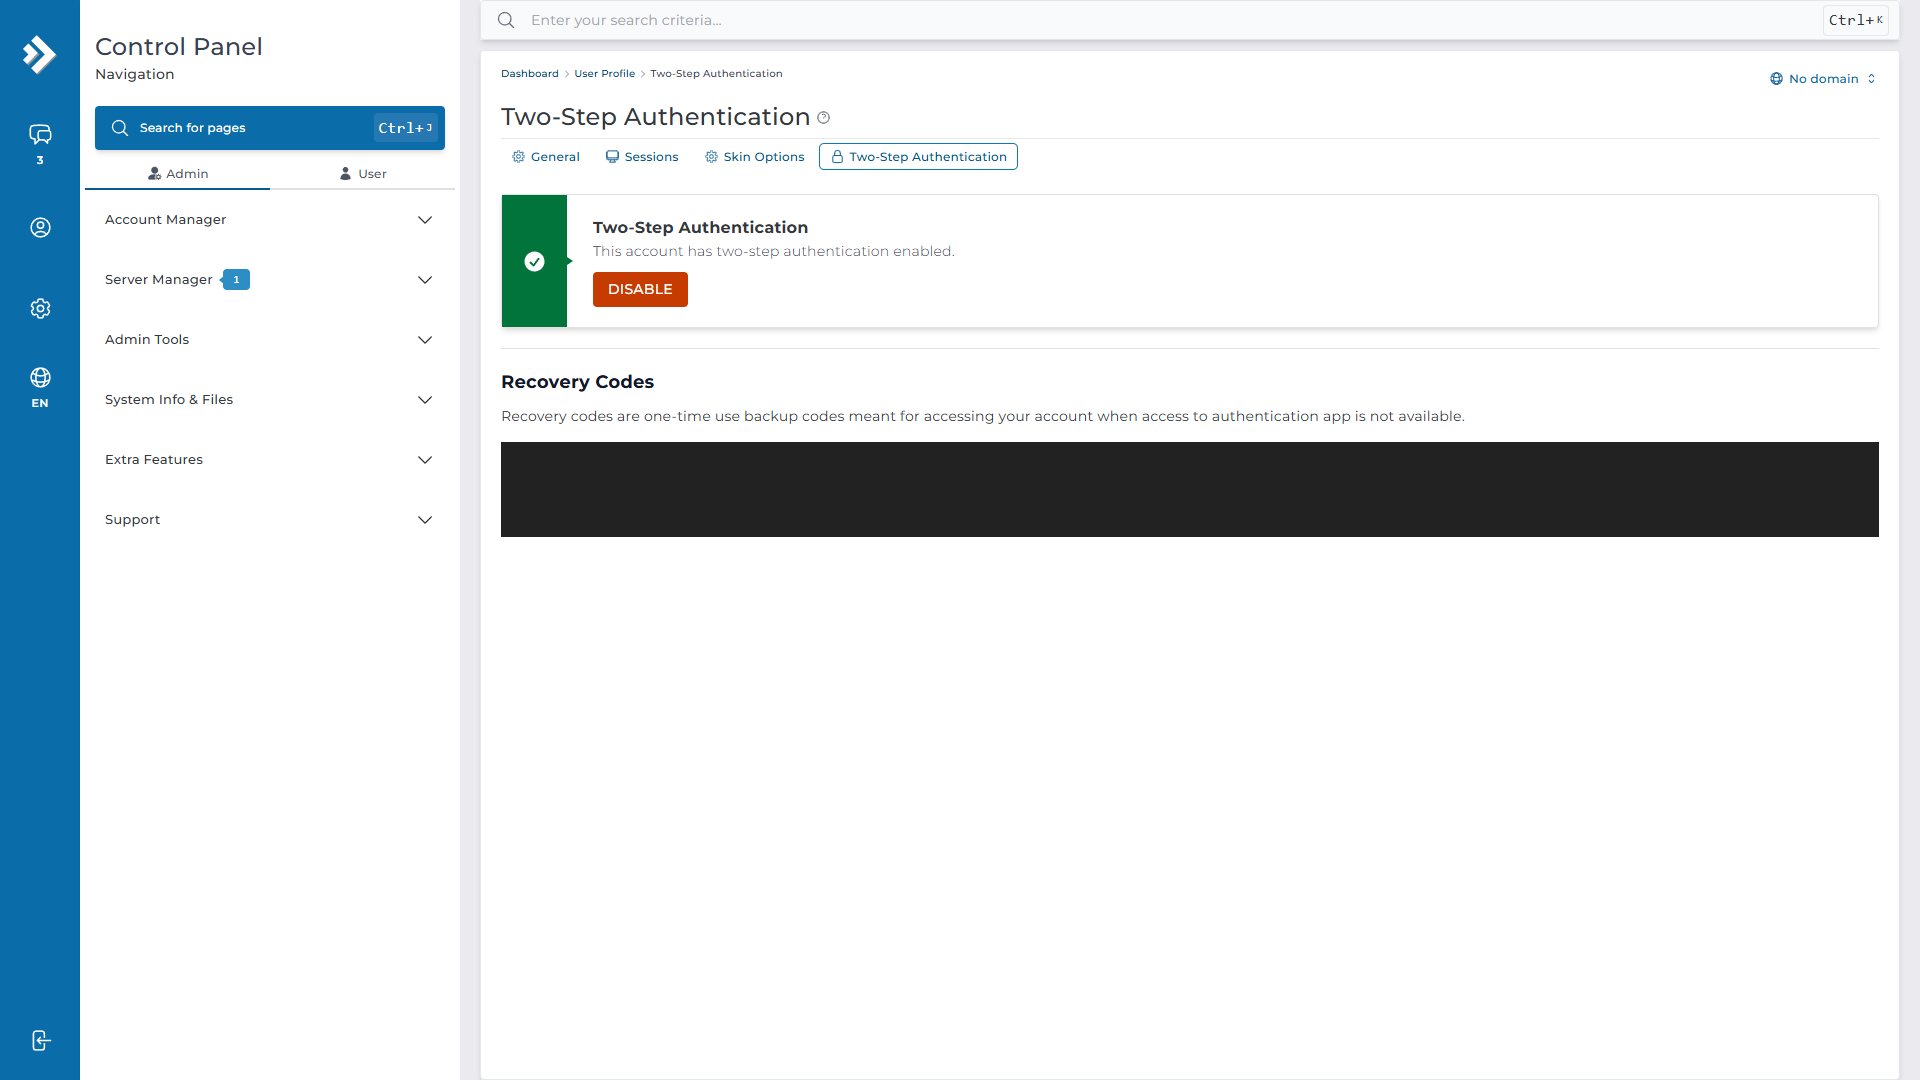
Two-step authentication adds a one-time code from your phone after the password. Go to Advanced Features → Two-Step Authentication and click Generate Secret. Point your authenticator app at the QR code, type its current code into One-Time Code, and click Enable Two-Step authentication.
Check what CSF allows
The installer also set up ConfigServer Security & Firewall (CSF). Open Extra Features → ConfigServer Security & Firewall and check that it reports Enabled and Running.
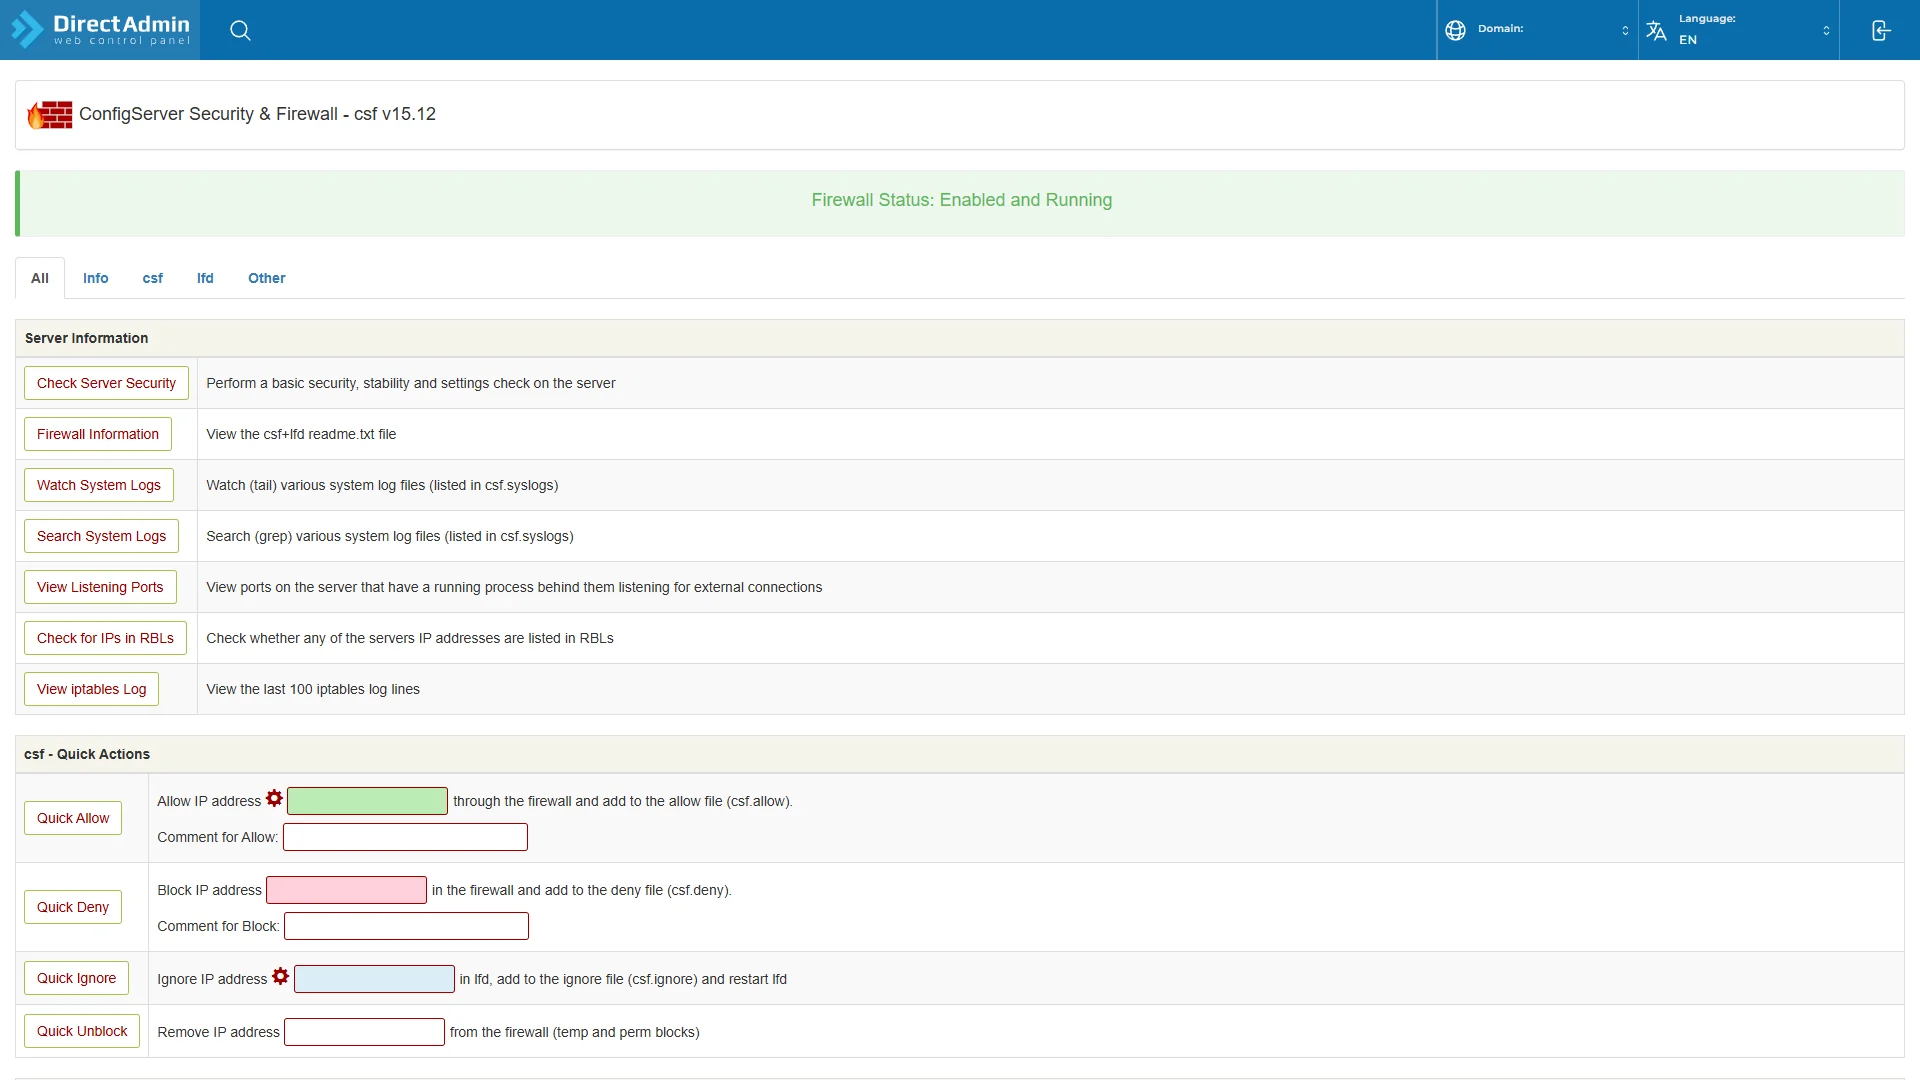
Its default Firewall Configuration already allows SSH (22), HTTP (80), HTTPS (443), and the panel (2222), plus mail, DNS, and FTP.
Step 5 — Create a Package, Then a User
With the admin level secure, you can set up the user who’ll own the website. A hosting package is the named set of limits that user receives, such as disk quota and domain count. DirectAdmin’s new-user form requires one, so create it first under Account Manager → Manage User Packages → Add Package in the Admin view.
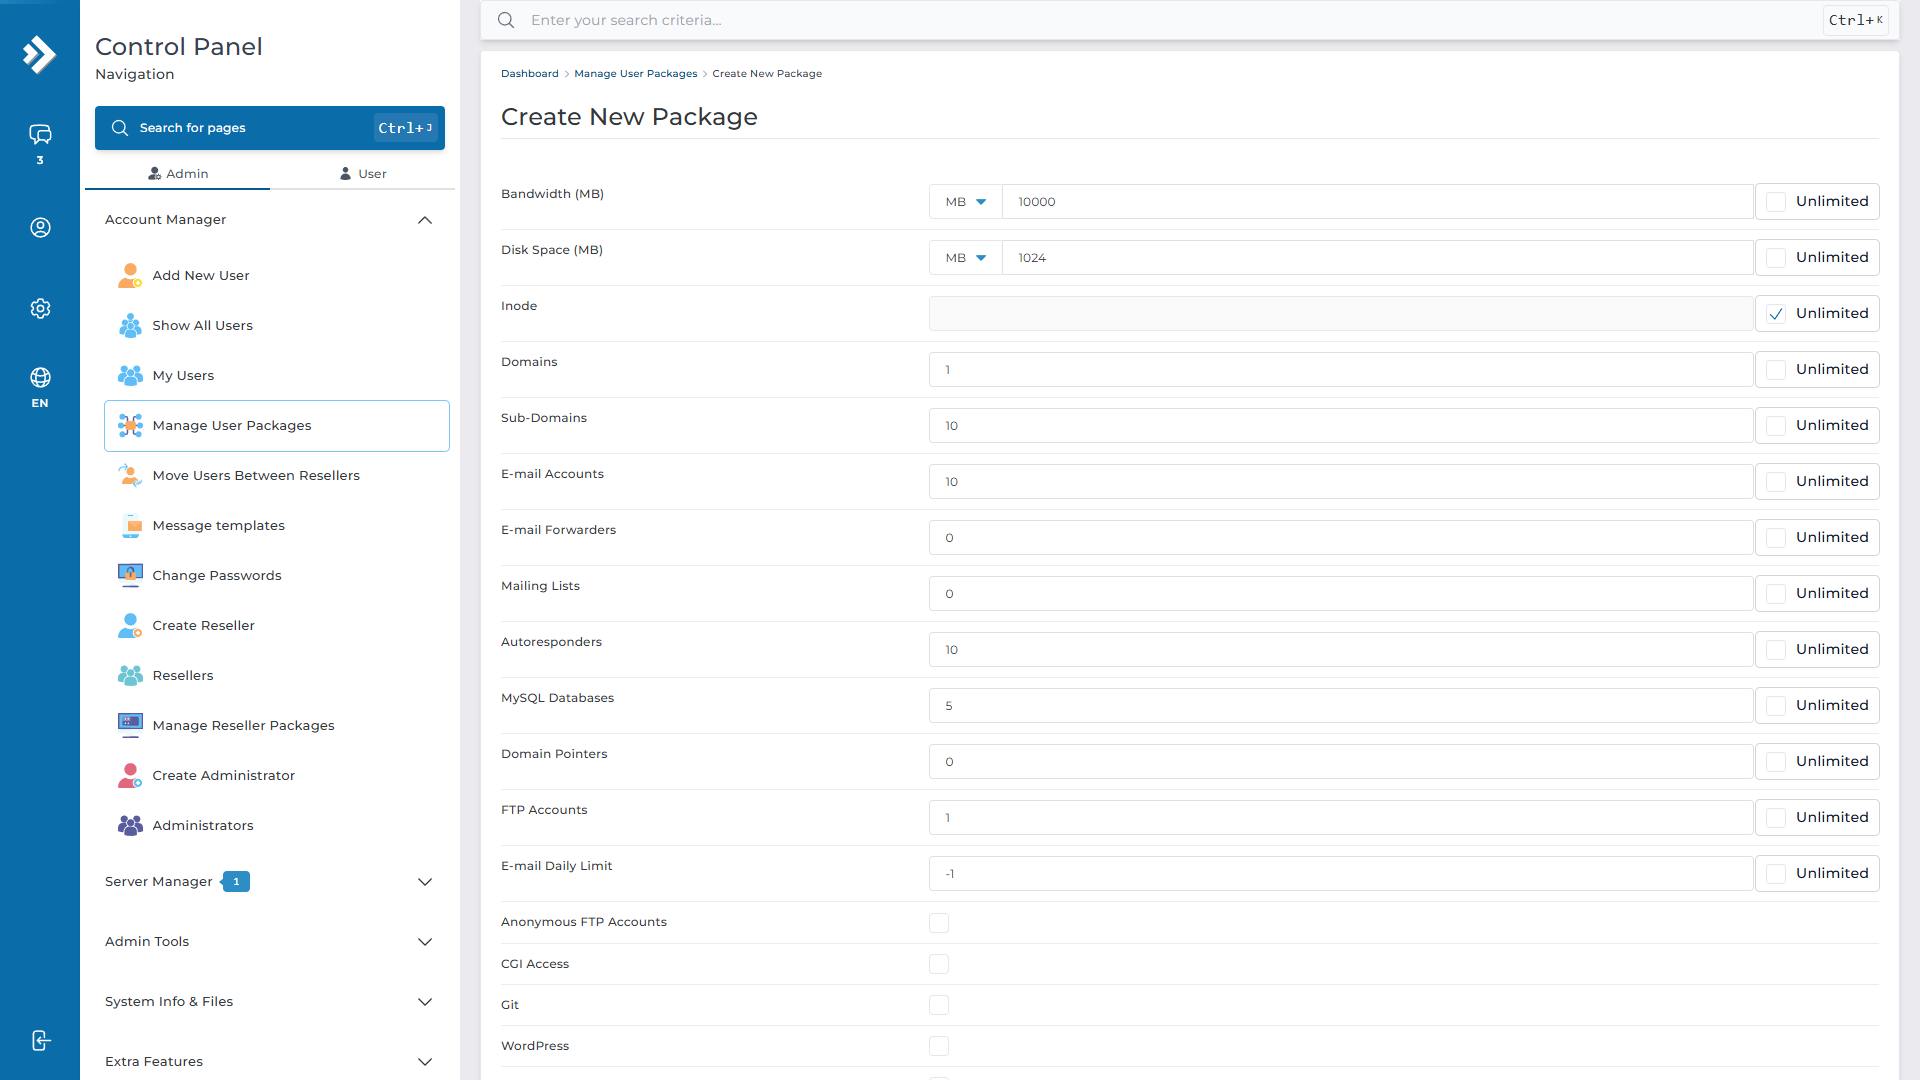
Bandwidth is the combined monthly allowance for data transferred in and out of the account. With SSH Access off, the owner works through DirectAdmin and never gets a command line on the server. Enter a Package Name at the bottom and click Save.
Next, open Account Manager → Add New User. Enter a username, the owner’s email address, and a unique password. Set Domain to site.example.com, choose your package, and pick the server’s shared IP address.
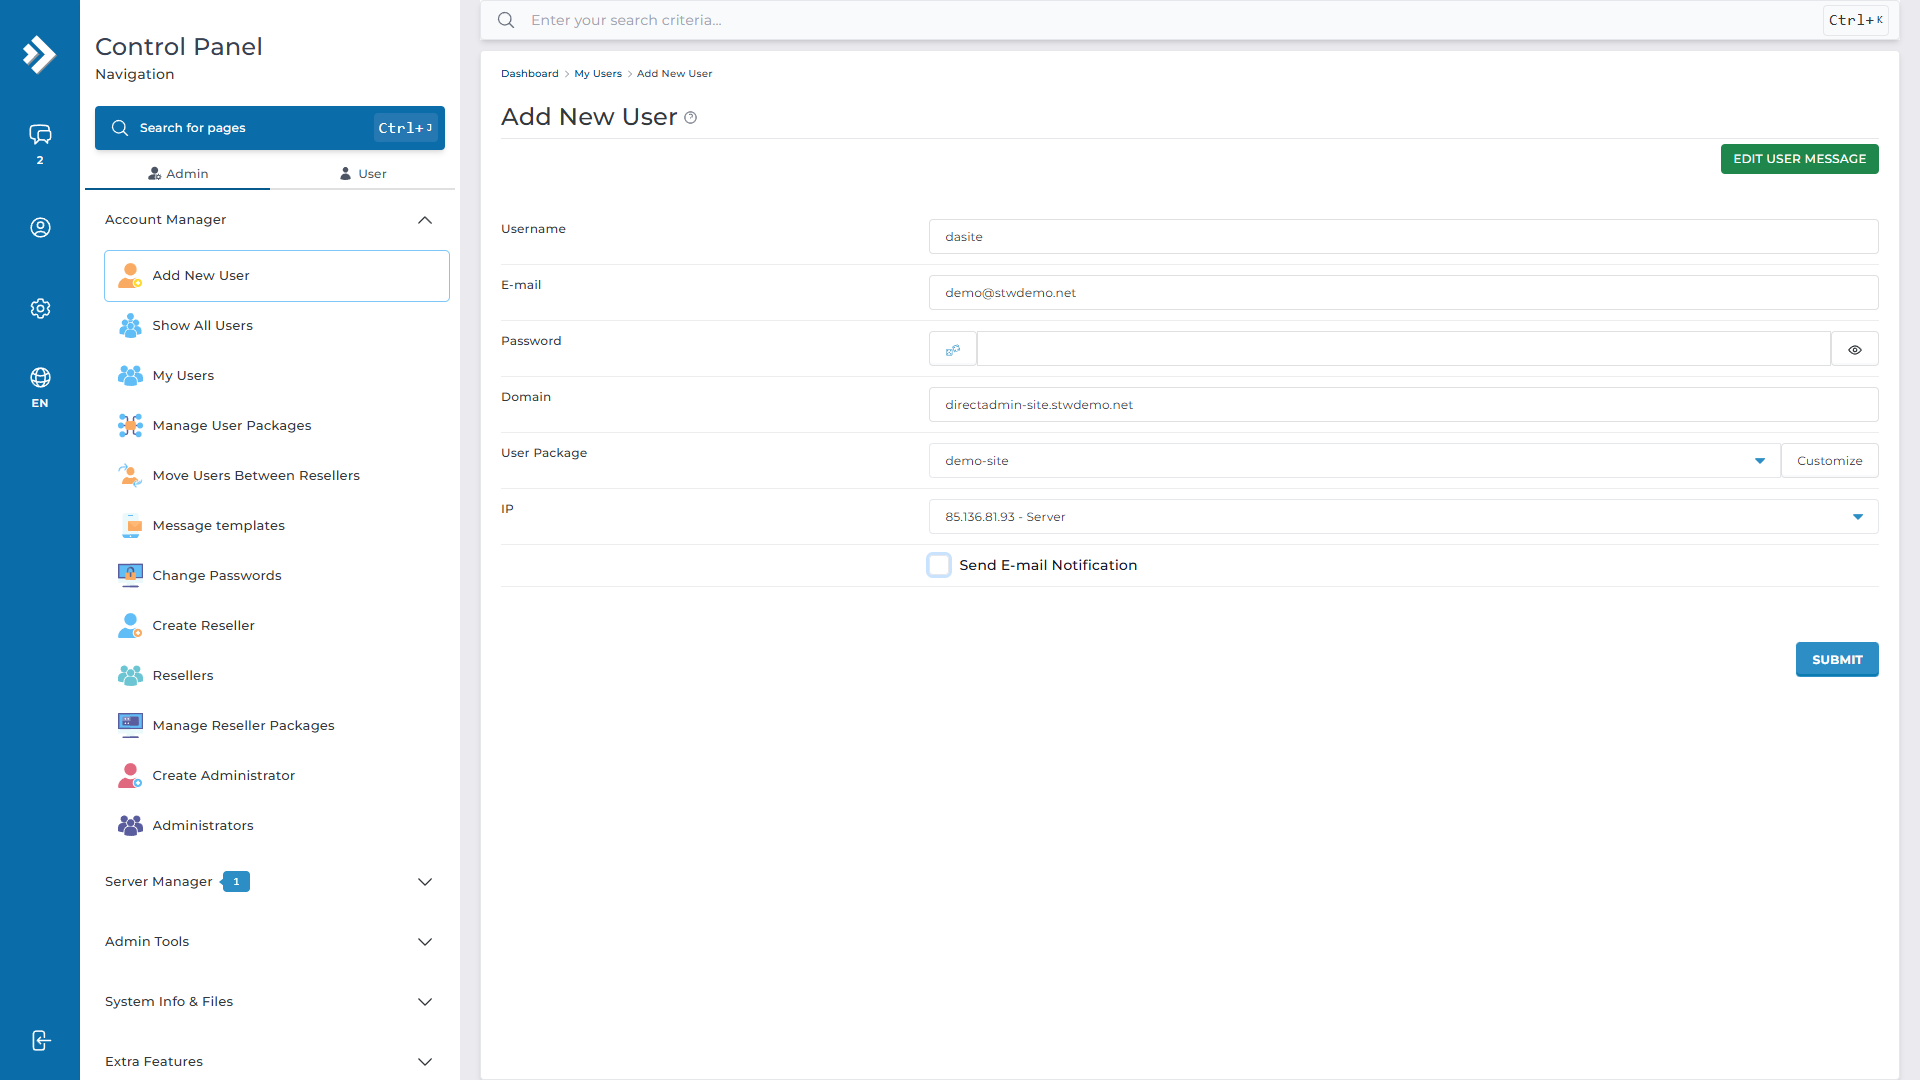
The Password field shows what you type in plain text, so don’t fill it in while sharing your screen. Untick Send E-mail Notification unless you want the details emailed, then click Submit.
Open a separate browser session and log in with the owner’s account. The owner will be logged in at the user level, with site.example.com and its website tools but no Admin switch. Stay signed in for the next step.
Step 6 — Force HTTPS on the New Domain
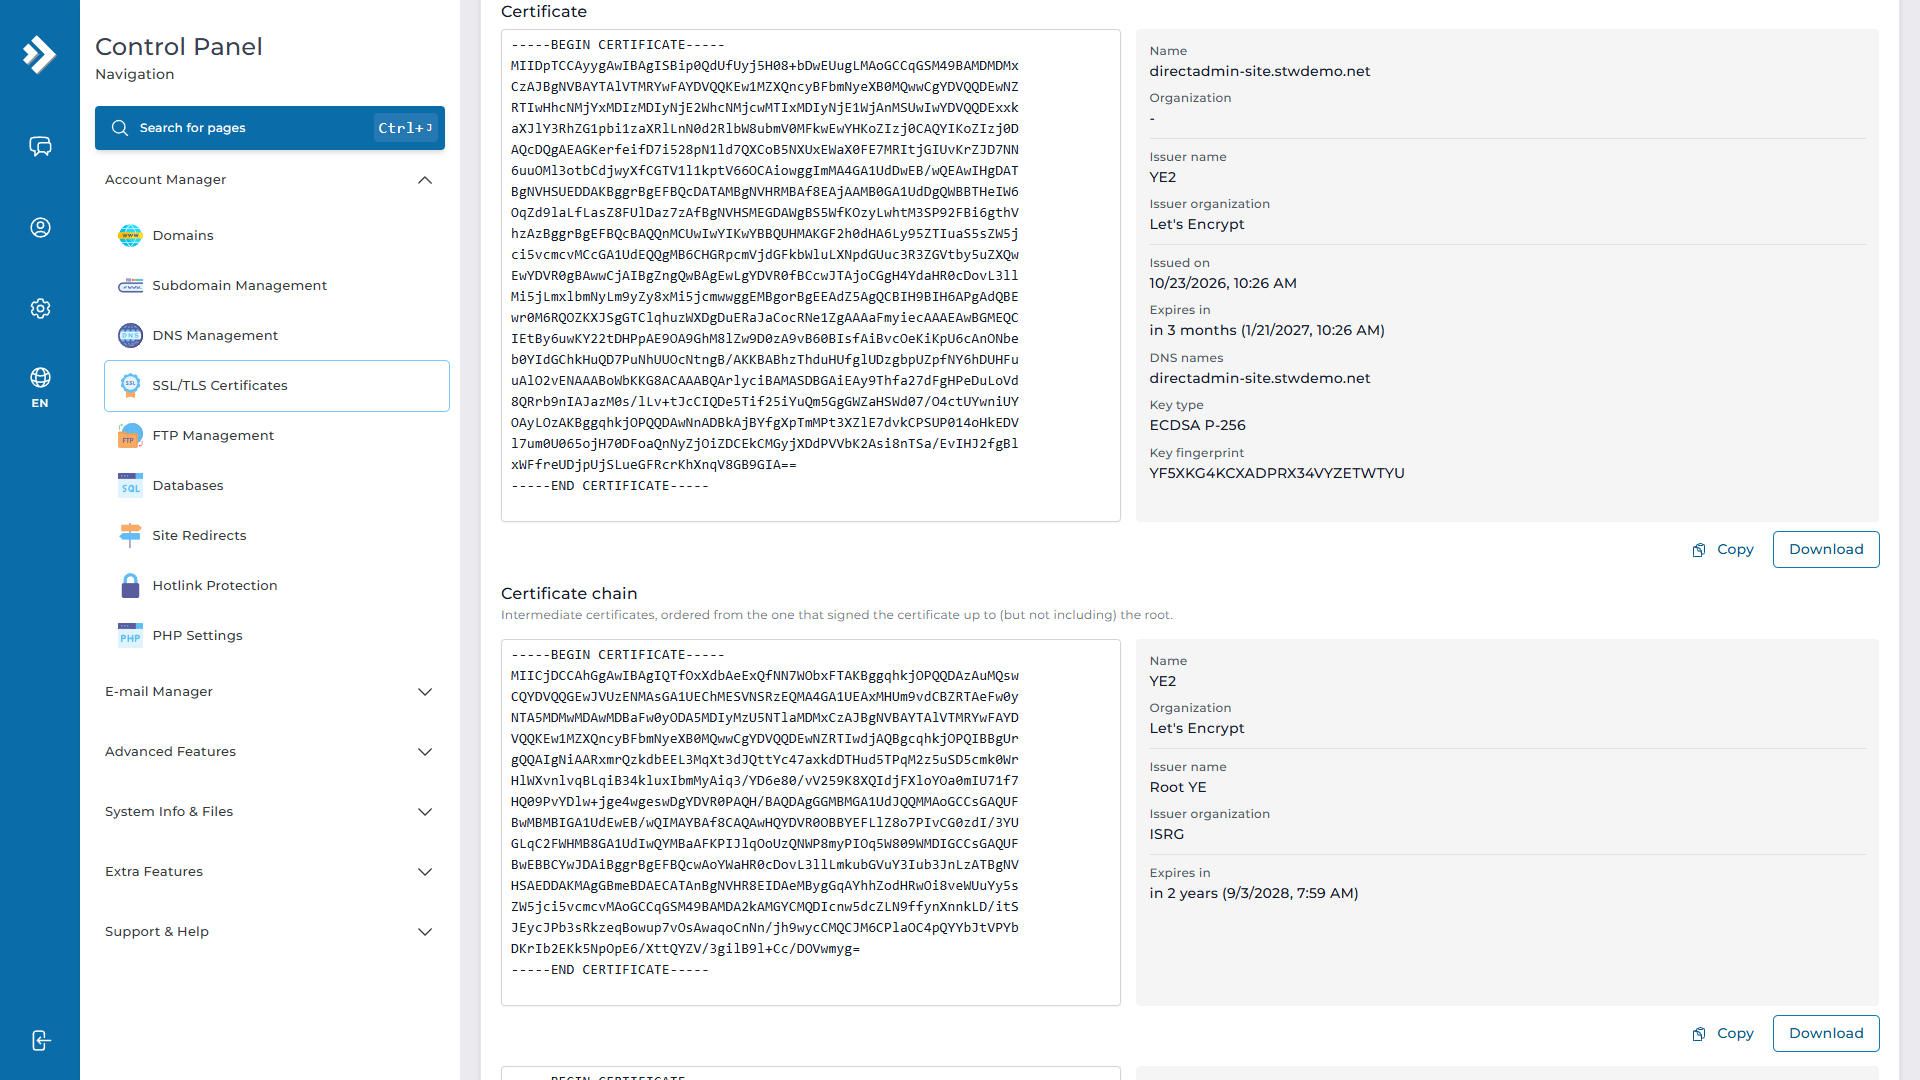
DirectAdmin fetches a certificate for each new domain by itself. As the owner, open Account Manager → SSL/TLS Certificates → Manage certificates and check that site.example.com has a valid certificate with renewal set to Automatic.
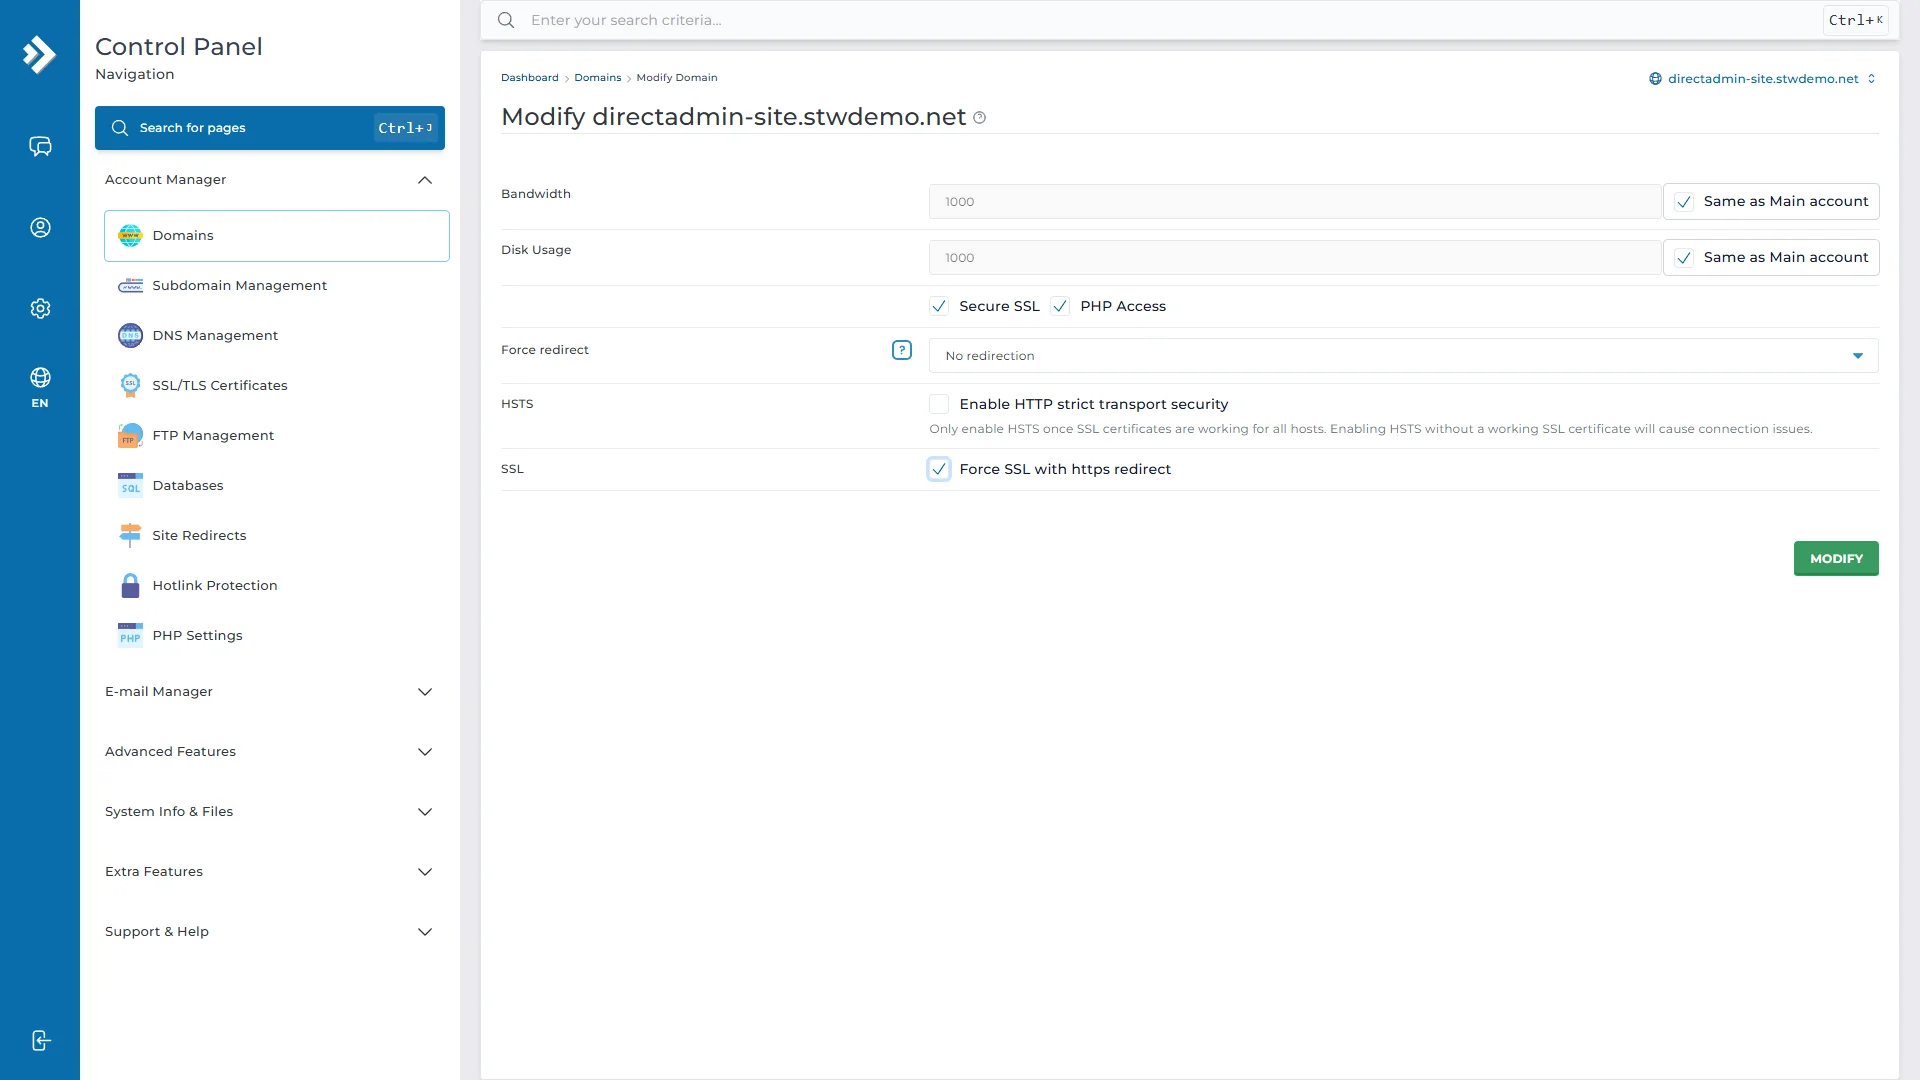
Next, open Account Manager → Domains, select site.example.com, tick Force SSL with https redirect, and click Modify. Anyone arriving at the plain http:// address now gets sent to the secure one.
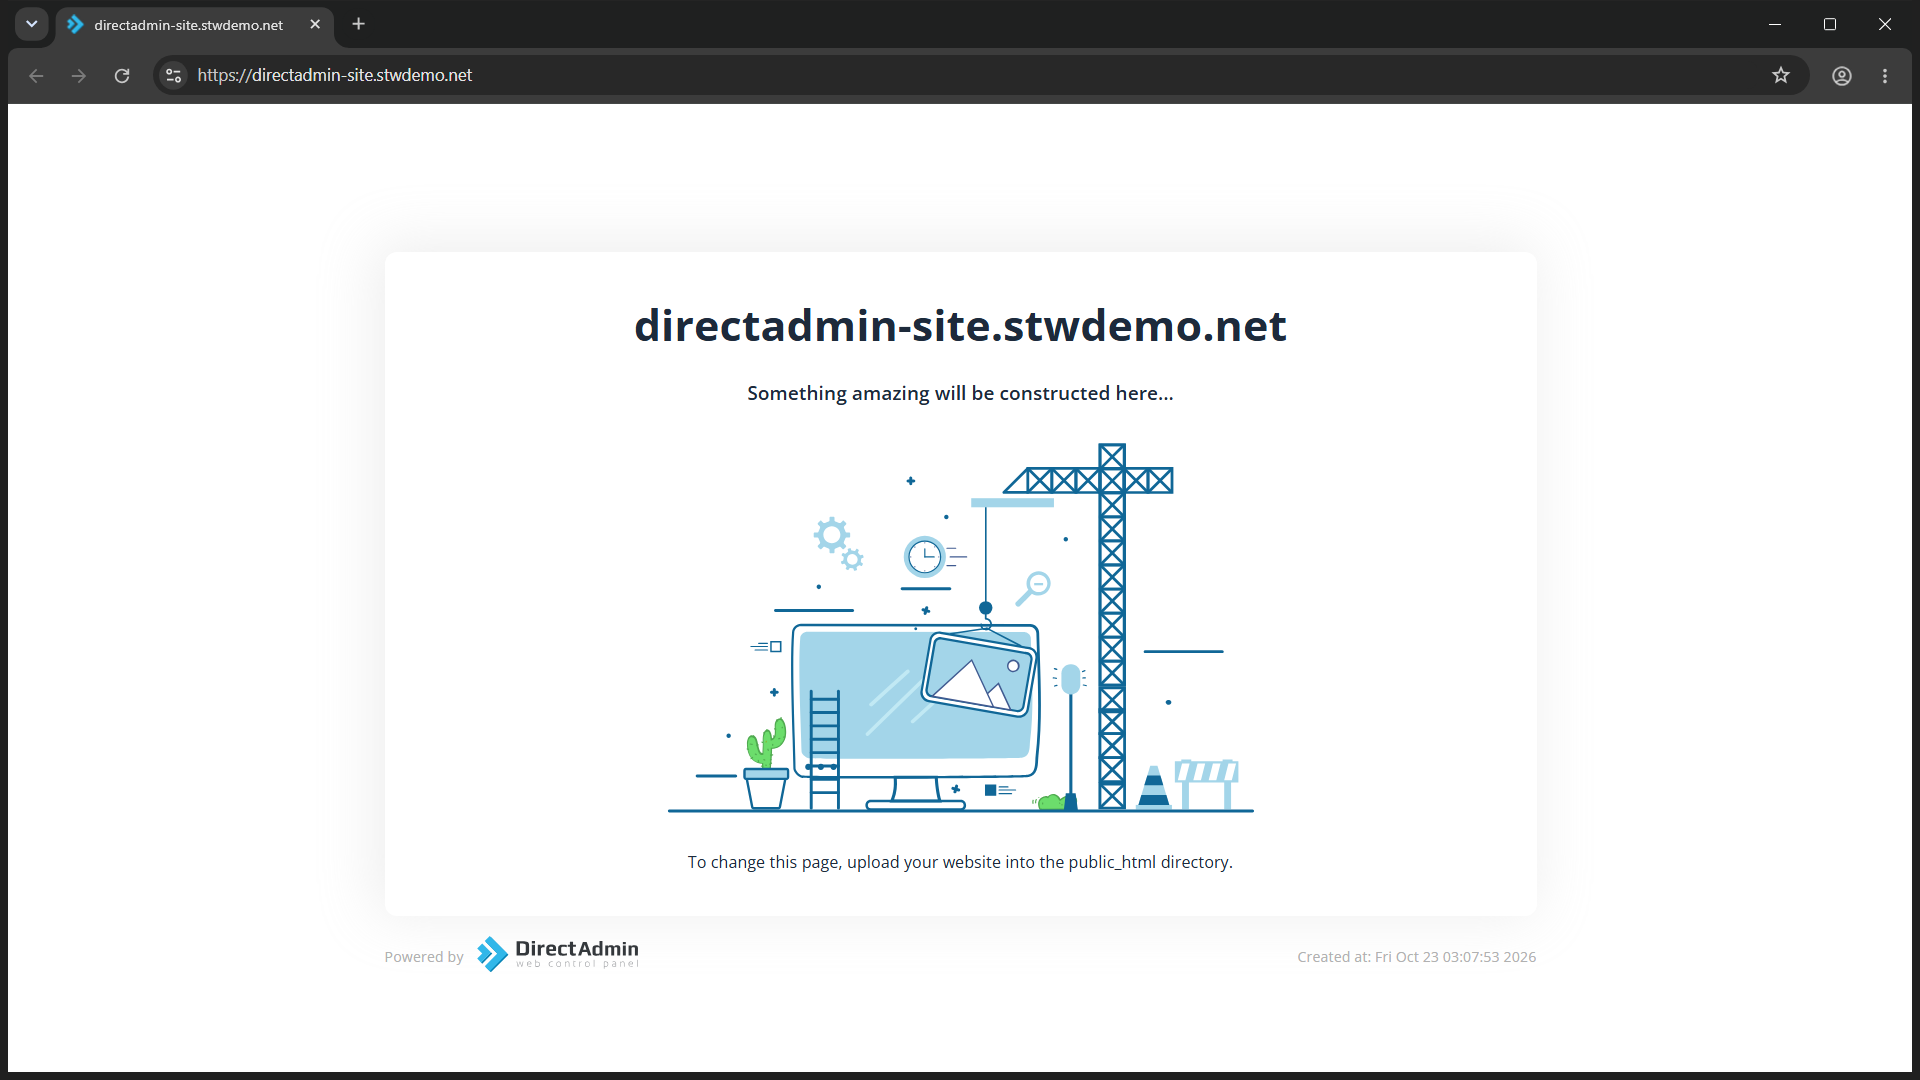
Visit https://site.example.com/. DirectAdmin’s placeholder page, Something amazing will be constructed here…, should load as a secure connection.
To test the redirect, request the plain HTTP address from a terminal.
curl -IL http://site.example.com/-I asks only for the response headers, and -L tells curl to follow any redirect it receives. The output should show two responses, first a 301 with Location: https://site.example.com/, then a 200 from the HTTPS address. Curl rejects untrusted certificates, so reaching that 200 also proves the certificate is valid.
One folder per domain. DirectAdmin gives each domain its own directory inside the user’s home, so for a user called
dasite, this site’s files live in/home/dasite/domains/site.example.com/public_html/. A second domain on the same account gets a separate folder beside it. The owner can replace the placeholder page through System Info & Files → File Manager.
Conclusion
Your server now has a secured admin level and one user whose site loads over HTTPS. You can add more users by following Step 5 if your licence has spare accounts.
Before importing real sites, schedule account backups under Admin Tools → Backup and Restore and send them to storage off the VPS. Our guide to securing, updating, and backing up a VPS control panel goes through restore tests and keeping DirectAdmin updated.
Next steps: