

Introduction
With page caching and image optimization in place, your site already loads faster than it did out of the box. Now we’ll show you the next layer of performance work: how your browser handles the CSS and JavaScript files that control your site’s appearance and behavior.
Every WordPress page loads multiple CSS files (which style the pages) and JavaScript files (which add interactivity). A site running ten plugins can easily send a dozen CSS files and as many JavaScript files to the browser before the visitor sees anything useful. Each of those files adds download time and processing overhead.
On STW WordPress hosting, AccelerateWP gives you direct control over CSS and JS optimization from inside your WordPress admin.
How CSS and JS Affect Page Speed
When a browser loads your page, it reads the HTML from top to bottom. Every time it encounters a CSS file, it pauses rendering until that file is fully downloaded and processed. The browser won’t display anything on screen until it knows how every element should look.
JavaScript causes an even longer pause. When the browser hits a <script> tag, it stops, downloads the file, parses it, and executes the code before resuming with the rest of the page. A single large JavaScript file from a slider plugin or analytics tracker can freeze the visible page for hundreds of milliseconds.
This is why a site with a fast server and properly sized images can still feel sluggish. Minifying those files (stripping unnecessary characters), deferring scripts (loading them after the page renders), and optimizing CSS delivery can all reduce your visitors’ wait.
File Optimization in AccelerateWP
On STW WordPress hosting, AccelerateWP includes a File Optimization page with granular control over CSS and JavaScript handling. Go to AccelerateWP → File Optimization in the WordPress admin sidebar to find it.
On some hosting configurations, this page may appear empty with only a Save Changes button. That means file optimization is handled at the server level and there’s nothing you need to configure here.
The File Optimization page is split into two sections: CSS Files and JavaScript Files. We’ll walk through each setting.
CSS settings
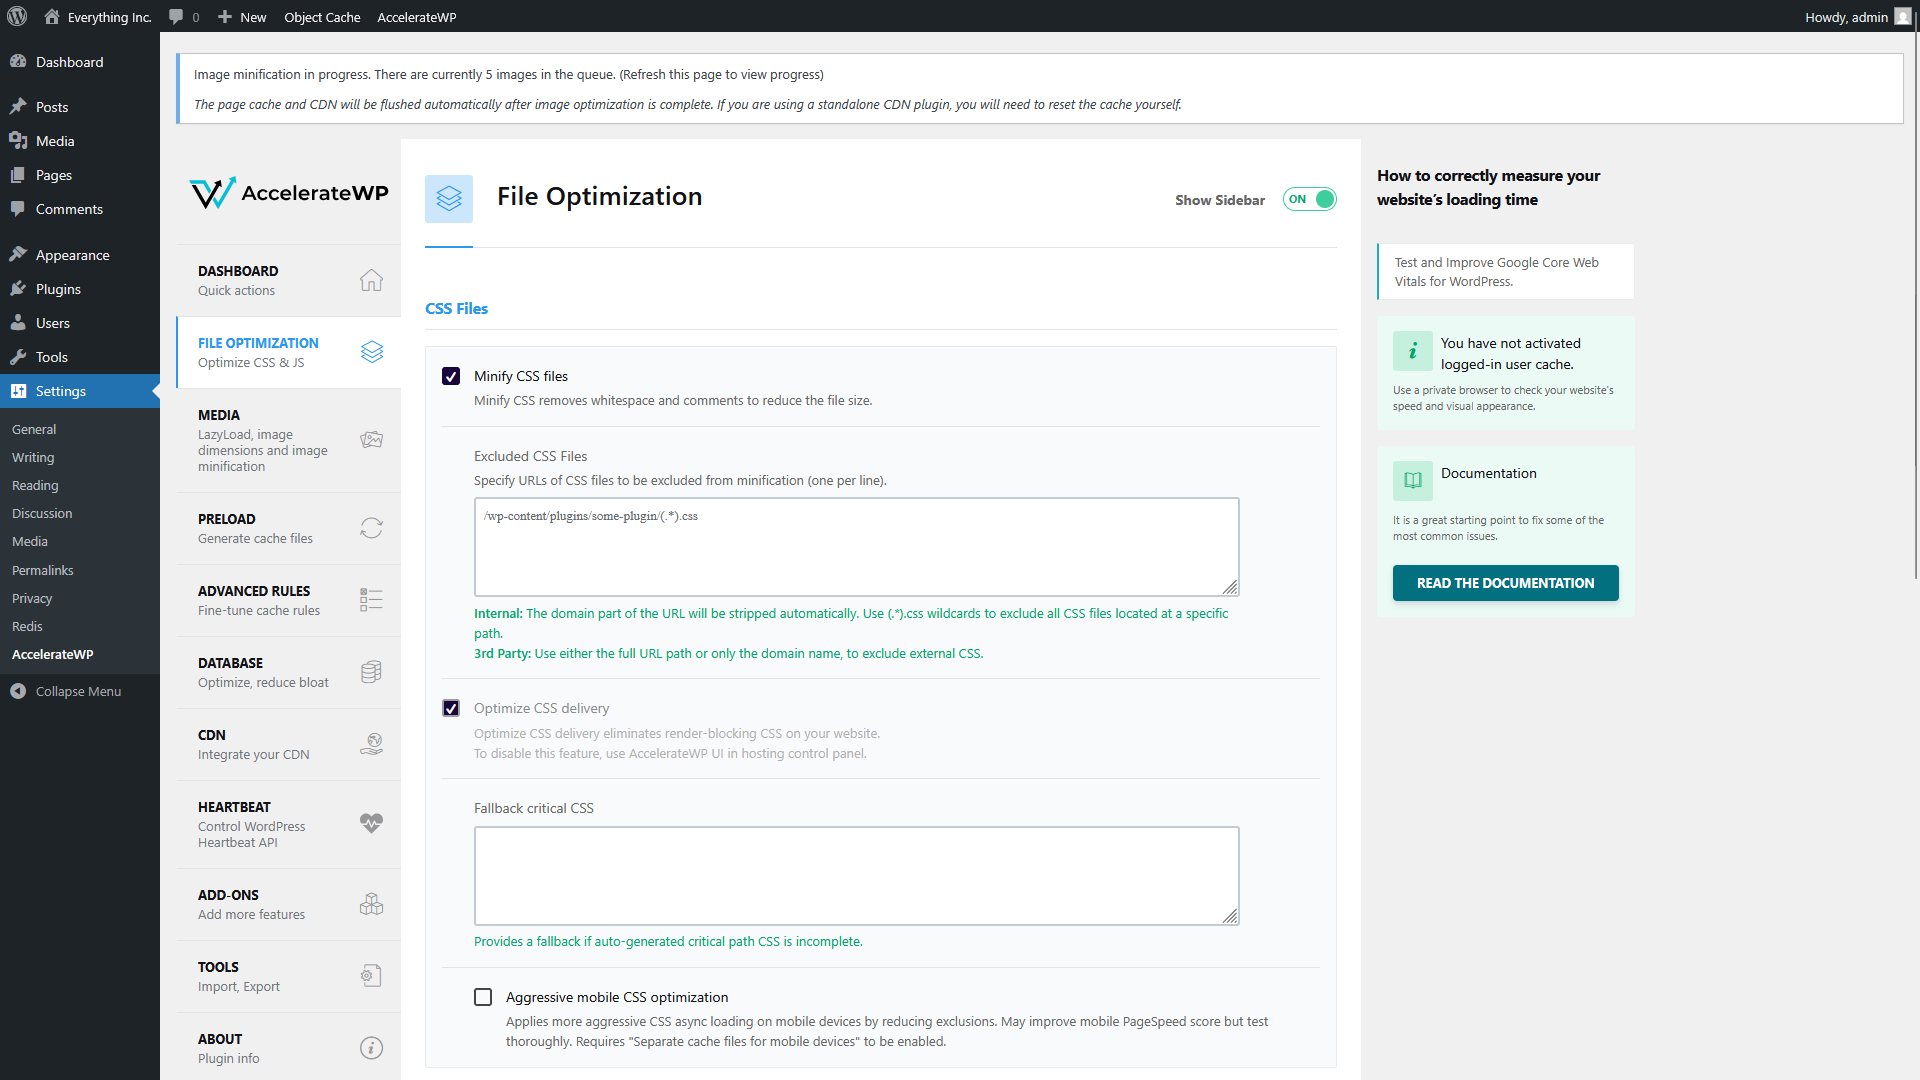
Minify CSS files strips whitespace, comments, and unnecessary formatting from your CSS files. A minified file delivers the same visual result at a smaller file size. A 120 KB stylesheet might drop to 85 KB after minification, with zero visible change. This is enabled by default, and you should leave it on.
Below the checkbox, the Excluded CSS Files field lets you exempt specific files from minification. You’d use this if a particular plugin’s CSS breaks when minified, which is rare but possible. Enter the file path (one per line) using the pattern shown in the placeholder, such as /wp-content/plugins/some-plugin/(.*).css. Most sites can leave this empty.
Optimize CSS delivery eliminates render-blocking CSS by loading styles asynchronously and injecting critical CSS inline. It’s often greyed out, meaning it’s managed at the server level.
Fallback critical CSS is a text field for providing manual critical CSS if the auto-generated version is incomplete. Critical CSS is the minimal styling needed to render the visible portion of your page before the full stylesheet finishes loading. If, in your testing, your above-the-fold content flashes unstyled briefly on load, you could paste fallback CSS here. Most sites won’t need to touch this field.
Aggressive mobile CSS optimization applies more aggressive async CSS loading on mobile devices. This can improve mobile PageSpeed scores but should be tested thoroughly. Leave this unchecked unless you’ve verified that your mobile layout handles async CSS loading without visual glitches.
JavaScript settings
Scroll down past the CSS section to find the JavaScript controls.
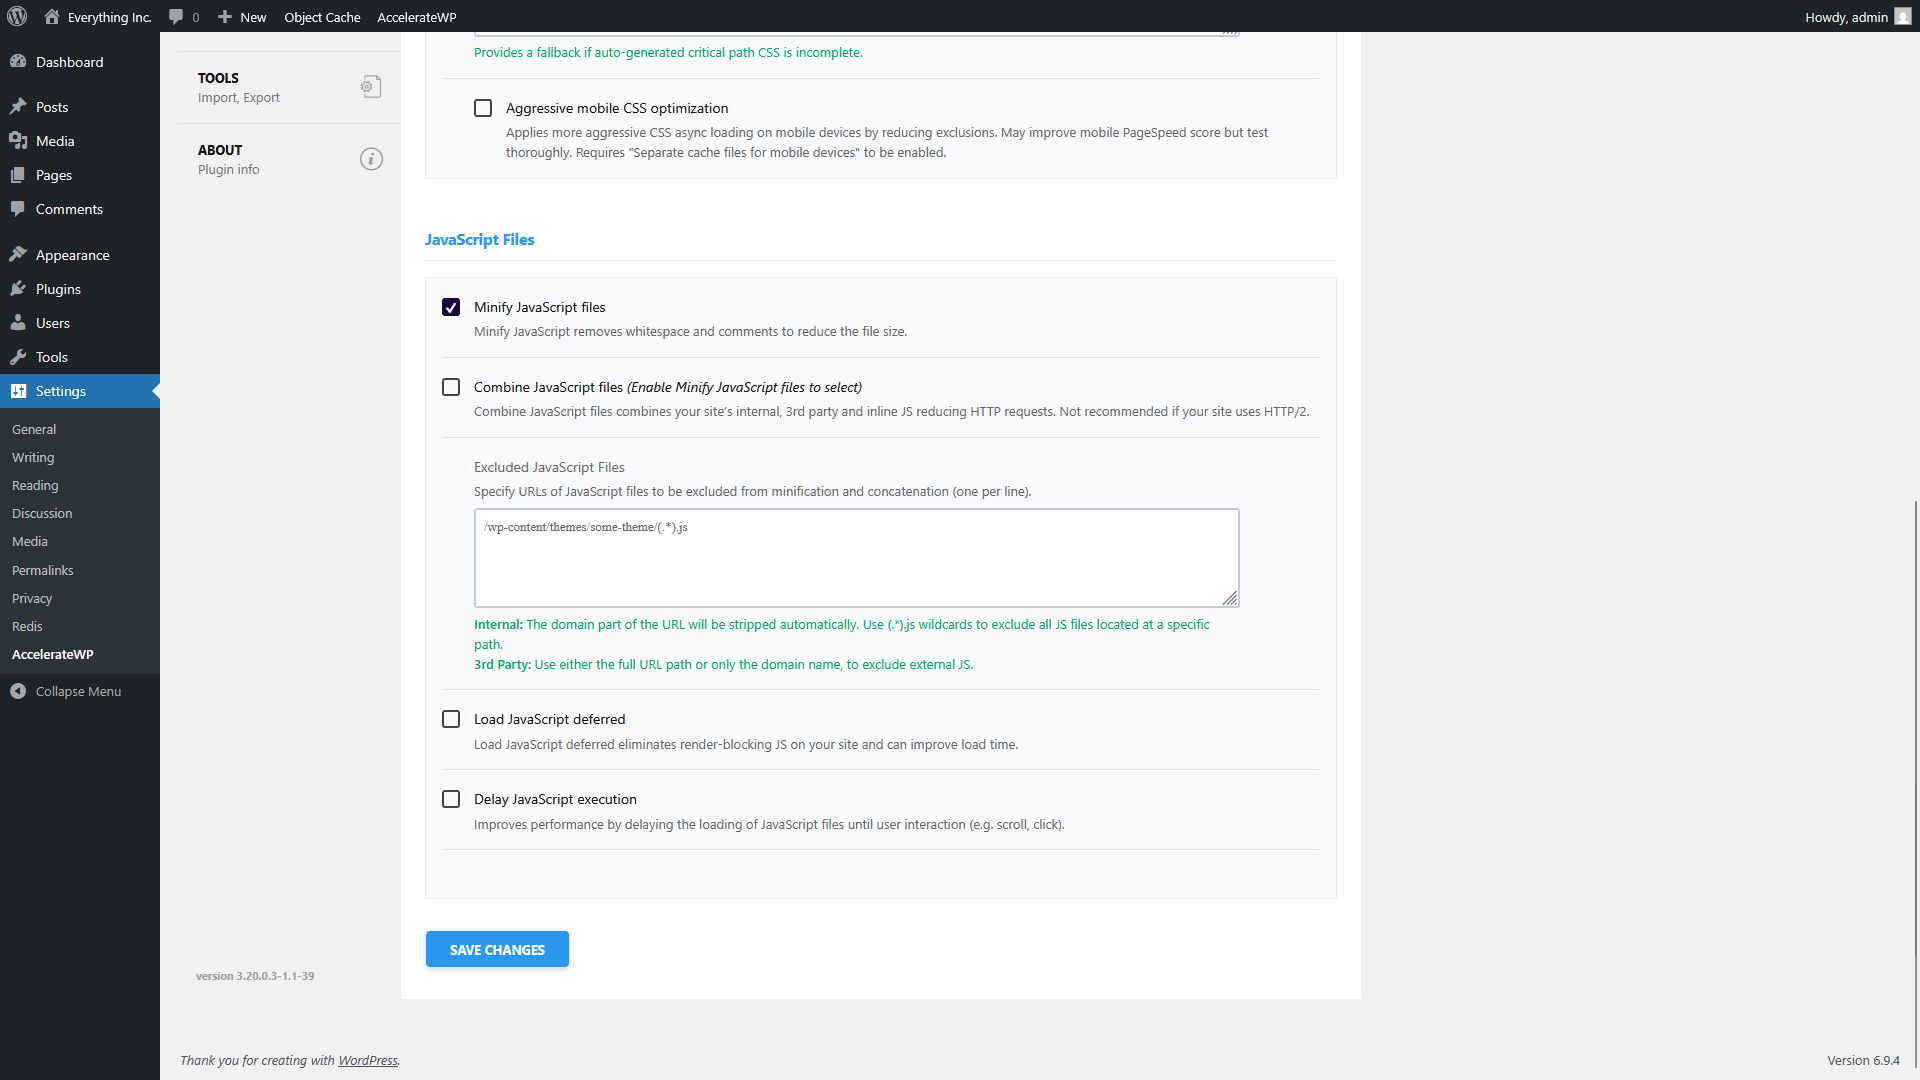
Minify JavaScript files works the same way as CSS minification. It strips whitespace and comments to shrink file sizes without changing behavior. This is enabled by default. Leave it on.
Combine JavaScript files merges your site’s internal, third-party, and inline JavaScript into fewer files. STW’s servers use HTTP/2 (and HTTP/3), which handle multiple simultaneous file downloads efficiently, so combining files provides almost no benefit. Combining also increases the risk of conflicts when scripts from different plugins are merged. We suggest to leave this unchecked.
Excluded JavaScript Files works the same as the CSS exclusion field. If a specific plugin’s JavaScript breaks after minification, add its file path here to exclude it. The placeholder shows the pattern: /wp-content/themes/some-theme/(.*).js.
Load JavaScript deferred tells the browser to download scripts in the background and execute them after the page finishes rendering. The page content appears first, and then interactive elements activate once their scripts run. Enabling this is a good idea, but test your site afterward. Scripts that control your header layout, mobile menu behavior, or above-the-fold animations can cause a brief flash or layout jump when deferred.
Delay JavaScript execution goes a step further than deferring. It prevents JavaScript files from loading at all until the visitor interacts with the page (scrolls, clicks, or taps). This produces the fastest initial load times because the browser downloads almost nothing until the visitor takes action. The tradeoff is that scripts dependent on page load (analytics tracking, chat widgets that auto-open, slider animations) won’t activate until that first interaction. Test carefully if you enable this, and consider using it alongside the exclusion field for any scripts that need to run immediately.
After adjusting your settings, click Save Changes at the bottom of the page.
Recommended starting configuration
| Setting | Default | Recommendation |
|---|---|---|
| Minify CSS files | On | On |
| Optimize CSS delivery | Managed by server | Leave as-is |
| Fallback critical CSS | Empty | Leave empty unless needed |
| Aggressive mobile CSS optimization | Off | Leave off until tested |
| Minify JavaScript files | On | On |
| Combine JavaScript files | Off | Off |
| Load JavaScript deferred | Off | Enable, then test |
| Delay JavaScript execution | Off | Enable only if comfortable testing |
The Heartbeat API
AccelerateWP also lets you control the WordPress Heartbeat API, a background feature that sends periodic requests from your browser to the server. Heartbeat powers things like autosave while you’re editing, real-time notifications, and post-locking (preventing two editors from overwriting each other’s work). By default, it fires every 15 to 60 seconds depending on context.
Go to AccelerateWP → Heartbeat in the sidebar.
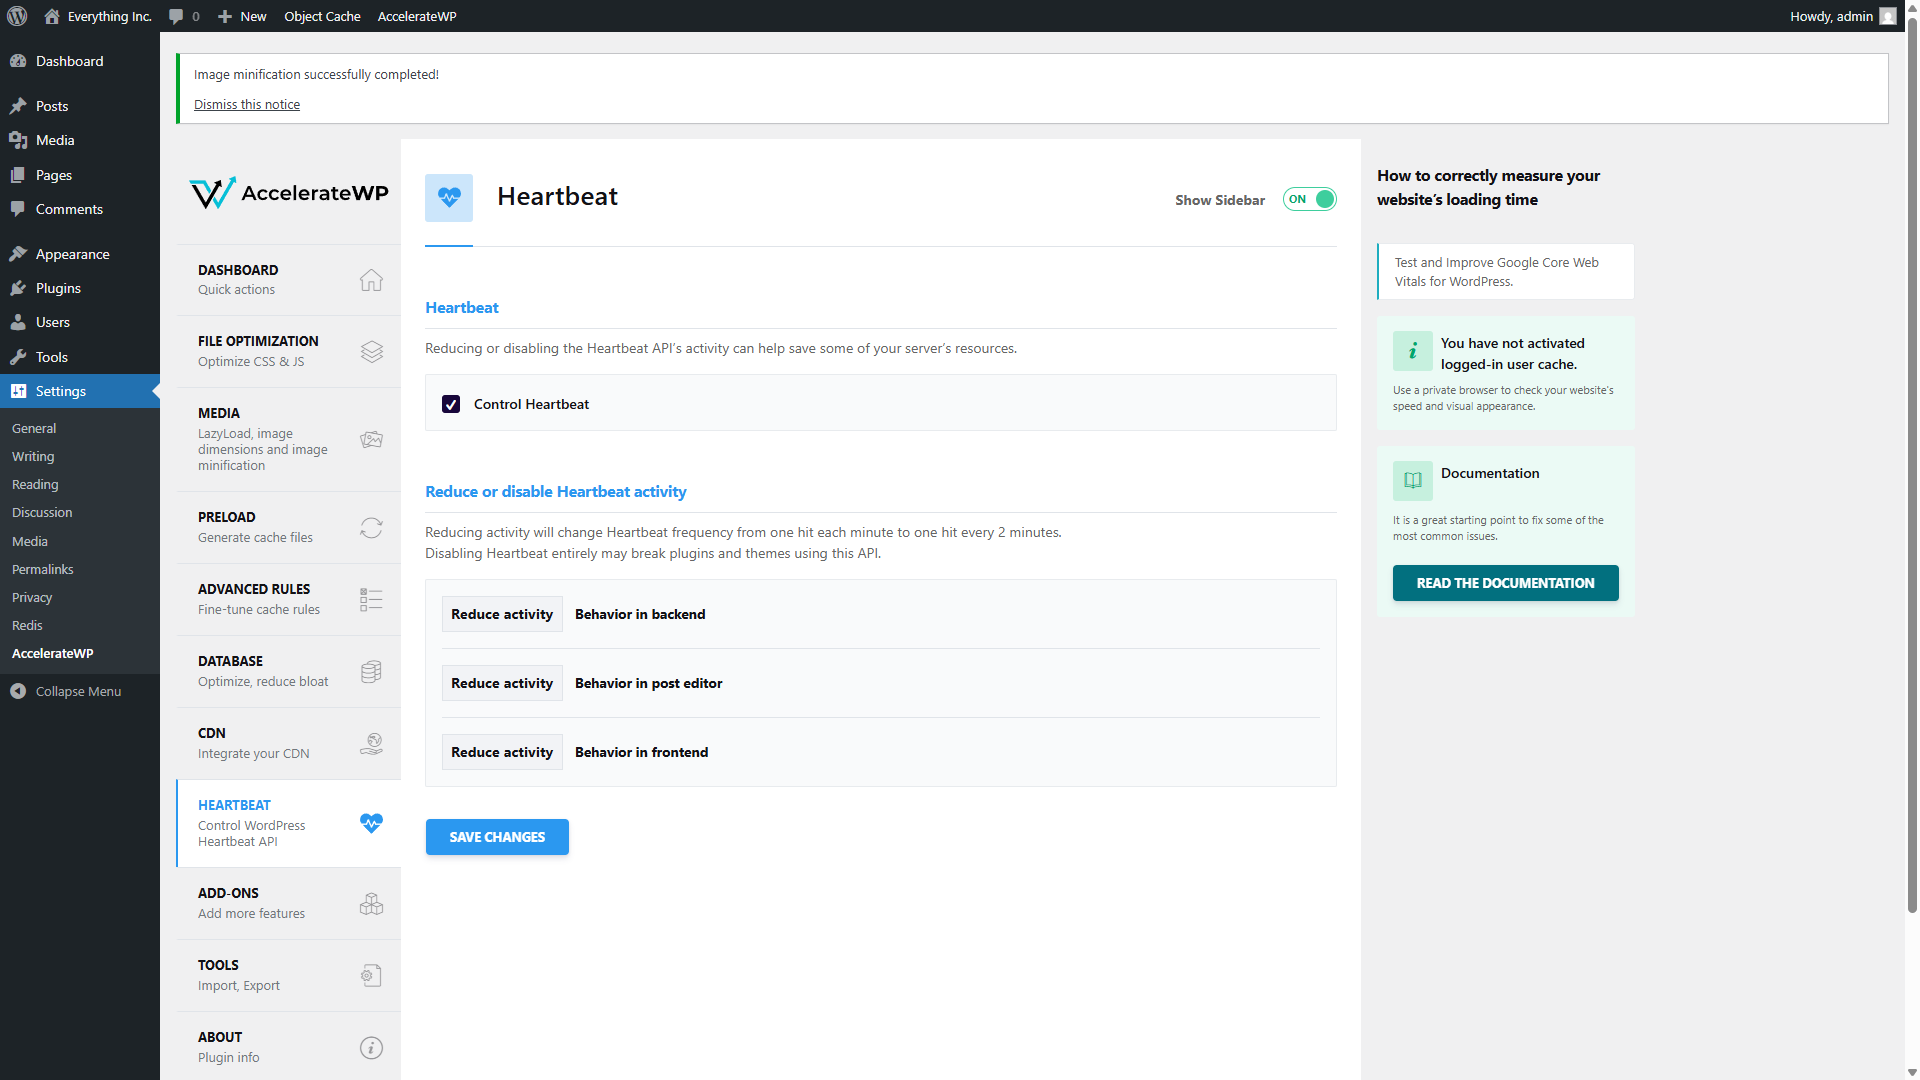
Control Heartbeat should be checked (it is by default). Three rows let you adjust the frequency in different parts of WordPress:
- Behavior in backend controls how often Heartbeat runs across the WordPress admin. “Reduce activity” changes the interval from once per minute to once every two minutes, which cuts background requests in half while keeping autosave and notifications functional.
- Behavior in post editor controls the interval while you’re editing posts or pages. Reducing it saves server resources and is fine for most workflows, though autosave will be slightly less frequent.
- Behavior in frontend controls Heartbeat on the public-facing site. Most sites don’t use Heartbeat on the front end at all, so visitors are generating unnecessary server requests. If you don’t run plugins that use real-time front-end features like live chat or collaborative editing, you can set this to “Disable.”
The default “Reduce activity” setting for all three is a safe starting point.
CDN Integration
AccelerateWP includes a CDN page for connecting your site to a Content Delivery Network. A CDN stores copies of your static files (CSS, JavaScript, images) on servers distributed around the world and serves them from whichever location is closest to each visitor, reducing download times for geographically distant users.
Go to AccelerateWP → CDN in the sidebar.
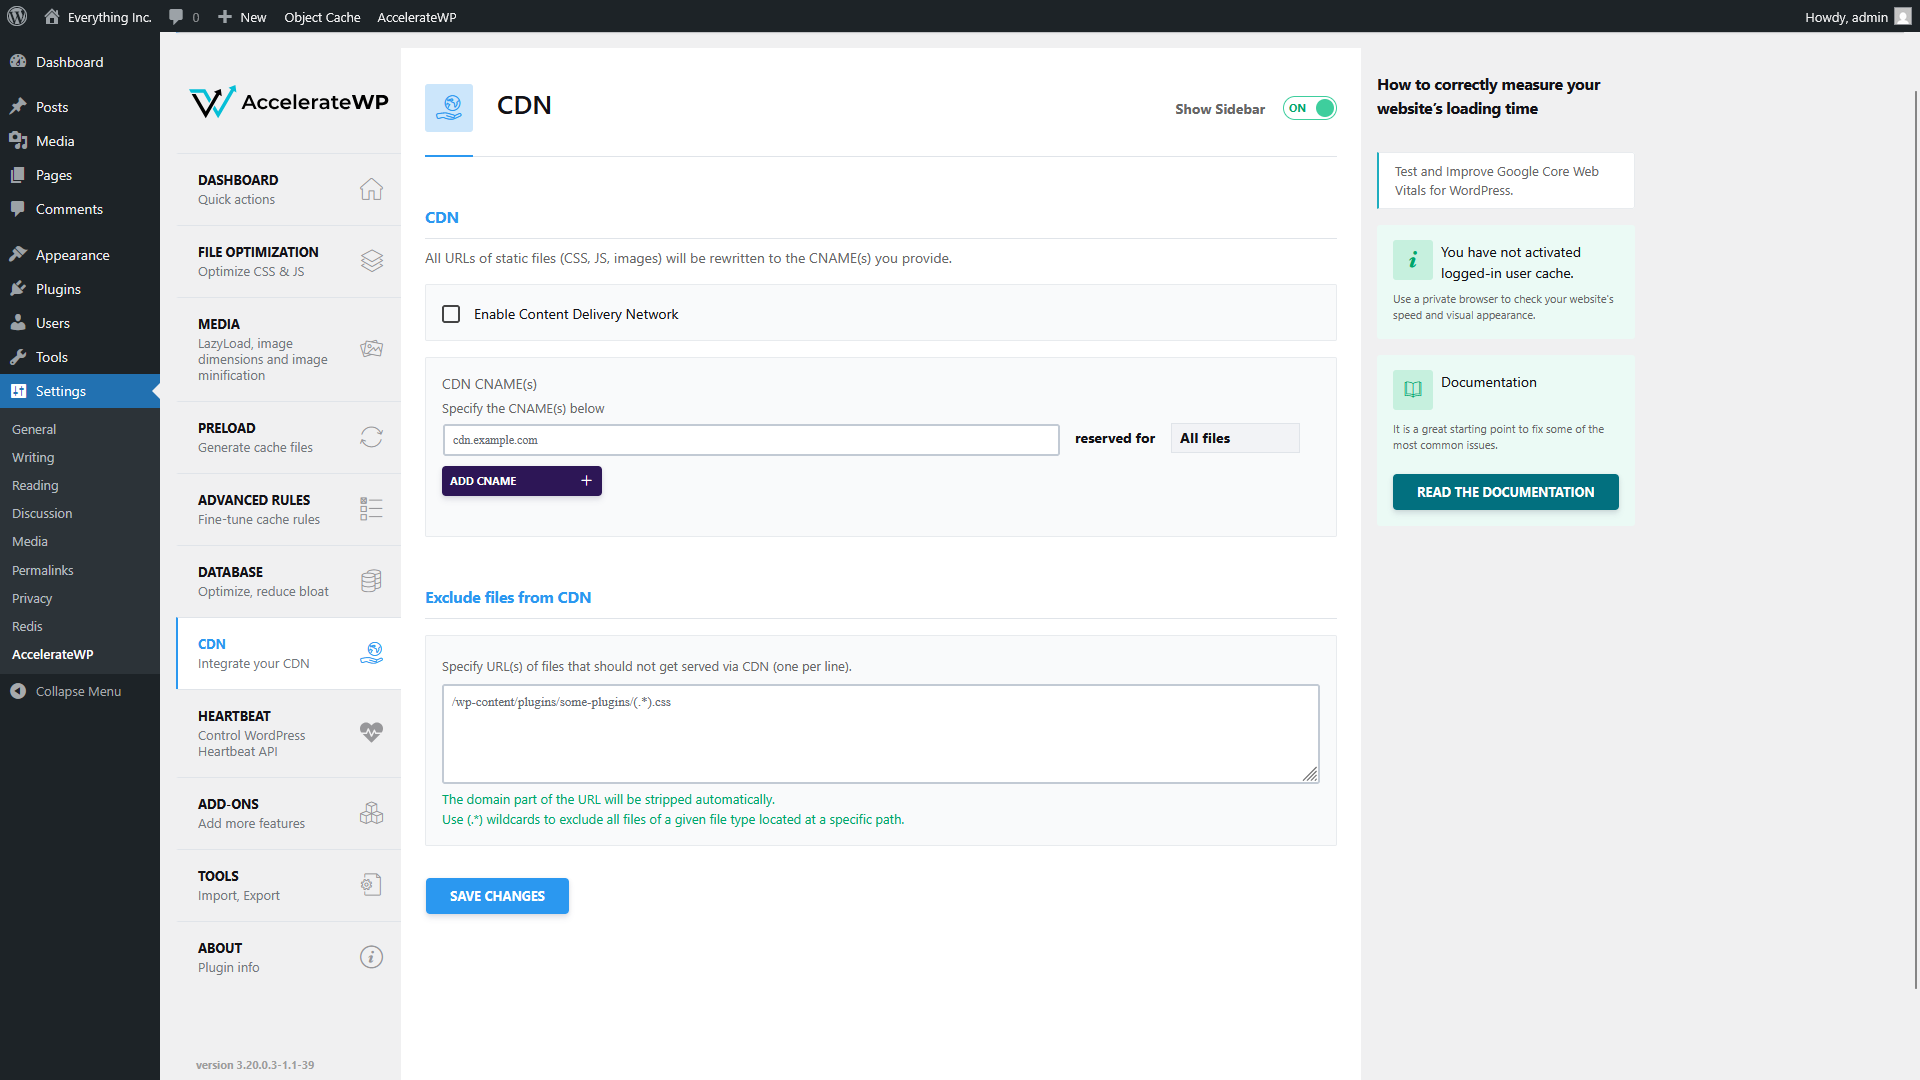
The Enable Content Delivery Network checkbox activates CDN rewriting. When enabled, AccelerateWP rewrites the URLs of your static files (CSS, JS, images) to point to the CDN domain you specify.
CDN CNAME(s) is where you enter the CDN subdomain that your CDN provider gives you, something like cdn.yourdomain.com. The “reserved for” dropdown lets you specify whether that CNAME handles all files or only specific file types.
Exclude files from CDN lets you list files that should always be served from your own server. If a particular plugin’s CSS or JavaScript causes issues when served through a CDN, you can exclude it here.
Most small WordPress sites won’t need a CDN. If your visitors are concentrated in the same region as your server, a CDN adds complexity without meaningful speed improvement. A CDN becomes worthwhile when you have a geographically spread audience or heavy static content. If you’ve signed up for a CDN service like Cloudflare or BunnyCDN and have a CNAME ready, this is where you connect it.
If You’re on Shared Hosting
If your hosting plan doesn’t include AccelerateWP, you’ll need a WordPress plugin to handle CSS and JS optimization.
Autoptimize
Autoptimize (free) is a focused optimization plugin. After installing and activating it through Plugins → Add New Plugin, go to Settings → Autoptimize.
The main settings page has three checkboxes at the top:
- Optimize JavaScript Code enables JS minification. Check this box.
- Optimize CSS Code enables CSS minification. Check this box.
- Optimize HTML Code minifies your page’s HTML markup. The savings are small compared to CSS and JS, but it’s safe to enable.
Below the main checkboxes, Autoptimize offers Aggregate JS-files and Aggregate CSS-files options. Leave both unchecked. Aggregation (combining files) is the same as AccelerateWP’s “Combine” option, and the same risks apply on HTTP/2 servers.
Under the JavaScript options, look for Also defer or Defer render-blocking JS. Enable this to defer JavaScript execution, which gives you the same benefit as AccelerateWP’s deferred loading option.
Click Save Changes and Empty Cache after adjusting settings.
WP-Optimize
WP-Optimize (free, with a premium tier) bundles caching, image compression, database cleanup, and CSS/JS optimization in one plugin. After installing it, go to WP-Optimize → Minify in the admin sidebar.
Toggle minification on, then configure CSS and JavaScript settings separately. Enable minification for both. WP-Optimize lets you exclude specific files from minification, which is useful if a particular plugin’s CSS or JS breaks after being processed.
WP-Optimize also includes a deferred JavaScript option under its advanced settings. Enable it and test your site.
If you’re already using a caching plugin from our guide to caching and site speed, check for overlap. WP Super Cache is purely a page caching plugin and doesn’t include minification, so it’s safe to pair with Autoptimize or WP-Optimize. W3 Total Cache has its own Minify section for CSS, JS, and HTML (off by default, but you may have enabled it). If you turn on minification in W3 Total Cache, don’t also run a separate minification plugin. Two tools minifying the same files causes conflicts.
Testing After Changes
CSS and JavaScript optimization settings can break your site’s appearance or functionality. A deferred script might control your mobile menu, or a minified file might break because of a syntax edge case the optimizer can’t handle. Testing before you move on is part of the process.
Open a private browser window (Ctrl+Shift+N in Chrome, Ctrl+Shift+P in Firefox) and load your homepage. Private mode loads the page without cached files or a logged-in session, so you see what a new visitor would see. Check that the layout looks correct, menus open properly, and any interactive elements (sliders, forms, dropdowns) still work.
Then navigate beyond the homepage. Load a blog post, your contact page, and any page with forms or embedded content. Different pages pull in different plugin scripts, so a problem that doesn’t appear on the homepage might show up on the contact form or a WooCommerce product page.
Check on mobile too, either on your phone or in your browser’s responsive mode (F12, then toggle the device toolbar). Mobile menus and touch interactions sometimes break differently than desktop versions because they rely on JavaScript that may now be deferred.
If something looks wrong, go back and disable the last setting you changed. Confirm the site recovers, then investigate. You might need to add the offending file to the exclusion list and re-enable the setting. The goal is to end up with minification and deferral active for everything except the specific files that don’t tolerate it.
Conclusion
CSS and JavaScript optimization reduces page load time by shrinking file sizes and changing when the browser processes scripts. On STW WordPress hosting, AccelerateWP’s File Optimization page gives you control over minification, CSS delivery, JavaScript deferral, and file exclusions. On shared hosting, Autoptimize or WP-Optimize provide the same capabilities through a plugin.
Start with minification (low risk, enabled by default in AccelerateWP), then enable JavaScript deferral and test your site. Leave file combining off. The Heartbeat API settings and CDN integration round out the optimization options available in AccelerateWP. The next tutorial covers the final piece of performance maintenance: keeping your WordPress database clean.
Next steps: