

Introduction
HestiaCP is a free, open-source hosting control panel released under the GPLv3 licence. It gives you a browser interface for managing websites, databases, users, and backups on your own server.
In our guide to choosing a VPS control panel, we discussed how it has no paid edition, includes a one-click WordPress installer, and switches on automatic updates by default.
In this install guide, we’ll take Hestia from a fresh Ubuntu VPS to a working website.
What You’ll Need
- A fresh VPS with root access. We tested HestiaCP 1.10.5 on an STW GP34 (two vCPUs, 4 GB of RAM, and 120 GB of storage) running Ubuntu 24.04 LTS. Hestia expects a clean system, so don’t install it over another panel or an existing web server setup. You’ll also need the VPS’s public IP address from your provider’s server details.
- A domain whose DNS you can edit. This guide uses
panel.example.comfor Hestia andsite.example.comfor the website. Replace both with names under your own domain. - SSH access or your provider’s console. You can run the installation over SSH from your own computer or in your provider’s browser console. STW’s GP3 documentation covers both.
- A password manager and an authenticator app. The administrator and the website owner get separate passwords, and the administrator login also asks for a code from your authenticator if you set up two-factor authentication.
Email stays with your existing provider. Hestia can install a full mail server, but we’ll leave its mail components out, so your current mailbox service and mail DNS records stay as they are. Part 2 explains why we recommend hosted email for this setup.
Step 1 — Prepare a Fresh Ubuntu VPS
If the VPS already holds anything you need, such as site files, database exports, or service configuration, copy it off the server first. Reinstalling Ubuntu erases everything on the server, and it will remove existing snapshots too, so only an off-server copy keeps that data safe.
Reinstall Ubuntu
If your VPS already runs a fresh Ubuntu installation, skip to the next section. Otherwise, use your provider’s OS reinstall option. On STW GP3, it’s on the VPS management page.
- Log in to my.servetheworld.net, go to Products, and click Manage on your VPS.
- Open Reinstallation.
- Select the
ubuntu2404template (or your choice of supported OS). - Read the warning that existing data will be erased, enter a strong new root password, and click Confirm once.
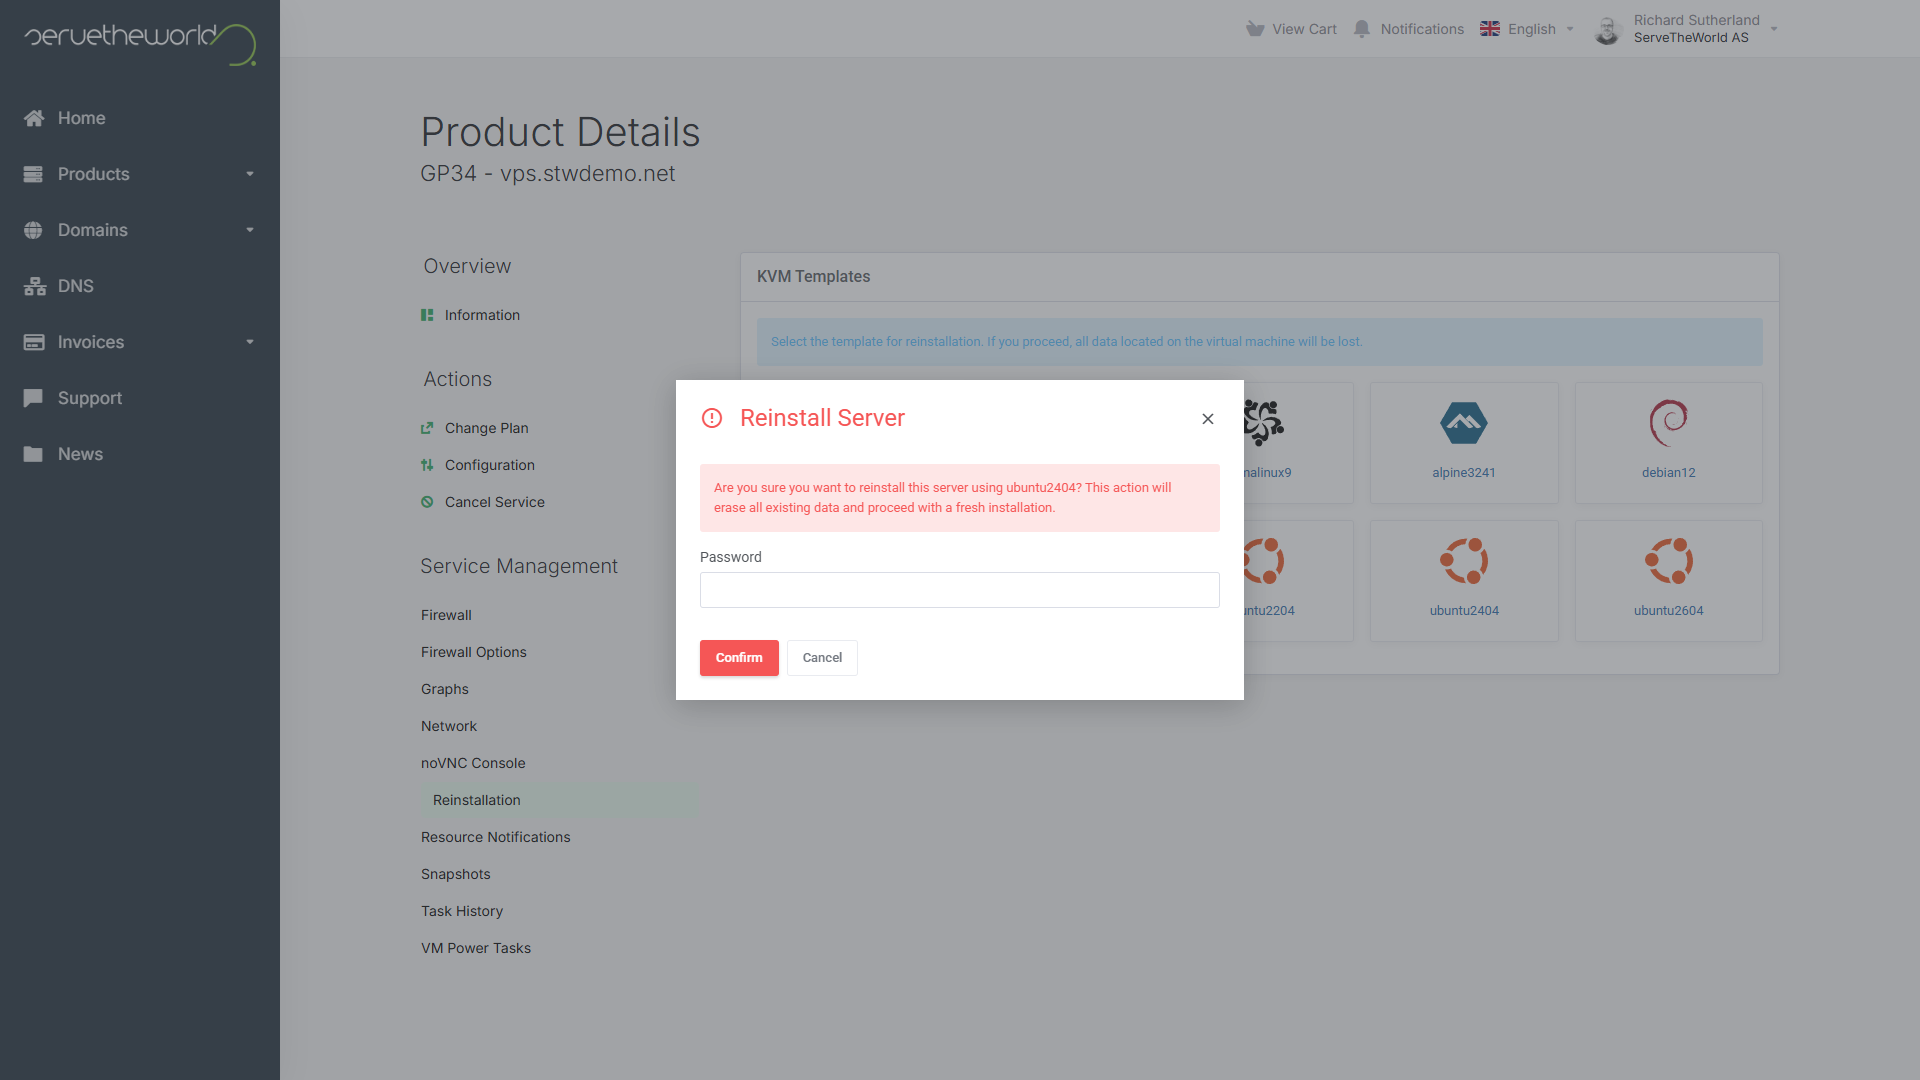
The rebuild takes a few minutes, and the portal will show Page Not Available while this runs. Wait and reload the page, and don’t submit a second reinstall.
Connect and update
You can run this guide’s commands over SSH or in your provider’s console. On STW, click noVNC Console on the VPS management page and log in as root with the new password. (noVNC is a browser-based console that gives you a direct keyboard and screen connection to the VPS.)
Run the commands that will install any available updates and reboot:
apt update
apt full-upgrade
reboot
Take a snapshot
Once you’ve reconnected, take a snapshot so you can return to this clean starting point if the installation goes wrong. In the STW control panel, open Snapshots and click Take Snapshot. Name it something like before-hestia-install, leave Include RAM unchecked, click Confirm, and wait for the snapshot to show Active.
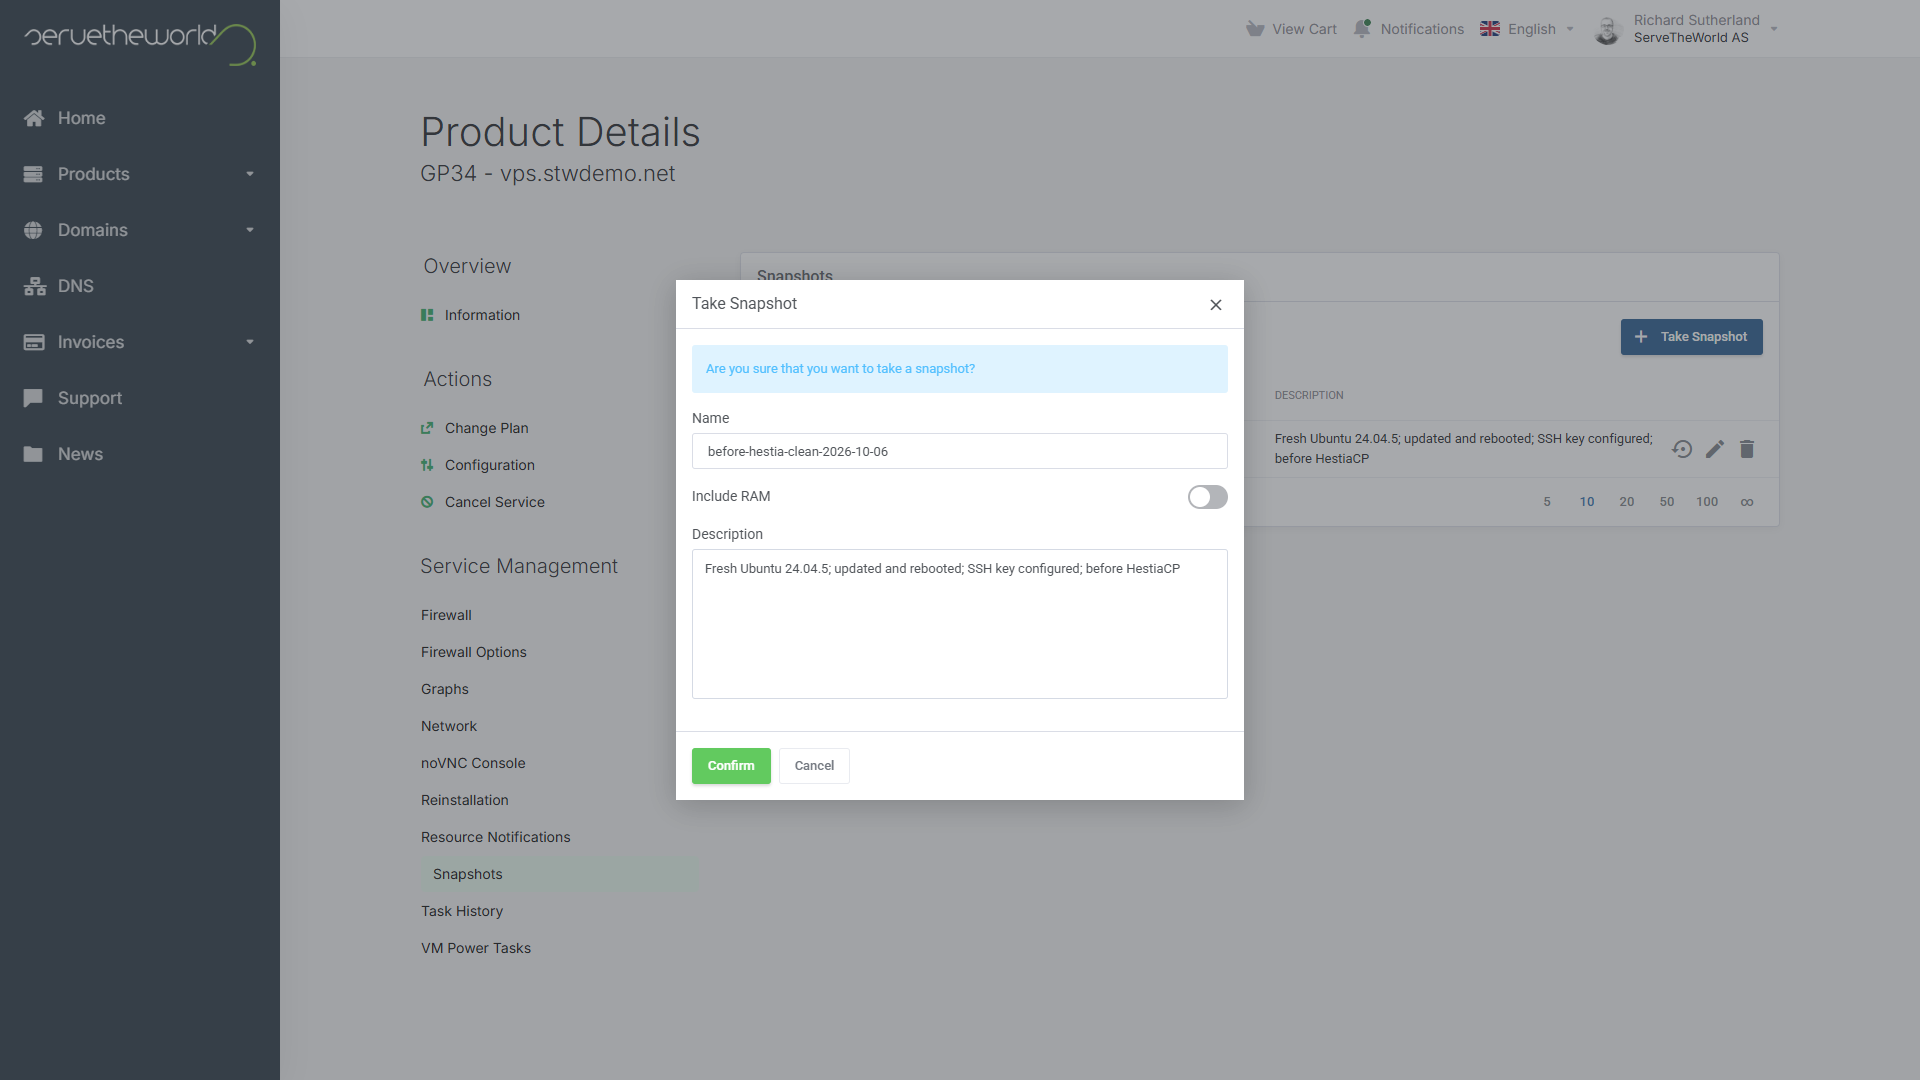
If the installation goes wrong later, choose the snapshot’s Rollback action and start again from Step 3. A rollback replaces everything currently on the VPS, and if the VPS is stopped afterwards, click Start on the VPS management page.
STW GP3 snapshots expire after seven days, so keep off-server backups of important data, too. Our Ubuntu upgrade tutorial covers snapshots and backups in more detail.
Step 2 — Point the Panel and Website Names at the VPS
Hestia can only get a security certificate for a name that already points at your VPS, so create both DNS records before you install. Each is an A record, which points a name at an IPv4 address. Add them at whichever DNS provider currently serves your domain.
| Record Type | Name | Value | TTL |
|---|---|---|---|
| A | panel |
Your VPS’s IPv4 address | 300 |
| A | site |
Your VPS’s IPv4 address | 300 |
If STW handles your DNS, add each record in STW’s central DNS as a draft from the domain’s zone, then publish both together. Our guide to changing DNS safely walks through the steps. Leave mail records and unrelated website records alone, and only add an AAAA record if you’ve set up the VPS’s IPv6 address.
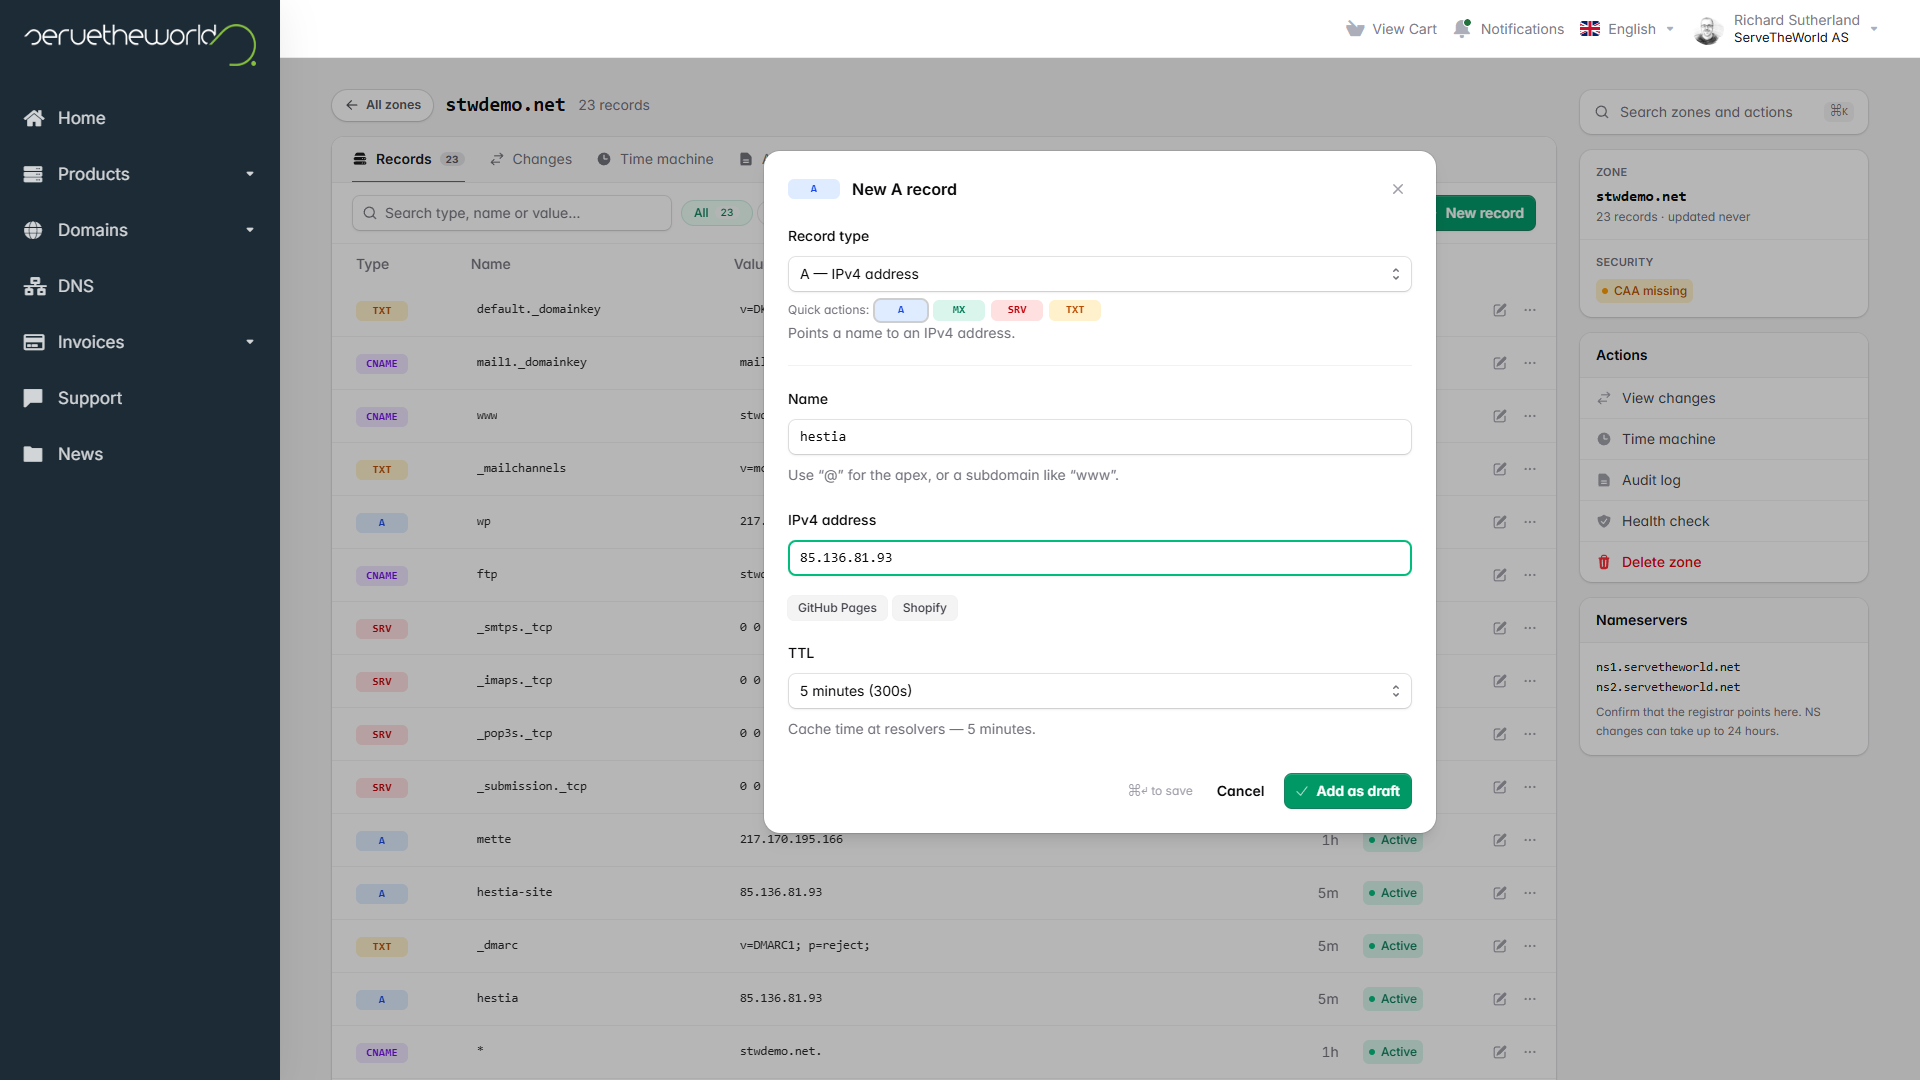
From your computer, you can check both names against a public resolver.
nslookup panel.example.com 8.8.8.8
nslookup site.example.com 8.8.8.8
Both should return your VPS’s address. The lookup checks Google’s public resolver and bypasses your computer’s local DNS cache.
Using Linux?
diggives the same check with tidier output, such asdig +short panel.example.com @8.8.8.8.
Step 3 — Install HestiaCP
Beyond installing the panel, Hestia’s installer also installs the server software that the panel manages, such as the programs that serve websites, store databases, and handle email. By default it installs everything, but you should switch off the parts you don’t need with options on the command line. Each service you leave out is one less thing running on the server that needs updates.
For a server that hosts websites, we’ll keep the following for this example:
- Web serving. Nginx and Apache work together to serve your sites, and PHP-FPM for running PHP applications such as WordPress.
- Databases. MariaDB stores the data for sites that need a database.
- Security. Hestia’s firewall controls which connections reach the server, and Fail2Ban blocks addresses after repeated failed logins.
We’ll leave out the DNS server and the mail services, because DNS and email can stay with your existing providers. We’ll also skip the FTP server, since Hestia’s built-in file manager handles uploads, and the API, which lets other software control Hestia. The official installation guide lists every option if you want a different mix.
On the VPS, enter the command to download the official installer.
wget https://raw.githubusercontent.com/hestiacp/hestiacp/release/install/hst-install.shChoose an admin username
The Hestia administrator username must not belong to an existing Linux user or group. STW’s image already has an admin group, so we’ll use hestiaadmin instead. If the installer rejects your choice, pick another unused name.
Run the installer
Replace panel.example.com with your panel name, then run the installer as root with the following command.
bash hst-install.sh \
  --hostname panel.example.com \
  --username hestiaadmin \
  --named no \
  --exim no \
  --dovecot no \
  --sieve no \
  --clamav no \
  --spamassassin no \
  --vsftpd no \
  --api no
The installer won’t run alongside conflicting software. STW’s Ubuntu 24.04 image includes the UFW firewall package, installed but inactive, and the installer will flag it. You can check UFW’s status and preview what removing it would do with the following commands:
ufw status verbose
apt-get -s remove ufw
If UFW is inactive and the preview shows that removing UFW would remove only that package, let the installer remove it when it asks. If UFW is enforcing rules, or the installer names other services, investigate first. Don’t use --force to push past a conflict you can’t explain.
After you’ve confirmed the removal of ufw, the installer lists the components it will install and asks you to confirm. It then asks for an administrator password and a contact email. Save the password in your password manager, and avoid sharing your screen while the installer runs, because it will display the password in plain text.
Installation can take a few minutes. When it finishes, note the panel URL and accept the reboot prompt.
Step 4 — Open the Panel and Secure the Administrator
After the reboot, open https://panel.example.com:8083/. Port 8083 is Hestia’s administration port. Hestia requests a Let’s Encrypt certificate for the panel as it boots, so the browser should connect without a warning.
If the page doesn’t load, check that the panel hostname resolves to your VPS and that any provider firewall allows TCP port 8083. Then check the services on the VPS. Each should report active.
systemctl is-active hestia nginx apache2 mariadb fail2banIf the browser shows a certificate warning, don’t type any credentials. Fix the DNS first, then request the panel certificate again as root, following Hestia’s SSL documentation.
/usr/local/hestia/bin/v-add-letsencrypt-hostOnce the panel loads securely, enter hestiaadmin, click Next, then enter your password and click Login.
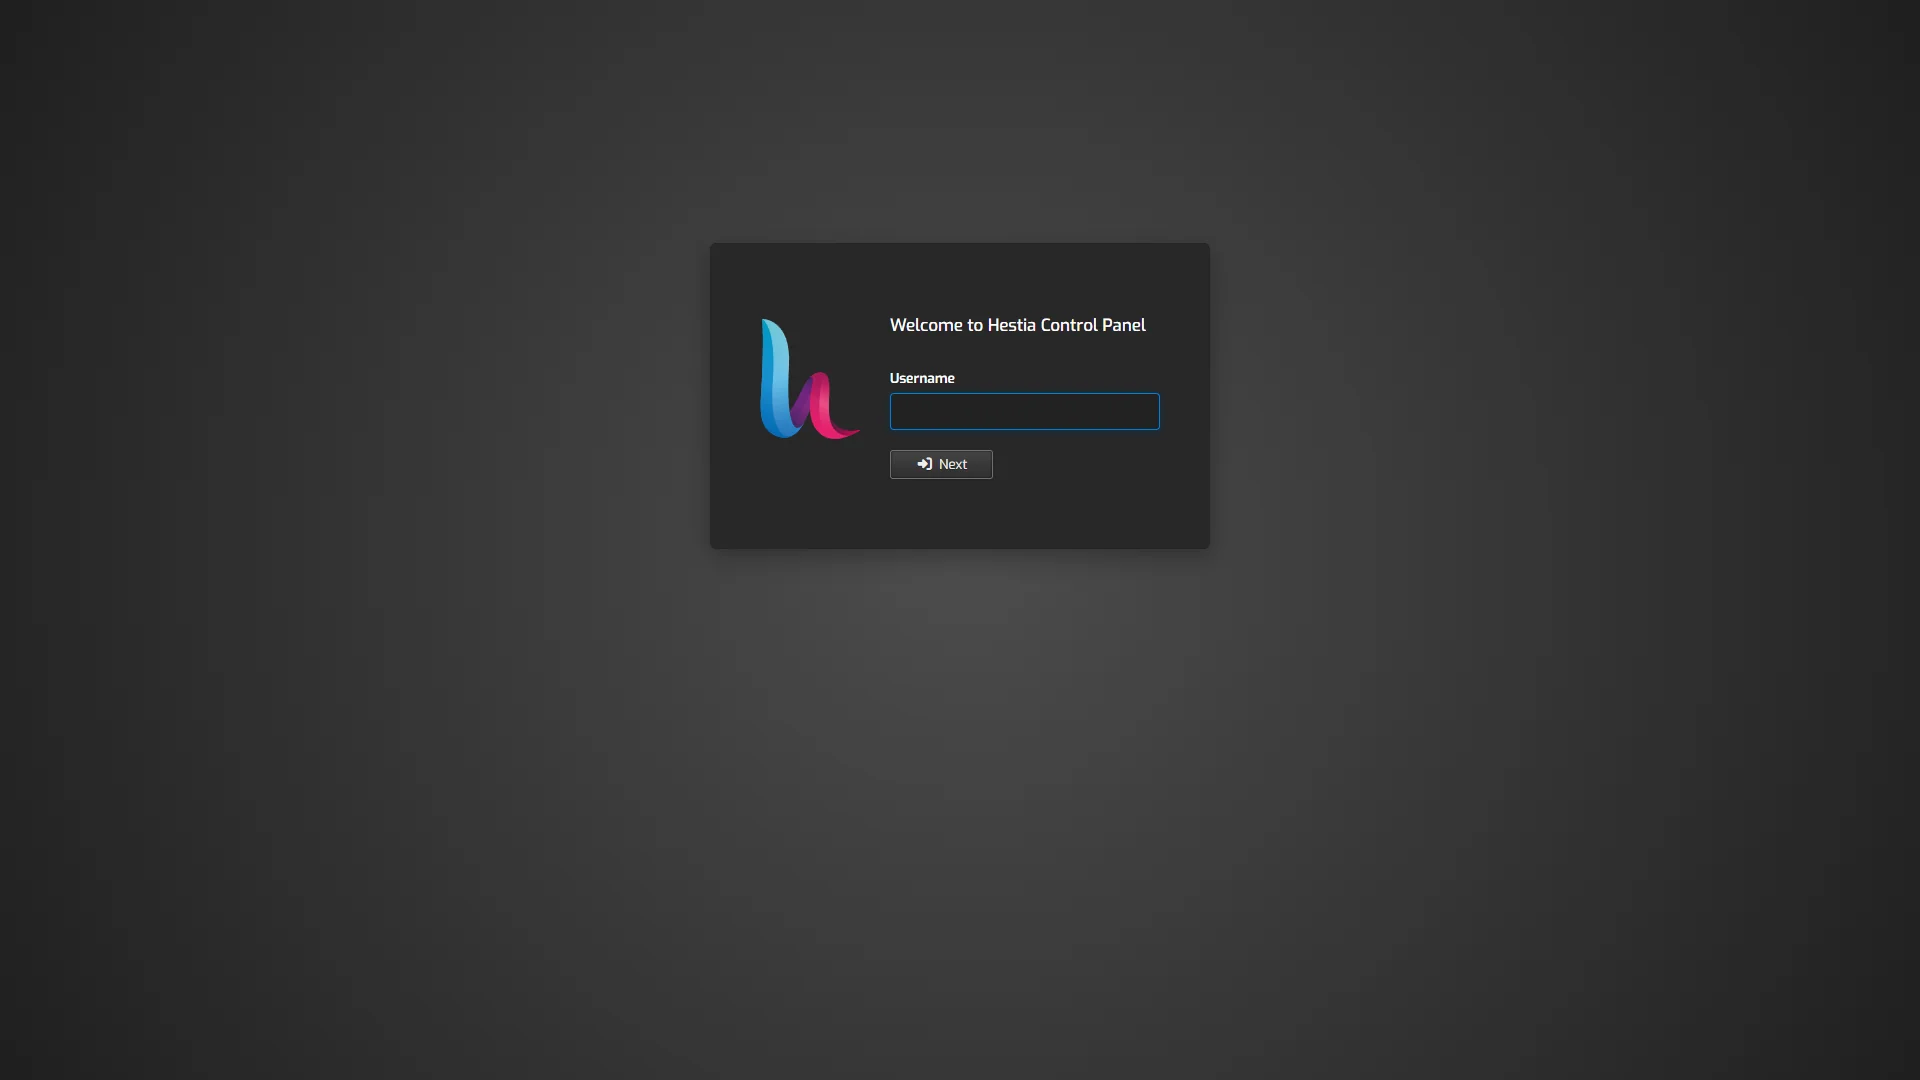
Optional: Enable two-factor authentication
Click the account icon in the top-right corner, select Enable two-factor authentication, and click Save. Scan the QR code Hestia shows with your authenticator app, and store the Account Recovery Code somewhere safe.
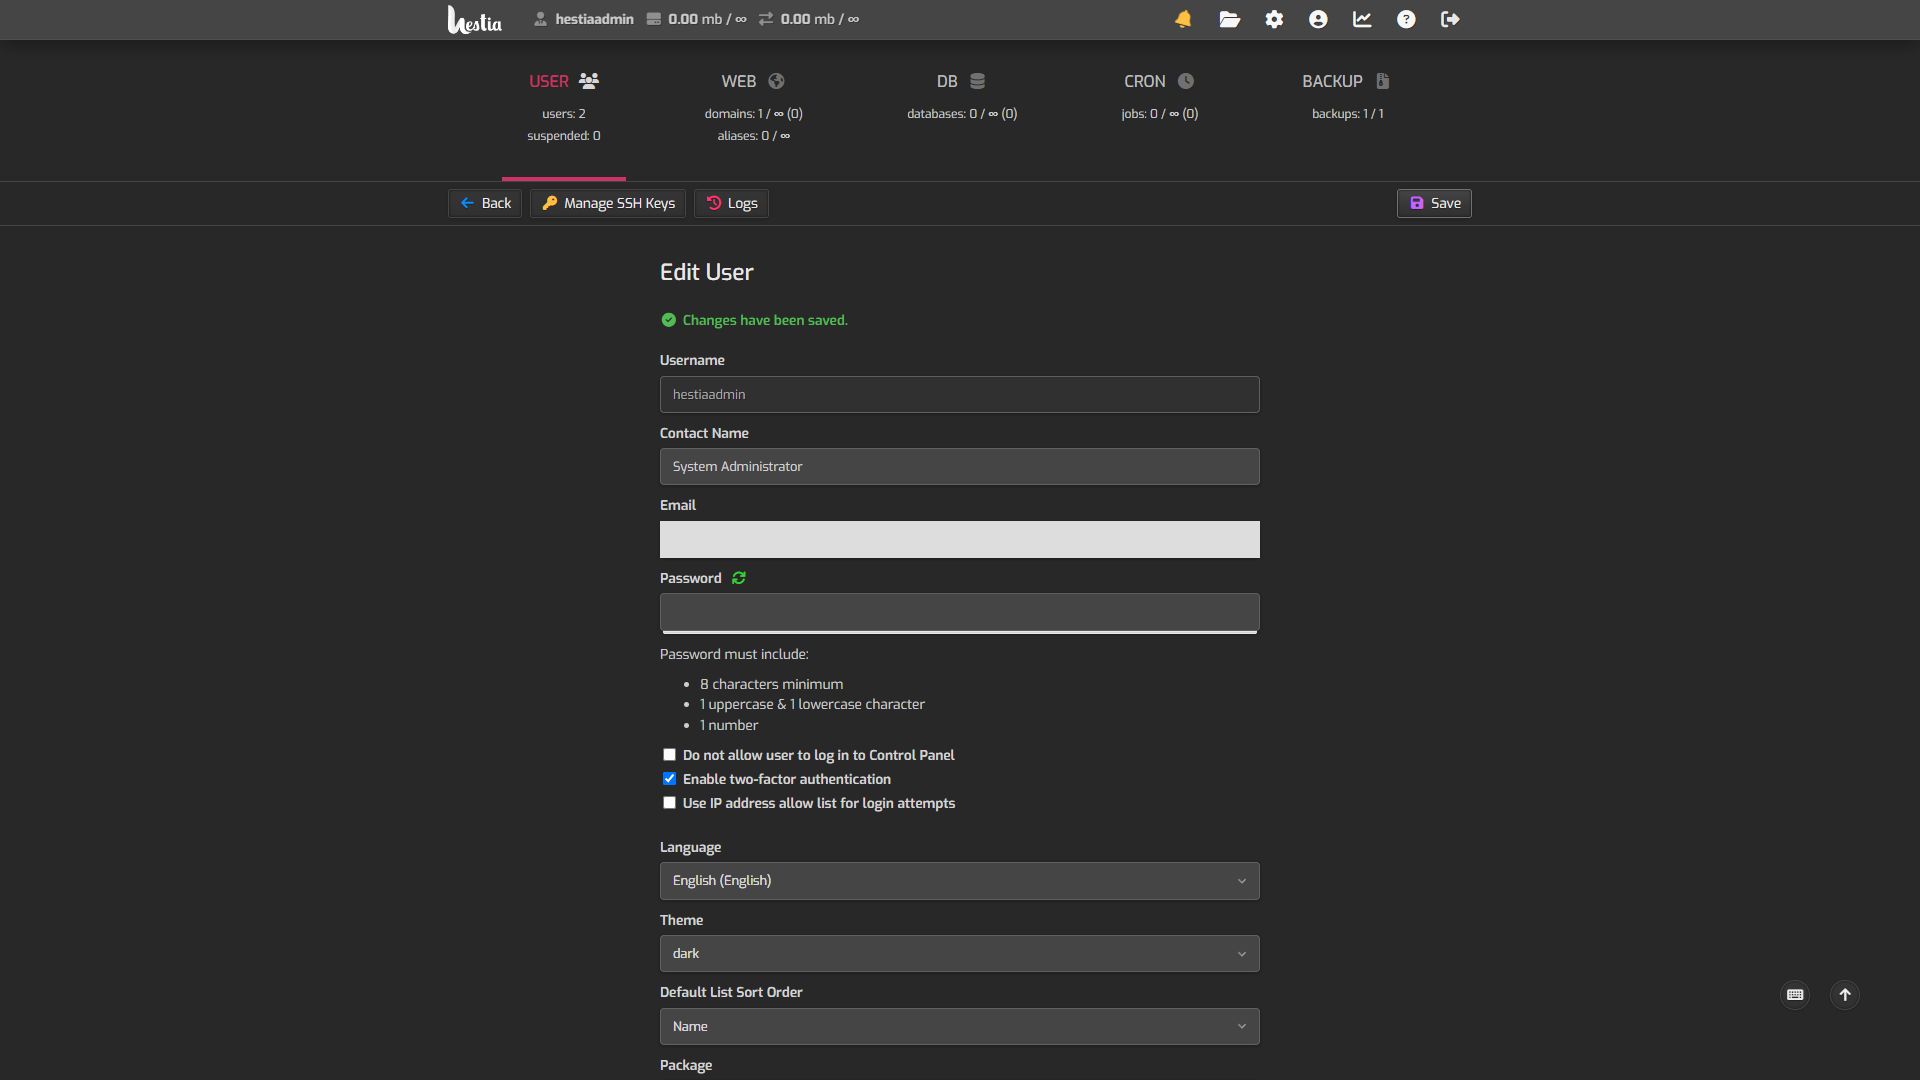
Log out and sign in again to check that Hestia asks for the code. Test it now, while you still have root access to fix things if it fails. Hestia’s account documentation covers the other security settings. Restricting administrator access to a fixed IP address is a strong option for security, but it’s only practical if you always connect from the same address.
Step 5 — Create a Separate Website Owner
Websites belong under a regular user account that can manage its own domains and files without the administrator’s full server controls.
- In the administrator view, open USER → Add User.
- Enter
siteowneror similar as the username, with a contact name, an email address, and a separate strong password. - Choose the User role and the Default package.
- Leave the welcome email and credentials options unchecked.
- Click Save.
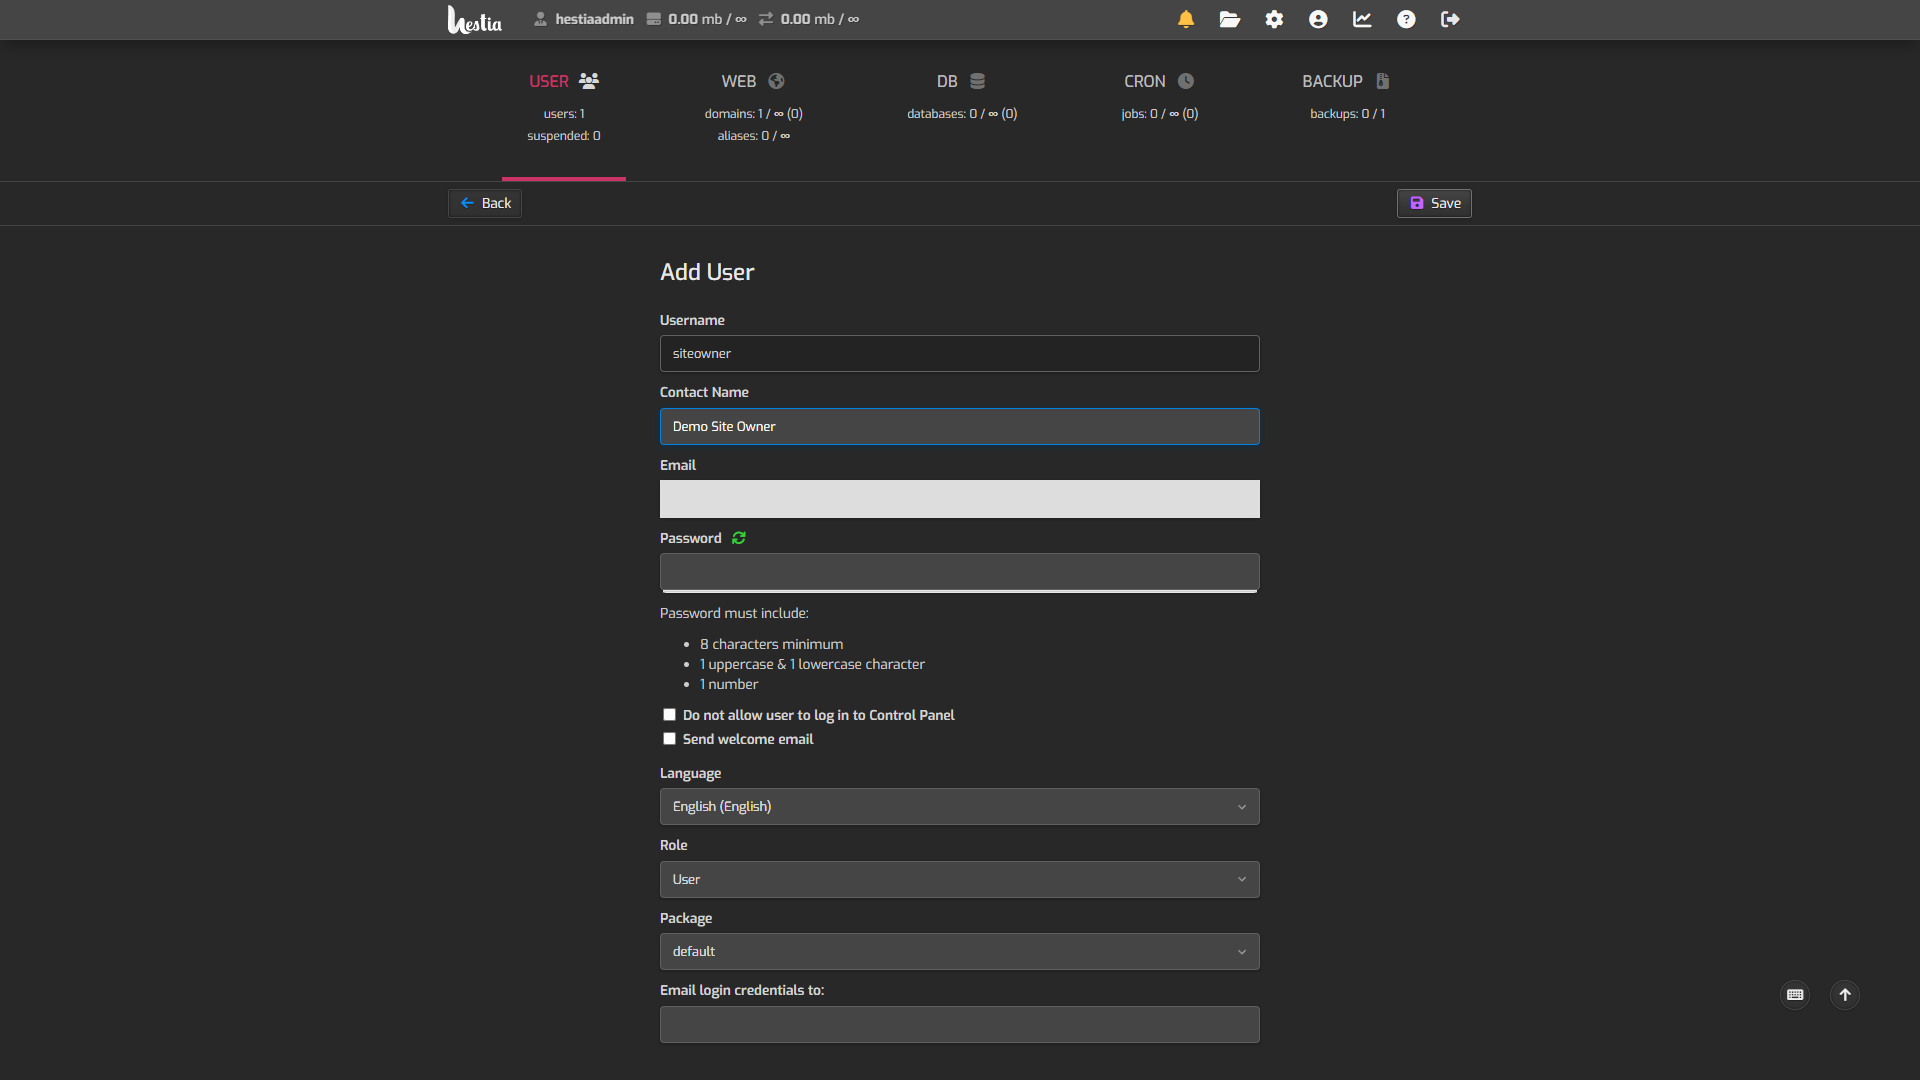
Back in the user list, click siteowner to work as that user in the control panel. (Log out (siteowner) returns you to the administrator view.)
Step 6 — Add the Website and Enable HTTPS
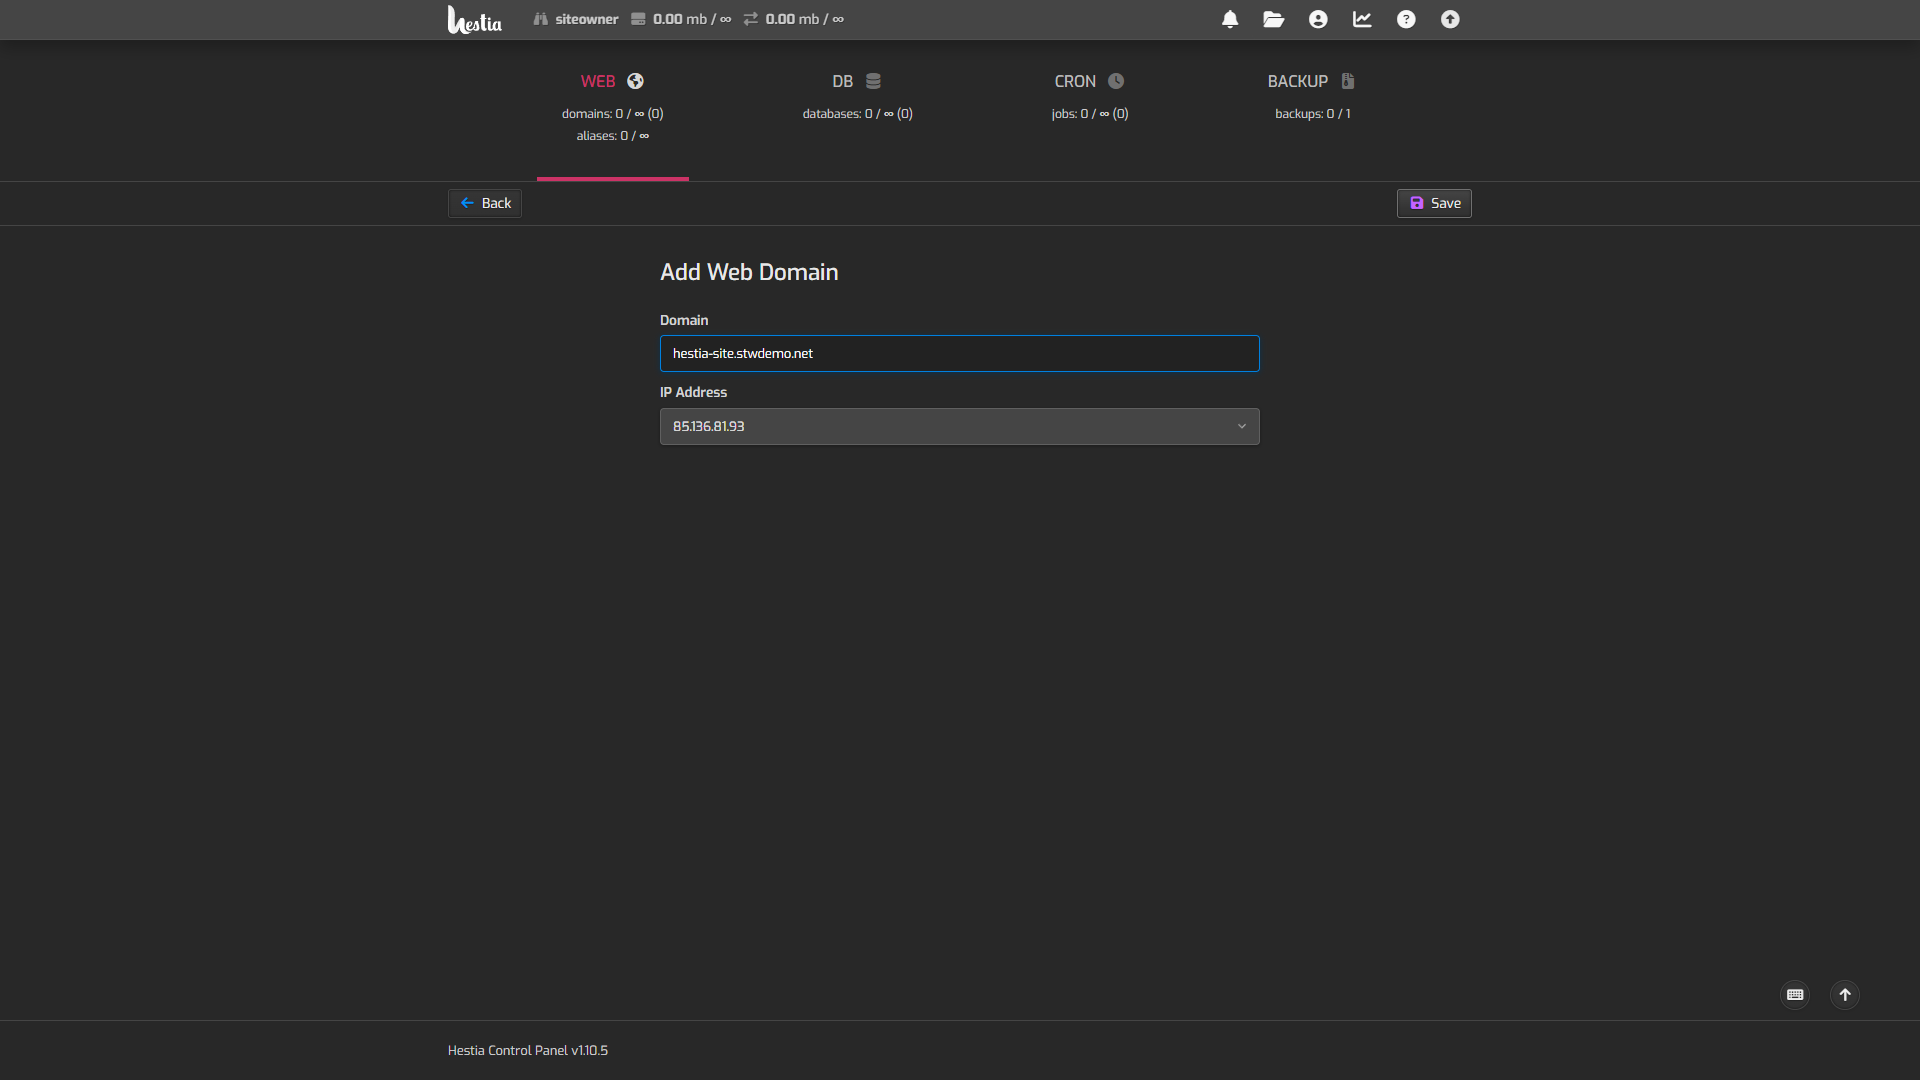
As siteowner, open WEB → Add Web Domain. Enter site.example.com, check that the IP address shown is your VPS’s address, and click Save. Leave aliases empty for now.
Open the new domain in the list, select these three options, and click Save.
- Enable SSL for this domain
- Use Let’s Encrypt to obtain SSL certificate
- Enable automatic HTTPS redirection
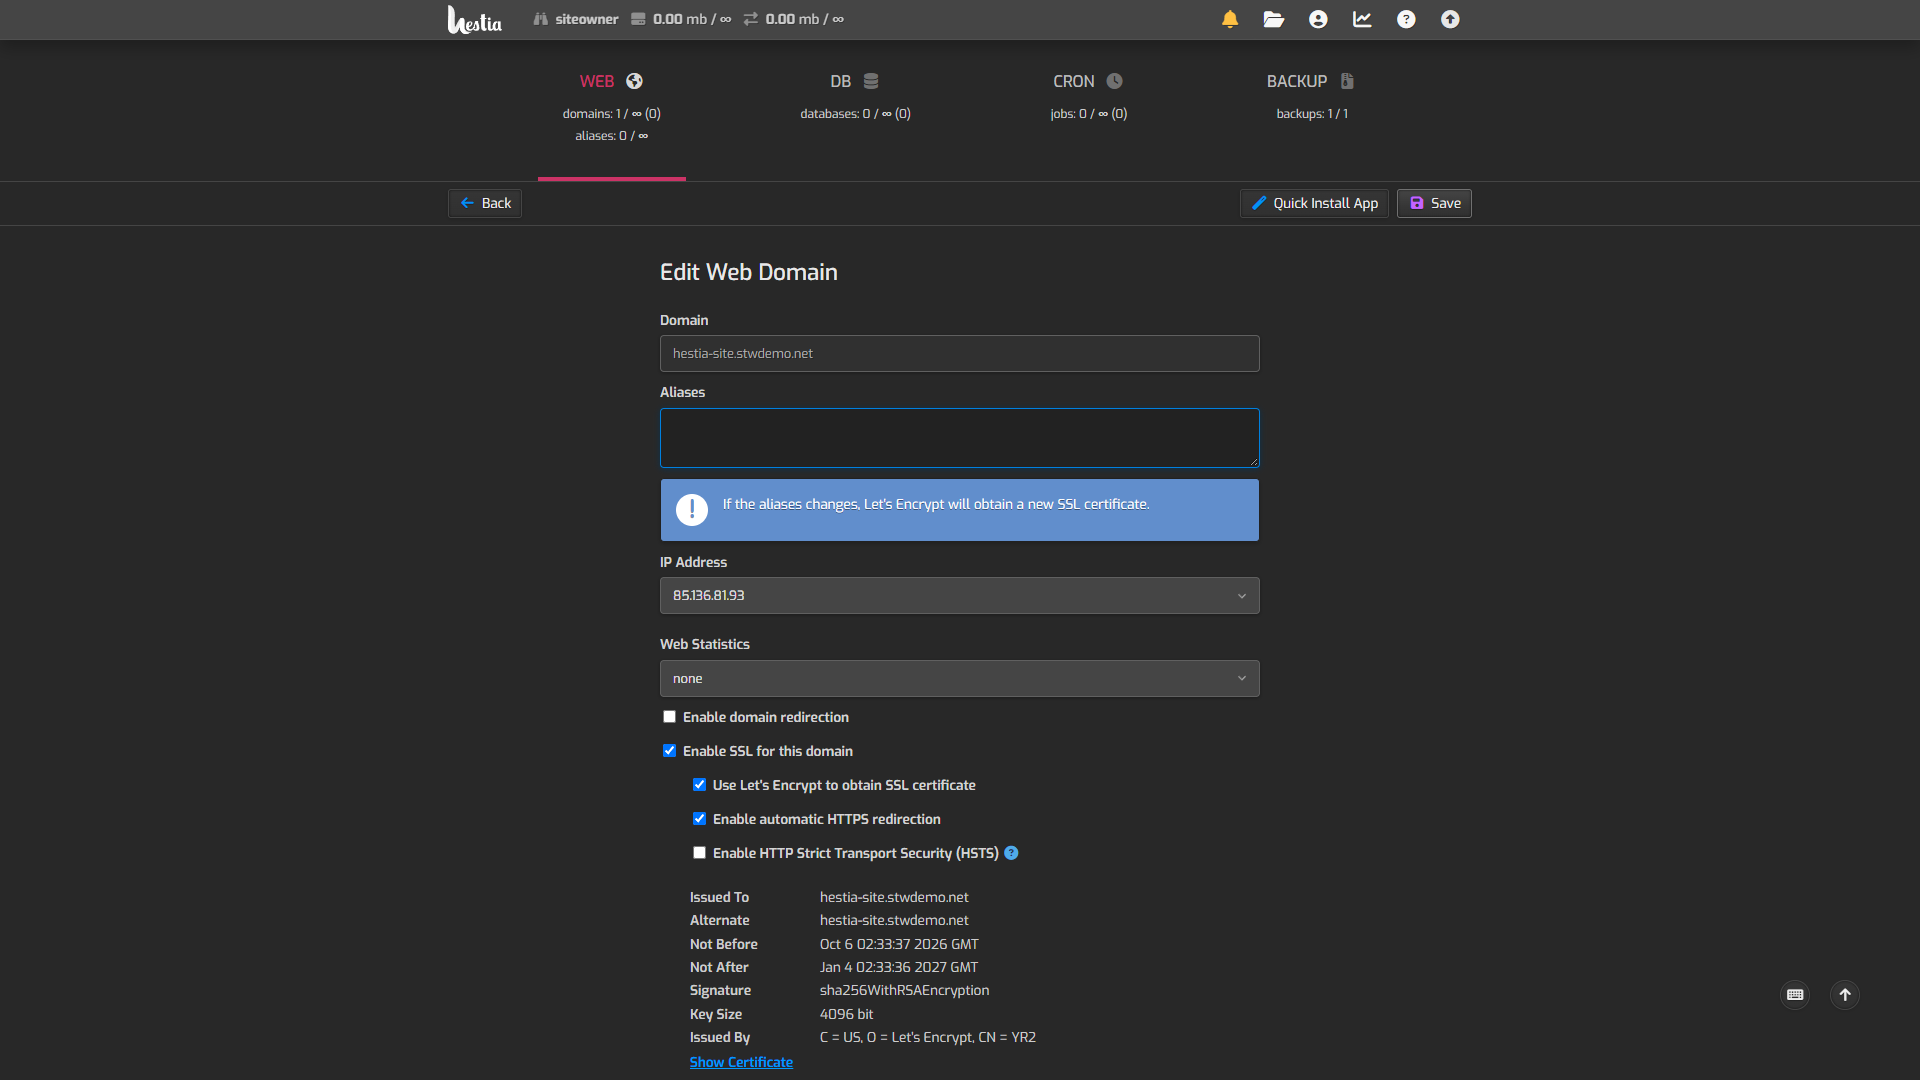
Leave HSTS unchecked for now. HSTS tells browsers to insist on HTTPS while its policy remains active, so turn it on only once you’re sure HTTPS will keep working.
Any provider firewall must also allow TCP ports 80 and 443, because Let’s Encrypt checks the site over HTTP and visitors arrive over HTTPS.
If the certificate request fails, check every name it should cover, any AAAA record, and whether port
80is reachable. Read the reported error before you retry, because repeated requests can run into Let’s Encrypt’s issuance limits.
Step 7 — Check the Website Over HTTPS
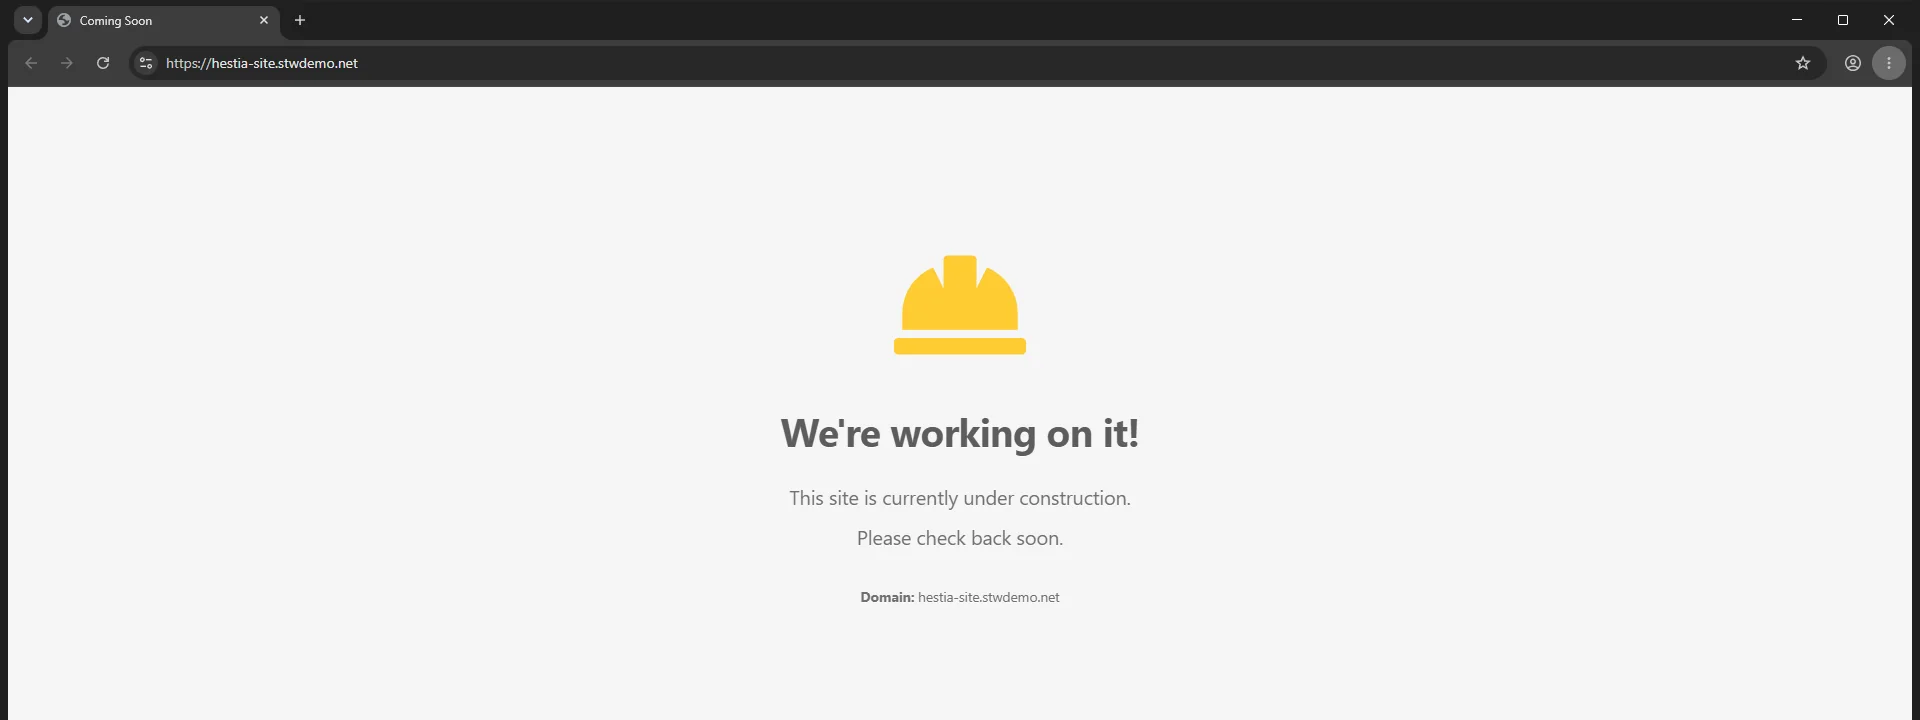
Open https://site.example.com/ in your browser. You should see Hestia’s placeholder page, We’re working on it!, with your domain listed underneath and no certificate warning.
From the VPS, check that HTTP redirects to HTTPS.
curl -IL http://site.example.comThe -L option makes curl follow the redirect, so you’ll see two sets of headers. The first should start with 301 and include Location: https://site.example.com/. The second should start with 200. A “maximum redirects” error means the site is redirecting in a loop.
Adding your own site. Website files go in
public_html, underweb → site.example.comin Hestia’s File manager. Rename or delete Hestia’s defaultindex.html.
Conclusion
Hestia is installed, the administrator login is secured (with two-factor authentication if you enabled it), and a separate user owns a website served over HTTPS.
Before you put a real site on the server, set up backups under BACKUP and keep copies off the VPS. You remain responsible for OS updates and for checking that Hestia’s automatic updates succeed. Part 12 covers both.
Next steps: