
Introduction
You know what DNS records are (Part 3). You know who manages them (Part 2). Now comes the part that makes some people nervous: actually changing them.
DNS changes have a reputation for being high-stakes, and it’s not entirely undeserved. Edit the wrong record and your website goes offline. Delete something you shouldn’t have and email stops arriving.
But DNS editing is safe and predictable when you follow a few ground rules. We’ll give you a practical workflow for making changes — where to make them, how to make them safely in the STW DNS Manager, what TTL to set and when, and which mistakes to avoid. By the end, you’ll have a checklist you can follow every time you touch your DNS.
Step 1 — Find Where Your DNS Changes Belong
The first question is always: where do I go to make this change?
DNS records are edited at your DNS host — the company whose nameservers are listed for your domain. If you’re not sure who that is, check:
nslookup -type=NS yourdomain.com(For more information on nslookup or alternatives, see Part 1).
The nameservers in the response tell you where your DNS lives.
- If you see something like
ns1.servetheworld.netandns2.servetheworld.net, your DNS host is ServeTheWorld, and you’ll make changes in the STW DNS Manager. - If you see nameservers belonging to another provider (Cloudflare, GoDaddy, etc.), your DNS host is that provider. You’ll make changes in their dashboard, not STW’s.
This matters because a common setup is to register a domain at one company, host DNS at another, and run the actual website on a ServeTheWorld VPS. In that case, the DNS records that point to your STW server are edited at the DNS host, not at STW. However, the steps to update your DNS records will be largely the same, just with a different interface.
Step 2 — Navigate the DNS Manager
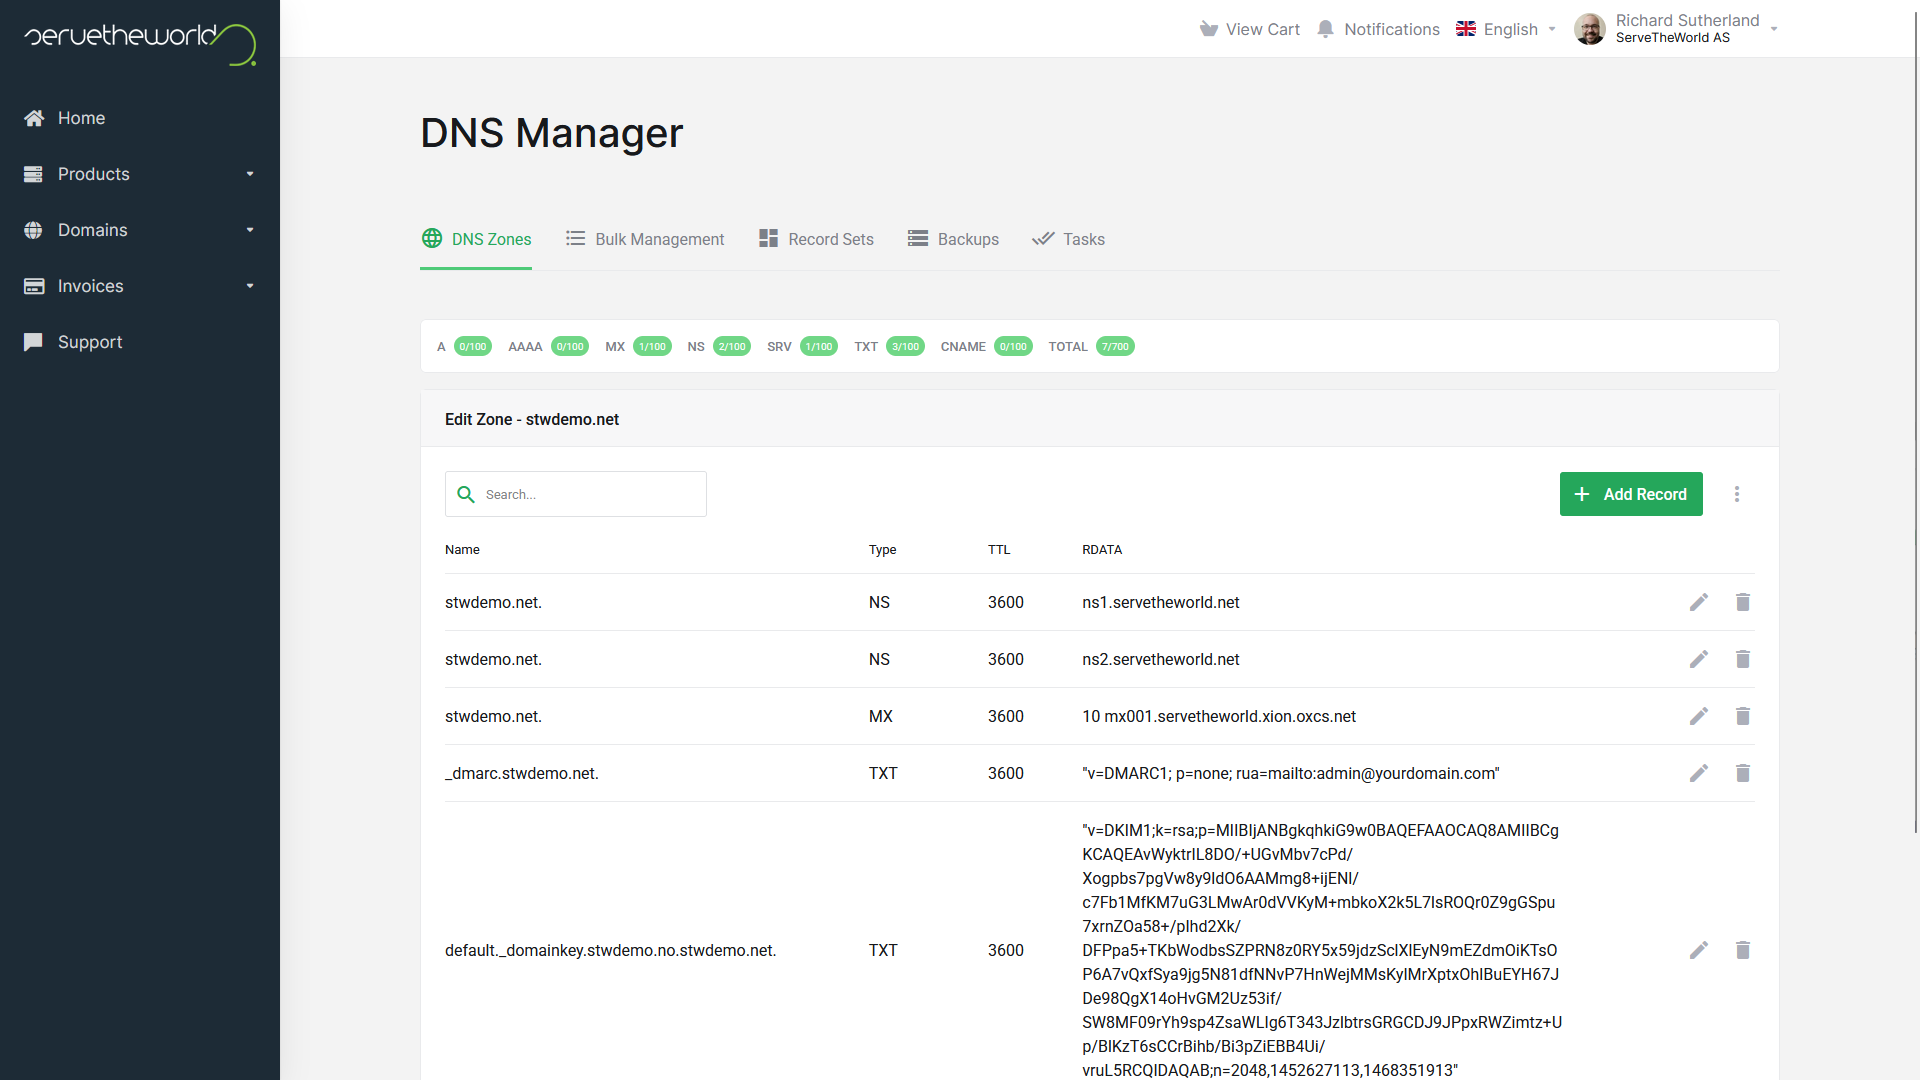
If ServeTheWorld is your DNS host, here’s where to find the editor. Log in to my.servetheworld.net and navigate to Domains > DNS Manager.
The DNS Manager has five tabs across the top:
| Tab | What it’s for |
|---|---|
| DNS Zones | View and edit individual records for each domain. This is where you’ll spend most of your time. |
| Bulk Management | Make changes across multiple zones at once. Useful if you manage many domains. |
| Record Sets | Group related records into reusable sets. |
| Backups | Create and restore zone snapshots. Your safety net before making changes. |
| Tasks | Track the progress of bulk operations, imports, and backups. |
Click on a domain under DNS Zones to see its records. Each record appears as a row with four columns: Name, Type, TTL, and RDATA (the record’s value data).
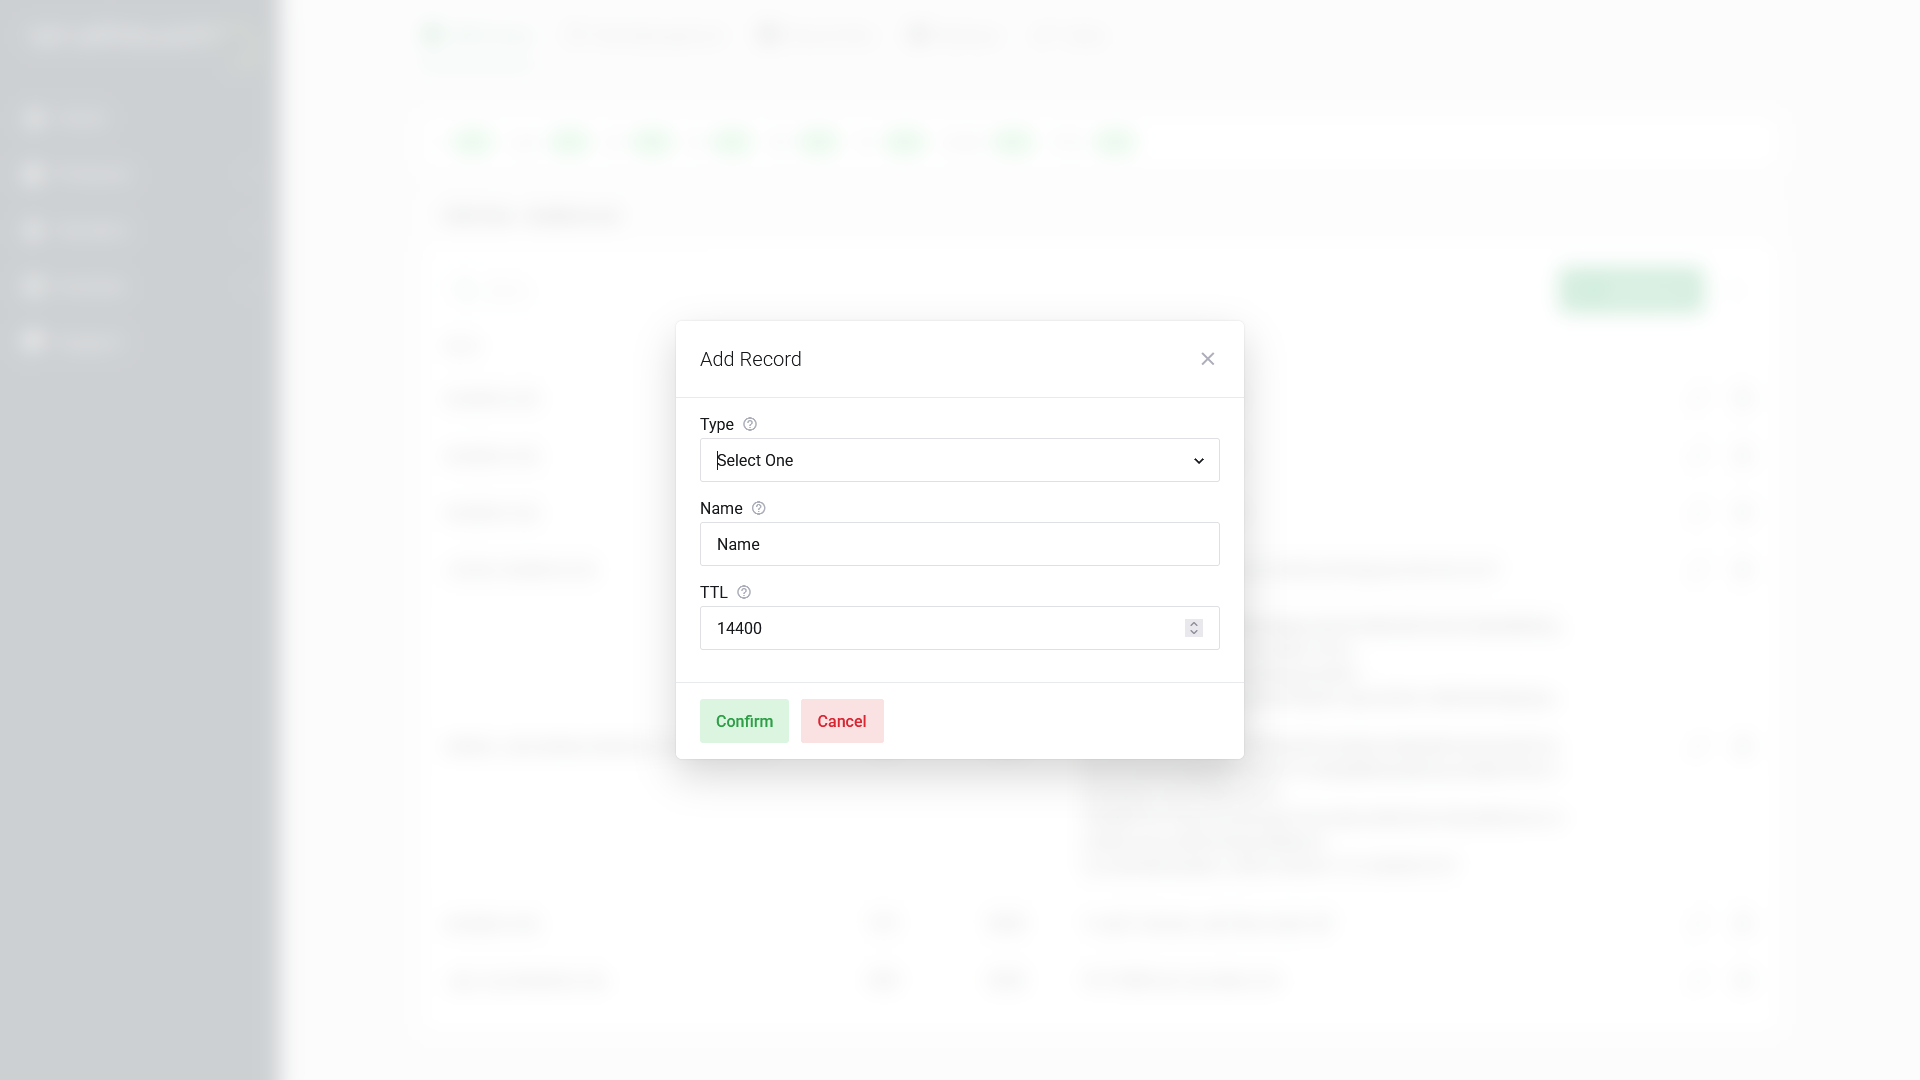
To add a new record, click the green + Add Record button. A dialog appears with fields for Type (a dropdown), Name, and TTL (often 14400 seconds, which is 4 hours). Additional fields appear depending on the record type you select.
To edit an existing record, click the pencil icon next to it. The edit dialog shows the same fields, pre-filled with the record’s current values. For example, editing an MX record shows Preference and Exchange fields:

And editing a TXT record shows a TXT data field:
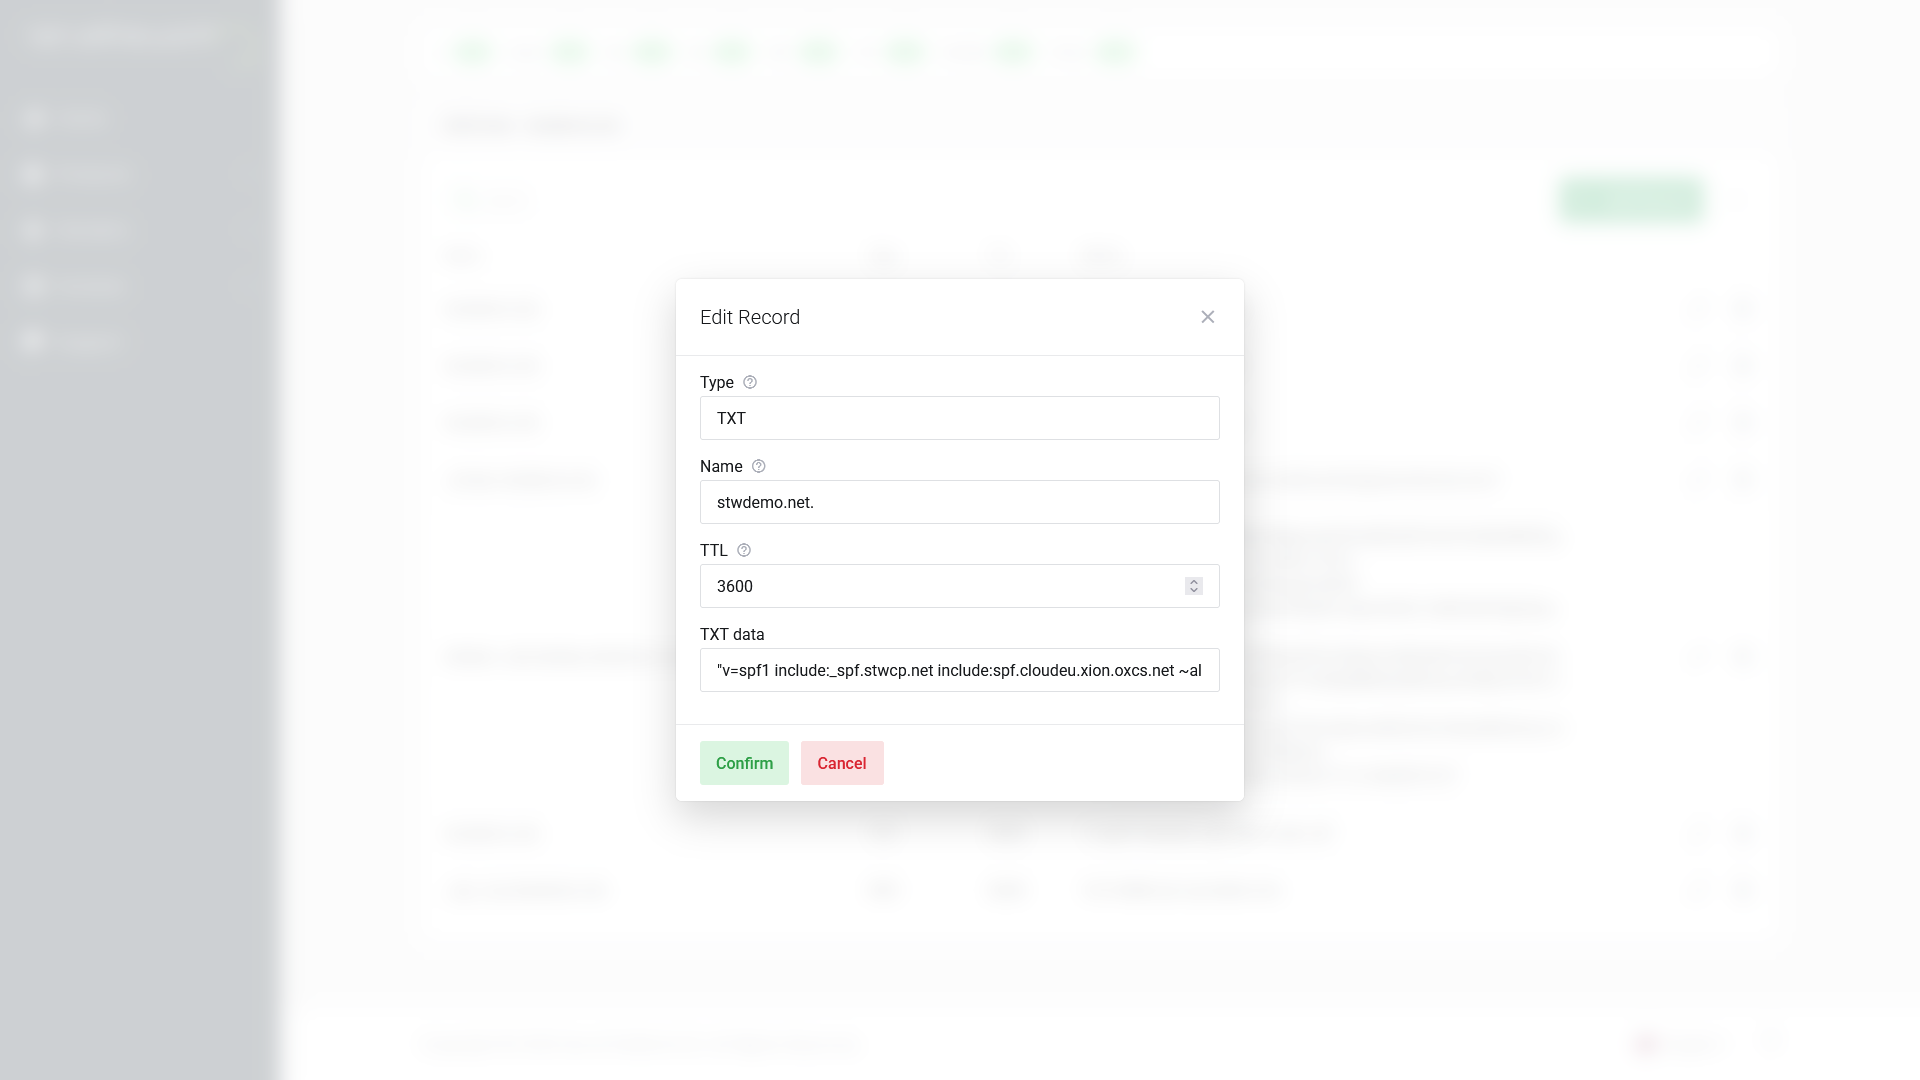
Each dialog has Confirm and Cancel buttons. Nothing is saved until you click Confirm.
Step 3 \ — Before You Change Anything, Make a Backup
Spend two minutes on insurance before touching a record so it’ll be easy to revert any mistake.
- Write down the current values. For every record you plan to change, note the exact Name, Type, TTL, and RDATA (the value field). A screenshot works. You need the precise values.
- Create a zone backup In the STW DNS Manager, go to the Backups tab and click + Create Backup. This snapshots every record in the zone and lets you restore the whole thing in seconds.

Now, if a change breaks something, you can undo it in two ways:
- Restore from backup: Go to the Backups tab, find the snapshot you just created, and click Restore. Every record returns to its pre-change state.
- Revert manually: If you only changed one or two records, re-open each one and reset it to the value you noted in step 1.
Step 4 — Make One Change, Then Verify
When you have multiple DNS changes to make, resist the urge to do them all at once. Make a single change, verify it works, then move to the next. This makes it obvious which change caused a problem if something breaks.
For example, if you’re migrating to a new web host and also setting up new email: update the A record first, confirm the website loads, then update the MX records.
How to Verify DNS Changes
After saving a record, you can check immediately at the authoritative level — your DNS host’s nameservers — even while the old value is still cached elsewhere.
First, find your authoritative nameservers (if you don’t already know them):
nslookup -type=NS yourdomain.comThen query one of those nameservers directly:
nslookup yourdomain.com ns1.servetheworld.netIn that command, the second argument (ns1.servetheworld.net) is the DNS server you are querying directly. This bypasses cached copies and shows you the current value at the source. If the response shows your new record, the change was saved correctly. For the rest of the world to see it, you’ll need to wait for the TTL to expire.
DNS Not Updating? Caching, TTL, and Propagation
If you’ve updated a DNS record but your website, email, or verification still shows the old value, the issue is usually caching, not a mistake in your configuration.
DNS does not update everywhere instantly. It is designed to cache results for efficiency and stability.
Understanding three concepts explains almost every “DNS not updating” situation:
1. TTL: Your Timing Control
TTL (Time to Live) controls how long DNS servers around the world cache your records before checking for updates. We introduced the concept in Part 3. Here’s how to use it strategically.
| TTL value | Duration | Trade-off |
|---|---|---|
300 |
5 minutes | Changes spread fast, but nameservers get queried more often |
3600 |
1 hour | A reasonable default for most records |
14400 |
4 hours | A common STW default for new records |
86400 |
24 hours | Efficient caching, but changes can take up to a day to spread |
Higher TTL values are technically possible but rarely useful.
2. DNS Caching: The Layered System
DNS is built around caching for speed and resilience. When a record is looked up, it is temporarily stored in several places:
- Your web browser
- Your operating system
- Your ISP’s DNS resolver
- Public resolvers such as Google or Cloudflare
When you change a record, these systems may continue serving the older cached result until the TTL expires.
This is why two devices on the same network may see different results. One may have refreshed its cache; the other may still be holding the previous value.
3. DNS Propagation: Why Changes Appear Gradual
The term “DNS propagation” is often used to describe the period after a change is made. It does not mean the update is slowly spreading across the world.
Instead, it reflects the reality that different resolvers refresh their cached records at different times. Some may retrieve the new value immediately. Others may continue using the old one until the TTL runs out.
During this window, both versions can briefly coexist depending on where and how the query is made.
The Pre-Migration TTL Strategy
If you know you’re going to change a DNS record — say, moving your website to a new server — lower the TTL in advance:
- 24-48 hours before the change: Edit the record you plan to update and lower its TTL to
300(5 minutes). Don’t change the value yet. - Wait for the old TTL to expire. If it was previously
86400, wait 24 hours. After that, every DNS server in the world knows to re-check every 5 minutes. - Make the actual change. Update the record’s value (e.g., the new server IP in an A record).
- Within minutes, the new value propagates. Because the TTL is now 5 minutes, servers pick up the change quickly.
- After the migration is stable: Raise the TTL back to a normal value (e.g.,
3600or14400).
This strategy dramatically reduces the “waiting period” after a DNS change. It solves a lot of the confusion and stress over why your changes haven’t taken effect yet by making changes propagate much faster.
When does this matter most? Anytime you’re changing an A record (moving servers), swapping MX records (changing email providers), or doing anything time-sensitive where “wait up to 24 hours” is not acceptable.
Common Mistakes That Cause Downtime
These are the DNS editing mistakes that catch people most often. Every one of them has caused real outages.
1. Editing DNS at the Wrong Provider
If your nameservers point to Provider B, editing records at Provider A does nothing. The internet follows the nameservers, not the registrar.
Prevention: Always check nslookup -type=NS first.
2. Putting an IP Address in a CNAME Record
A CNAME must point to another domain name, never to an IP address. If you want to point a name at an IP, use an A record.
| Wrong | Right |
|---|---|
www CNAME 203.0.113.10 |
www CNAME stw.no |
www A 203.0.113.10 |
3. CNAME at the Root Domain
A CNAME cannot coexist with other record types for the same hostname (except certain DNSSEC-specific records). At the root domain, you almost certainly need MX and TXT records, so a CNAME there will create conflicts.
Prevention: Use an A record for your root domain. Use CNAME for subdomains.
4. Deleting Records You Don’t Recognize
Some records look mysterious but are critical. NS records delegate your zone. SOA records define zone behavior. TXT records might have been placed by a service you set up months ago.
Prevention: If you don’t know what a record does, look it up before removing it. NS and SOA records, in particular, should never be deleted unless you know exactly what you’re doing.
5. Changing Multiple Records at Once
If you update your A record, MX records, and TXT records in the same session and something breaks, you won’t know which change caused the problem.
Prevention: One change, one verification, then the next change.
The DNS Editing Checklist
Follow this every time you make a DNS change:
- Confirm your DNS host. Run
nslookup -type=NSand make sure you’re editing at the right provider. - Create a backup. Use the STW Backups tab (+ Create Backup) or save
nslookupoutput for each record type. - Lower TTL in advance (if the change is time-sensitive). Set to
300, then wait for the old TTL to expire before making the actual change. - Make one change. Edit a single record in DNS Zones and click Confirm.
- Verify at the source. Query an authoritative nameserver directly to confirm the new value is live.
- Test the result. Load the website, send a test email, or check whatever service the record affects.
- Raise TTL back once the change is confirmed and stable.
- Document what you changed. A quick note about what changed and when saves future headaches.
Conclusion
DNS editing is predictable. The records follow clear rules, changes propagate on a known schedule controlled by TTL, and mistakes are recoverable as long as you’ve documented the starting state.
The key principles: verify your DNS host, back up before editing, change one thing at a time, and use TTL strategically when timing matters. The STW DNS Manager gives you the tools to do all of this.
In Part 5, we put these skills to work. You’ll create and modify A records to point a domain at a server, set up subdomains, and learn about AAAA records for IPv6.
Next steps: