
Introduction
Email is the second thing most people set up after a website — and the first thing they notice when it breaks. If your domain’s DNS records aren’t configured correctly for email, incoming mail never arrives or outgoing mail lands in spam folders.
These are two different problems with two different causes, and they’re solved by different DNS records. In this article, we’ll cover all four:
- MX records — tell the internet where to deliver incoming mail for your domain.
- SPF — declares which servers are allowed to send mail on your behalf.
- DKIM — attaches a cryptographic signature so recipients can verify the message wasn’t tampered with.
- DMARC — ties SPF and DKIM together with a policy that tells receiving servers what to do when checks fail.
By the end, you’ll have the records in place, know how to verify them, and understand the most common mistakes that cause email problems. You’ll need to know how to add DNS records (Part 4) and which provider is your DNS host (Part 2). Have your email provider’s setup instructions handy — we’ll use STW Mail as the primary example.
Two Problems, Two Paths
Before looking at the records, it helps to know which problem you’re solving. Email DNS issues almost always fall into one of two categories:
| Problem | Symptom | Records involved |
|---|---|---|
| Not receiving email | Messages sent to you@yourdomain.com bounce or vanish |
MX records |
| Email going to spam | You can send mail, but it lands in junk folders | SPF, DKIM, DMARC |
If you’re setting up email for the first time, you need all four. If you’re troubleshooting, this split tells you where to look first.
Step 1 — MX Records: Where to Deliver Incoming Mail
As we covered in Part 3, an MX record tells other mail servers where to deliver email for your domain — a hostname and a priority number that controls the order servers are tried. Without MX records, mail sent to you@yourdomain.com has nowhere to go.
STW Mail lists four MX servers:
| Name | Type | Priority | Value (Exchange) |
|---|---|---|---|
@ |
MX | 10 |
mx001.servetheworld.xion.oxcs.net |
@ |
MX | 10 |
mx002.servetheworld.xion.oxcs.net |
@ |
MX | 10 |
mx003.servetheworld.xion.oxcs.net |
@ |
MX | 10 |
mx004.servetheworld.xion.oxcs.net |
Adding MX records in the STW DNS Manager
Navigate to Domains → Manage DNS → DNS Zones → [your domain], click + Add Record, and select MX as the type.

Set the Name to @ (your root domain), enter the Preference (priority number), and paste the Exchange hostname from your email provider. Repeat for each MX server.
Step 2 — SPF: Who’s Allowed to Send
SPF (Sender Policy Framework) is a TXT record that lists which mail servers are authorized to send email on behalf of your domain. When a receiving server gets an email claiming to be from you@yourdomain.com, it checks the SPF record to see if the sending server is on the approved list.
If the server isn’t listed, the email is more likely to be flagged as spam or rejected outright.
What an SPF record looks like
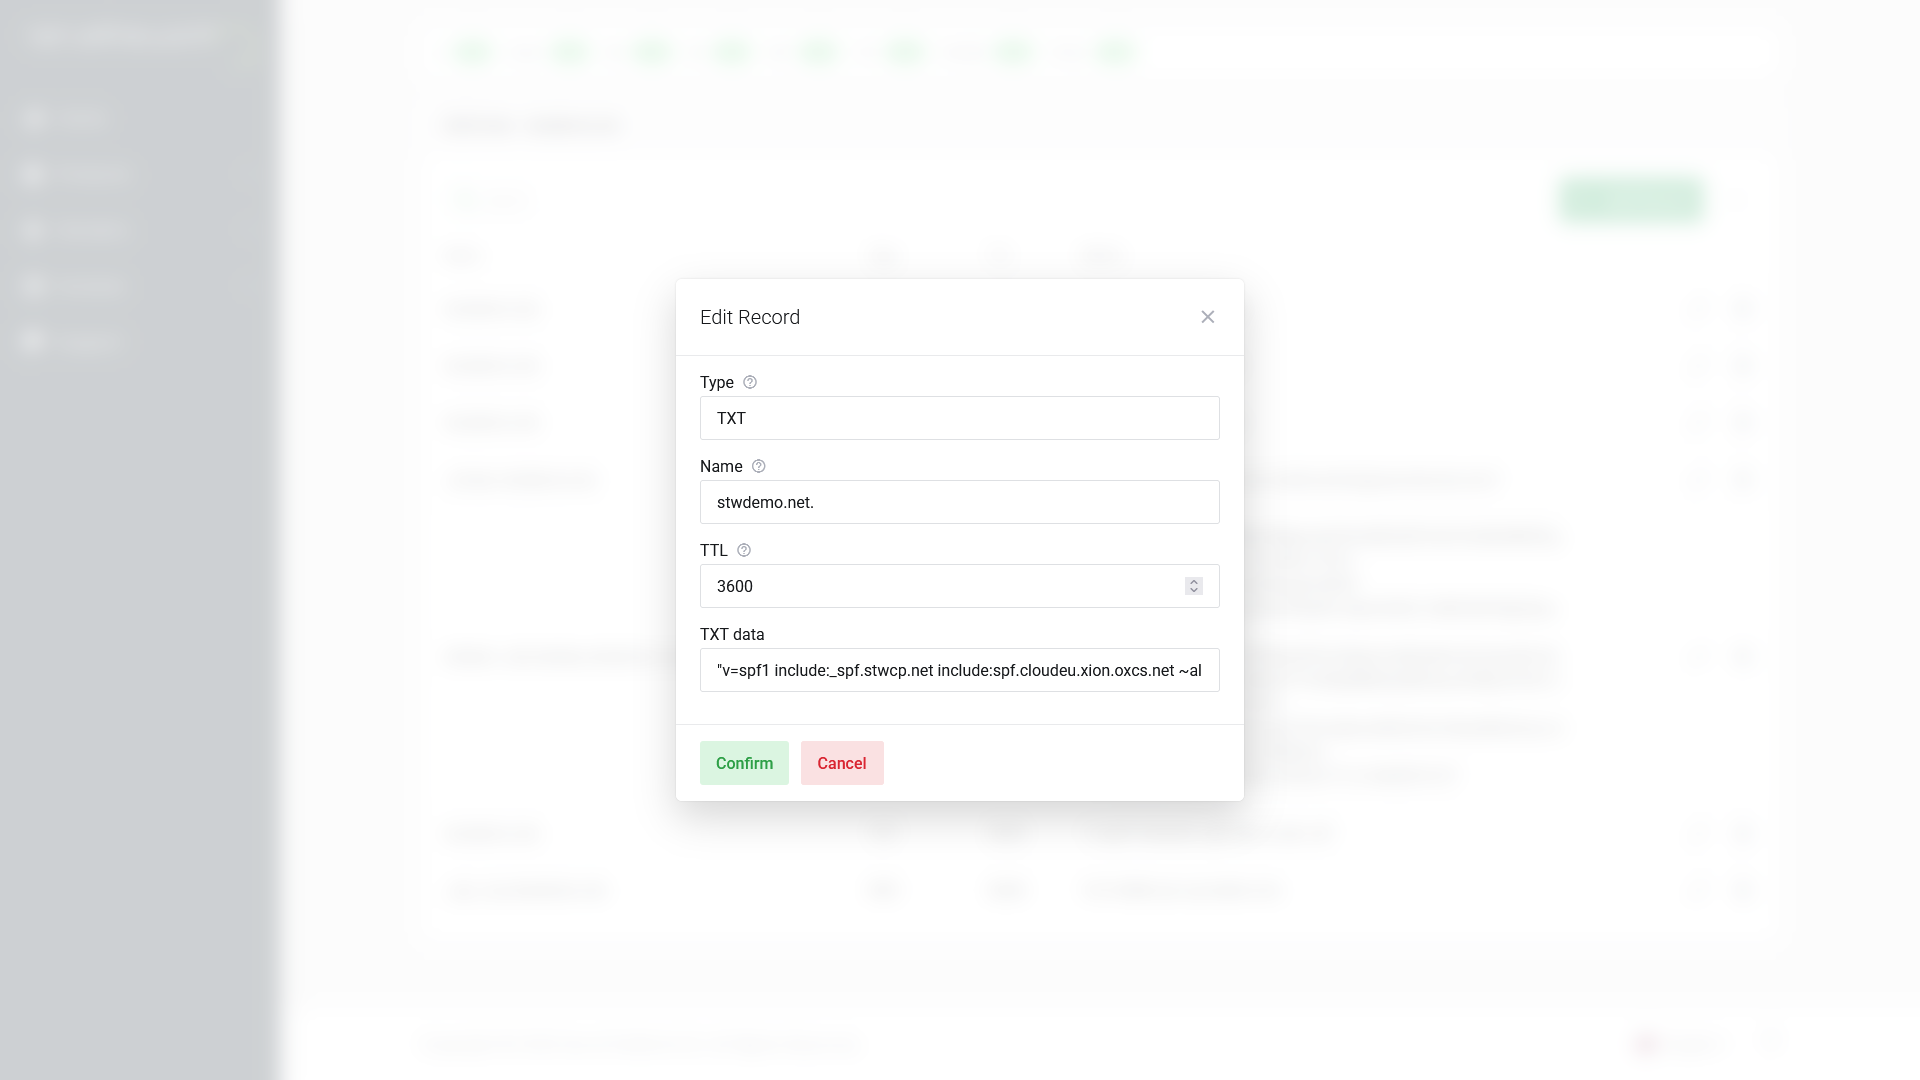
An SPF record is a TXT record on @ (your root domain). Here’s a typical STW Mail SPF record:
v=spf1 include:_spf.stwcp.net include:spf.cloudeu.xion.oxcs.net ~allBreaking that down:
| Part | Meaning |
|---|---|
v=spf1 |
Identifies this as an SPF record (version 1) |
include:_spf.stwcp.net |
Authorize servers listed in STW’s SPF configuration |
include:spf.cloudeu.xion.oxcs.net |
Authorize servers listed in Open-Xchange’s SPF configuration |
~all |
Soft fail — mail from any other server should be treated with suspicion, but not outright rejected |
Adding the SPF record
In the DNS Manager, click + Add Record, select TXT, set the Name to @, and paste the SPF string into the TXT data field.
The one-SPF rule
Your domain must have exactly one SPF TXT record. This is one of the most common email DNS mistakes. If you use multiple services that each tell you to add an SPF record (say, your email provider and Google Workspace), you need to merge them into a single record — not add two separate TXT records that both start with v=spf1.
Multiple SPF records cause an automatic fail (a “PermError” in SPF terminology), which is worse than having no SPF at all.
To merge, combine the include: statements into one record:
v=spf1 include:_spf.stwcp.net include:spf.cloudeu.xion.oxcs.net include:_spf.google.com ~allThat single record authorizes STW Mail, Open-Xchange, and Google Workspace to send on your behalf.
Step 3 — DKIM: Proving the Message Is Genuine
DKIM (DomainKeys Identified Mail) adds a cryptographic signature to every outgoing email. The receiving server uses a public key published in your DNS to verify that the message hasn’t been altered in transit and that it genuinely came from your domain.
How it works (simplified)
- Your mail server signs each outgoing message with a private key.
- The corresponding public key is published as a DNS record on your domain.
- The receiving server looks up the public key, checks the signature, and confirms the message is authentic.
You don’t need to understand the cryptography. You just need to publish the right DNS record.
The DKIM record
DKIM records are published as TXT (or sometimes CNAME) records at a specific hostname that includes a selector — a label your email provider uses to identify which key to check. The format is:
<selector>._domainkey.yourdomain.comYour email provider will give you the selector and the value. For STW Mail, the DKIM configuration is a CNAME:
| Name | Type | Value |
|---|---|---|
mail1._domainkey |
CNAME | mail1._domainkey.servetheworld.xion.oxcs.net |
Because this is a CNAME rather than a TXT record, you don’t paste a key directly as the CNAME points to STW’s key server, which serves the public key automatically. This means that if we rotate the key in the future, you won’t need to update your DNS.

Common DKIM mistakes
- Wrong selector. If your provider says the selector is
default, the record goes ondefault._domainkey, not_domainkeyby itself. A mismatched selector means receiving servers can’t find the key. - Mixing up TXT and CNAME. Some providers publish DKIM as a CNAME that points to their key server. Others give you the full TXT value to paste directly. Use whichever method your provider specifies — don’t guess.
- Truncated key value. DKIM public keys are long strings. If you accidentally cut off the end when pasting, the signature check will fail on every message.
Step 4 — DMARC: The Policy That Ties It Together
DMARC (Domain-based Message Authentication, Reporting and Conformance) builds on SPF and DKIM. It tells receiving mail servers what to do when an email fails authentication checks, and where to send reports about those failures.
What a DMARC record looks like
A DMARC record is a TXT record at the hostname _dmarc.yourdomain.com:
v=DMARC1; p=none; rua=mailto:dmarc-reports@yourdomain.com| Part | Meaning |
|---|---|
v=DMARC1 |
Identifies this as a DMARC record |
p=none |
Policy: what to do with mail that fails checks |
rua=mailto:... |
Where to send aggregate reports |
How DMARC uses “alignment”
DMARC does more than checking whether SPF and DKIM pass. It also checks whether they align with the domain in the From address. Alignment means the domain that SPF or DKIM validated must match (or be a subdomain of) the domain the recipient sees in the “From” field.
For example, if your From address is you@yourdomain.com but the SPF check validates mail.otherdomain.com, SPF passes but alignment fails. DMARC would treat this as a failure. This prevents spammers from passing SPF with their own server while spoofing your From address.
In practice, alignment works automatically when your email provider is properly configured.
The three DMARC policies
| Policy | What happens to failing mail | When to use it |
|---|---|---|
p=none |
Nothing — just collect reports | Starting out, monitoring |
p=quarantine |
Move to spam/junk | After reviewing reports, confident in SPF/DKIM setup |
p=reject |
Reject the message entirely | Fully confident, maximum protection |
The safe rollout
Do not start with p=reject. If your SPF or DKIM records have any gaps (a forgotten third-party service, a misconfigured selector), legitimate email will be rejected with no fallback.
The recommended approach:
- Start with
p=none— this enables reporting without affecting delivery. You’ll receive reports showing which servers are sending mail as your domain and whether they pass SPF/DKIM. - Review reports for 2–4 weeks. Look for legitimate senders that aren’t covered by your SPF record or aren’t signing with DKIM. Fix those first.
- Move to
p=quarantine— failing messages go to spam instead of the inbox. Monitor for complaints. - Move to
p=reject— only after you’re confident everything legitimate is passing.
Adding the DMARC record
In the DNS Manager, click + Add Record, select TXT, and set the Name to _dmarc (not @ — this is a subdomain-level record). Enter your DMARC policy string in the TXT data field.

Step 5 — Verify Your Email DNS Records
As with web DNS changes (Part 5), verify each record after saving it. Query your authoritative nameserver directly to confirm the values are live.
Check MX records
dig @ns1.servetheworld.net MX yourdomain.comYou should see your mail servers listed with their priority values:
;; ANSWER SECTION:
yourdomain.com.     3600    IN    MX    10 mx001.servetheworld.xion.oxcs.net.
yourdomain.com.     3600    IN    MX    10 mx002.servetheworld.xion.oxcs.net.
Check SPF
dig @ns1.servetheworld.net TXT yourdomain.comLook for a TXT record starting with v=spf1. If you see two records both starting with v=spf1, you have the multiple-SPF problem described above — merge them.
Check DKIM
dig @ns1.servetheworld.net CNAME selector._domainkey.yourdomain.com(Replace selector with the actual DKIM selector from your email provider. For STW, this is typically mail1). You should see a CNAME pointing to your provider’s key server, for example, mail1._domainkey.servetheworld.xion.oxcs.net.
If your provider uses a TXT record instead of CNAME for DKIM, query for TXT:
dig @ns1.example.com TXT selector._domainkey.yourdomain.comYou should see a TXT record containing a public key (a long string starting with v=DKIM).
Check DMARC
dig @ns1.servetheworld.net TXT _dmarc.yourdomain.comYou should see your DMARC policy string:
;; ANSWER SECTION:
_dmarc.yourdomain.com.  3600  IN  TXT  "v=DMARC1; p=none; rua=mailto:dmarc-reports@yourdomain.com"
Troubleshooting
“I’m not receiving email”
- Check MX records. Run
dig MX yourdomain.com— are they pointing to the right mail servers? - Check for conflicting MX records. Do you have MX records from a previous provider mixed in with the new ones?
- Check propagation. If you changed MX records recently, some mail servers may still be using the cached old values. See Part 9 for how to verify and wait this out.
“My email goes to spam”
- Check SPF. Run
dig TXT yourdomain.com— is there an SPF record? Is it the only one? Does it include your email provider? - Check the SPF lookup limit. SPF records are limited to 10 DNS lookups. Each
include,a,mx,redirect, andexistmechanism counts as a lookup, and nested includes count towards the same limit. If your record exceeds 10 lookups, SPF lookups return a permanent error (PermError). If you need to authorize many services, a consolidatedincludecan cover multiple servers under a single lookup. - Check DKIM. Run
dig TXT selector._domainkey.yourdomain.com— does it return a key? Is the selector correct? - Check DMARC. Run
dig TXT _dmarc.yourdomain.com— is there a policy? What does it say? - Check reverse DNS. If you’re sending mail from your own server (like a VPS), the server’s IP address needs a matching PTR record. We’ll cover this in Part 8.
Conclusion
Email DNS comes down to four records, each with a distinct job:
- MX — routes incoming mail to the right server.
- SPF — authorizes which servers can send mail for your domain.
- DKIM — lets receiving servers verify your messages are authentic.
- DMARC — sets the policy for what happens when SPF or DKIM checks fail.
Get all four right and your email arrives reliably and stays out of spam folders. The most common mistakes — multiple SPF records, wrong DMARC hostname, skipping the DMARC rollout — are all avoidable if you verify each record with dig after adding it.
In Part 7, we move to a different category of DNS record: SRV records, which help services like VoIP, email clients, and game servers find the right connection point automatically.
Next steps: